Integrating with Webhook
Basics of Webhook Integration
-
Types of Webhooks
- Submit: Sends a notification when a response is submitted.
- Reject: Sends a notification when a response is rejected (e.g., when it leads to a disqualification field).
-
Webhook Name: The name of the webhook.
-
Webhook URL: The URL provided by third-party tools for webhook integration.
-
Request Type: You can choose between Post and Get for the type of HTTP request.
-
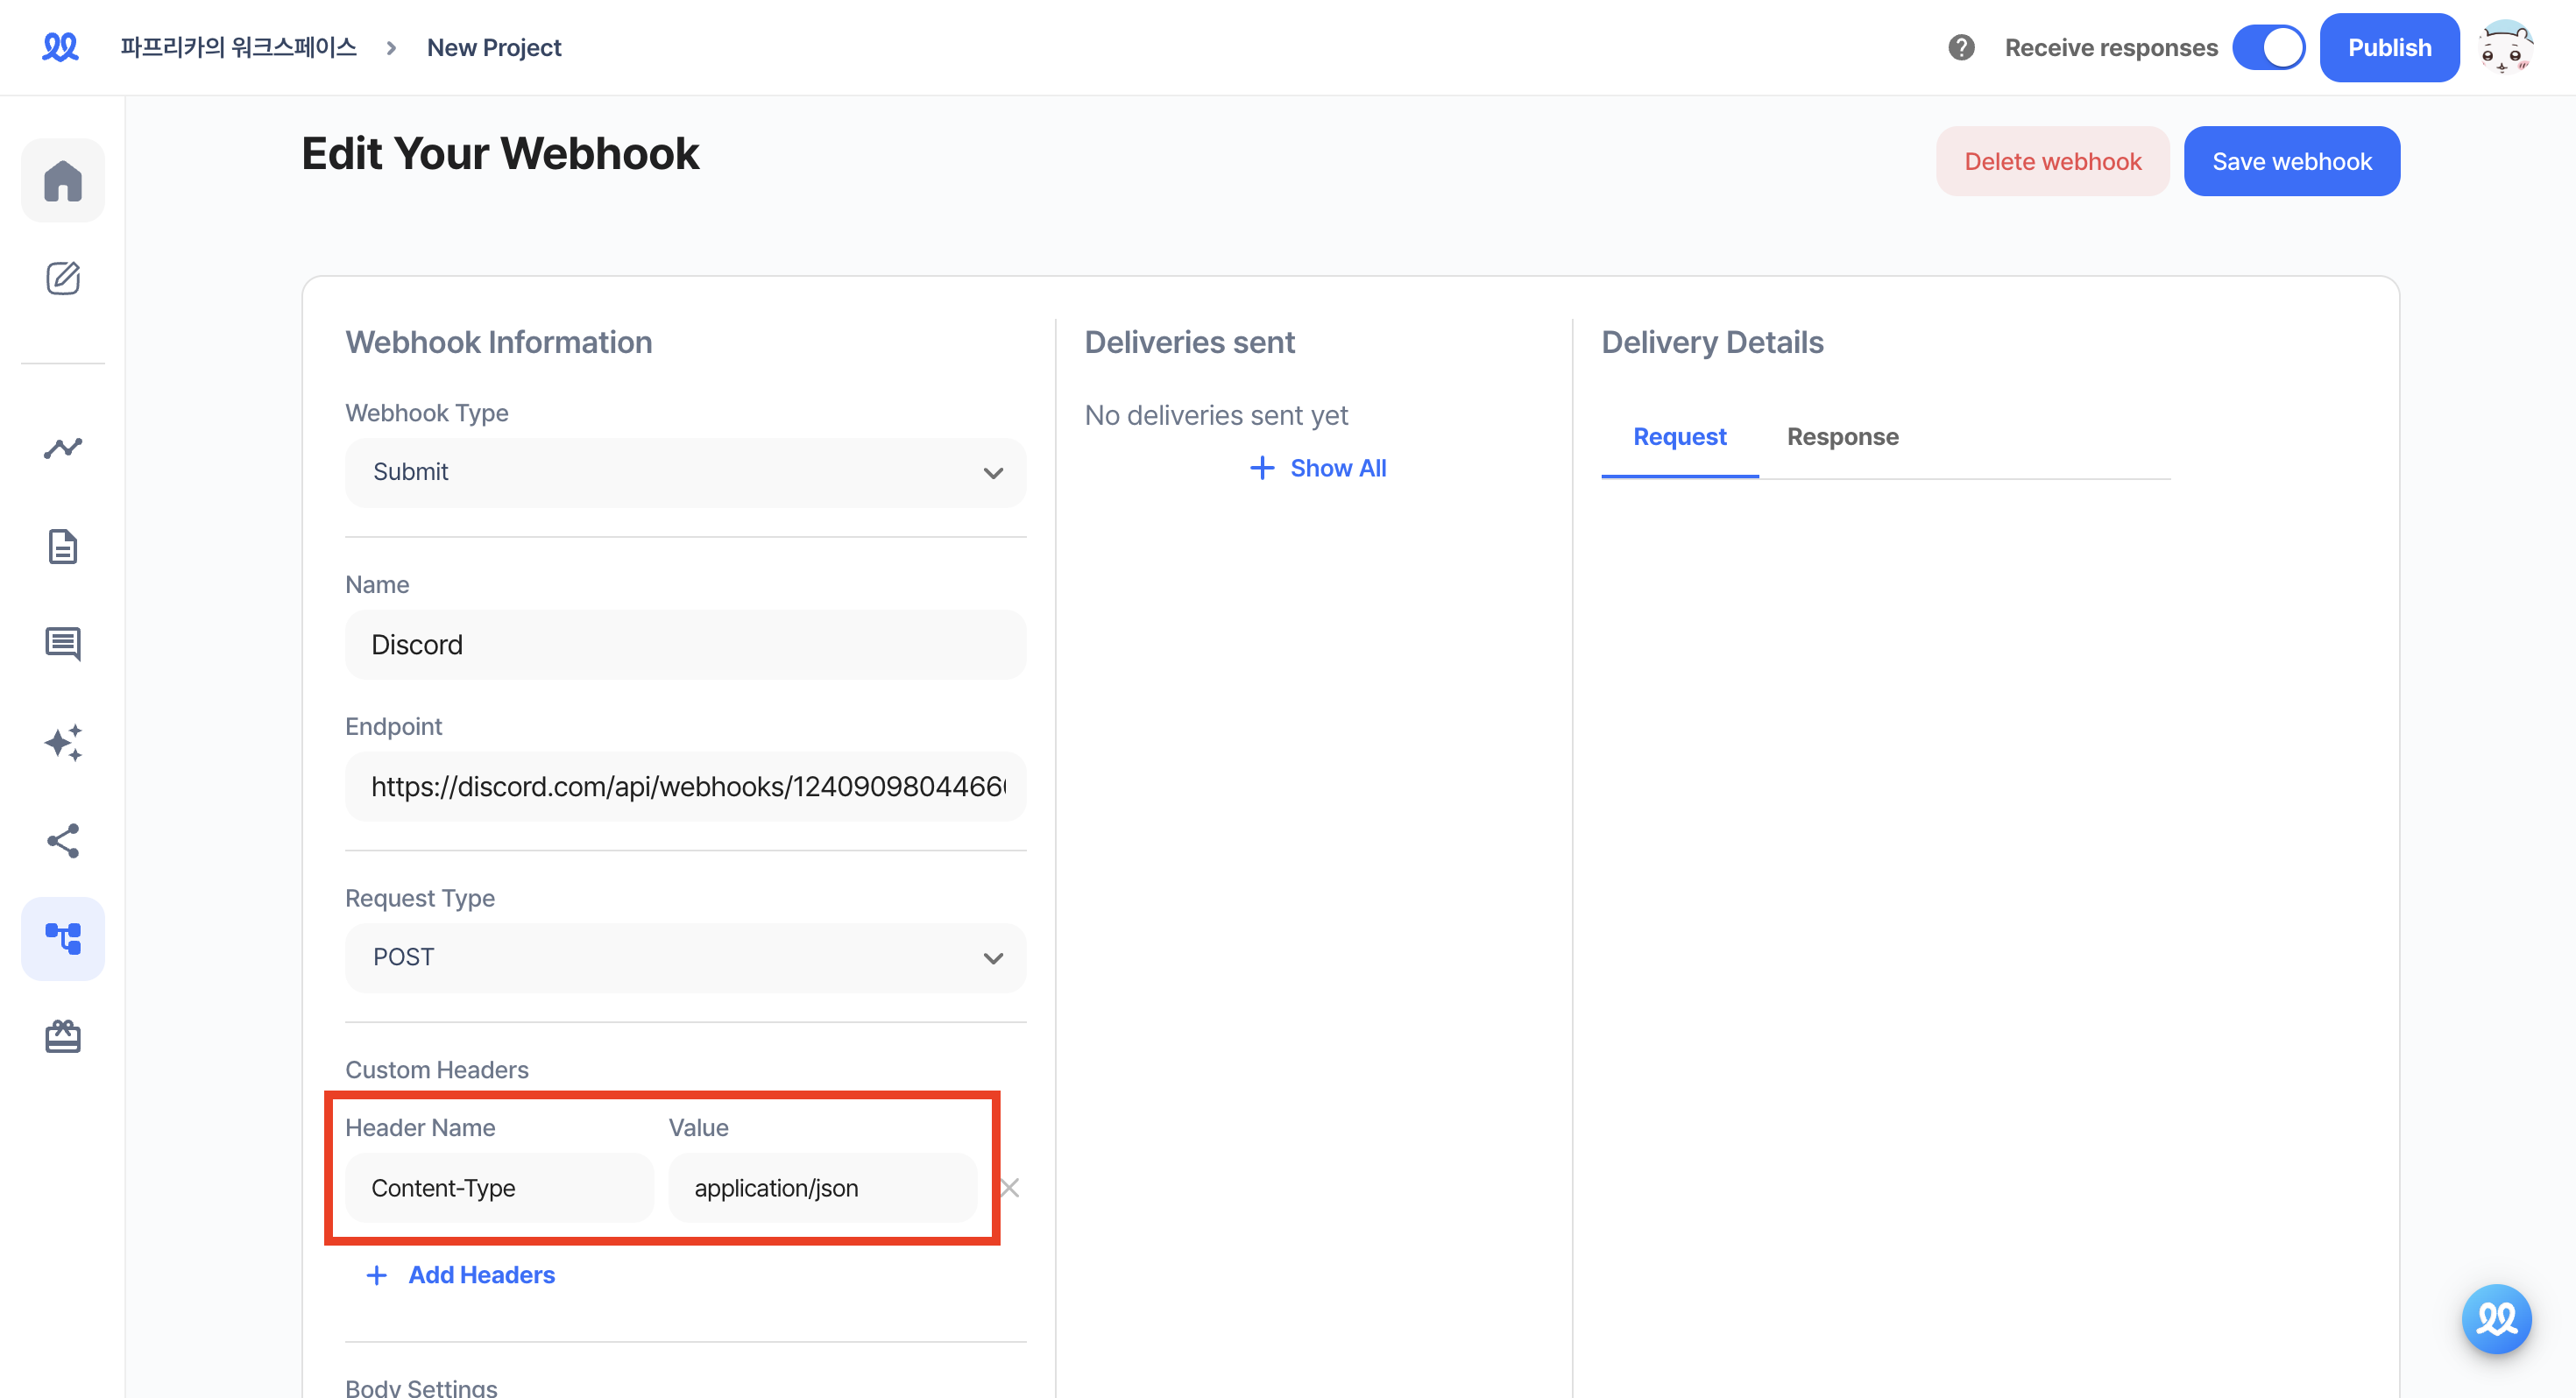
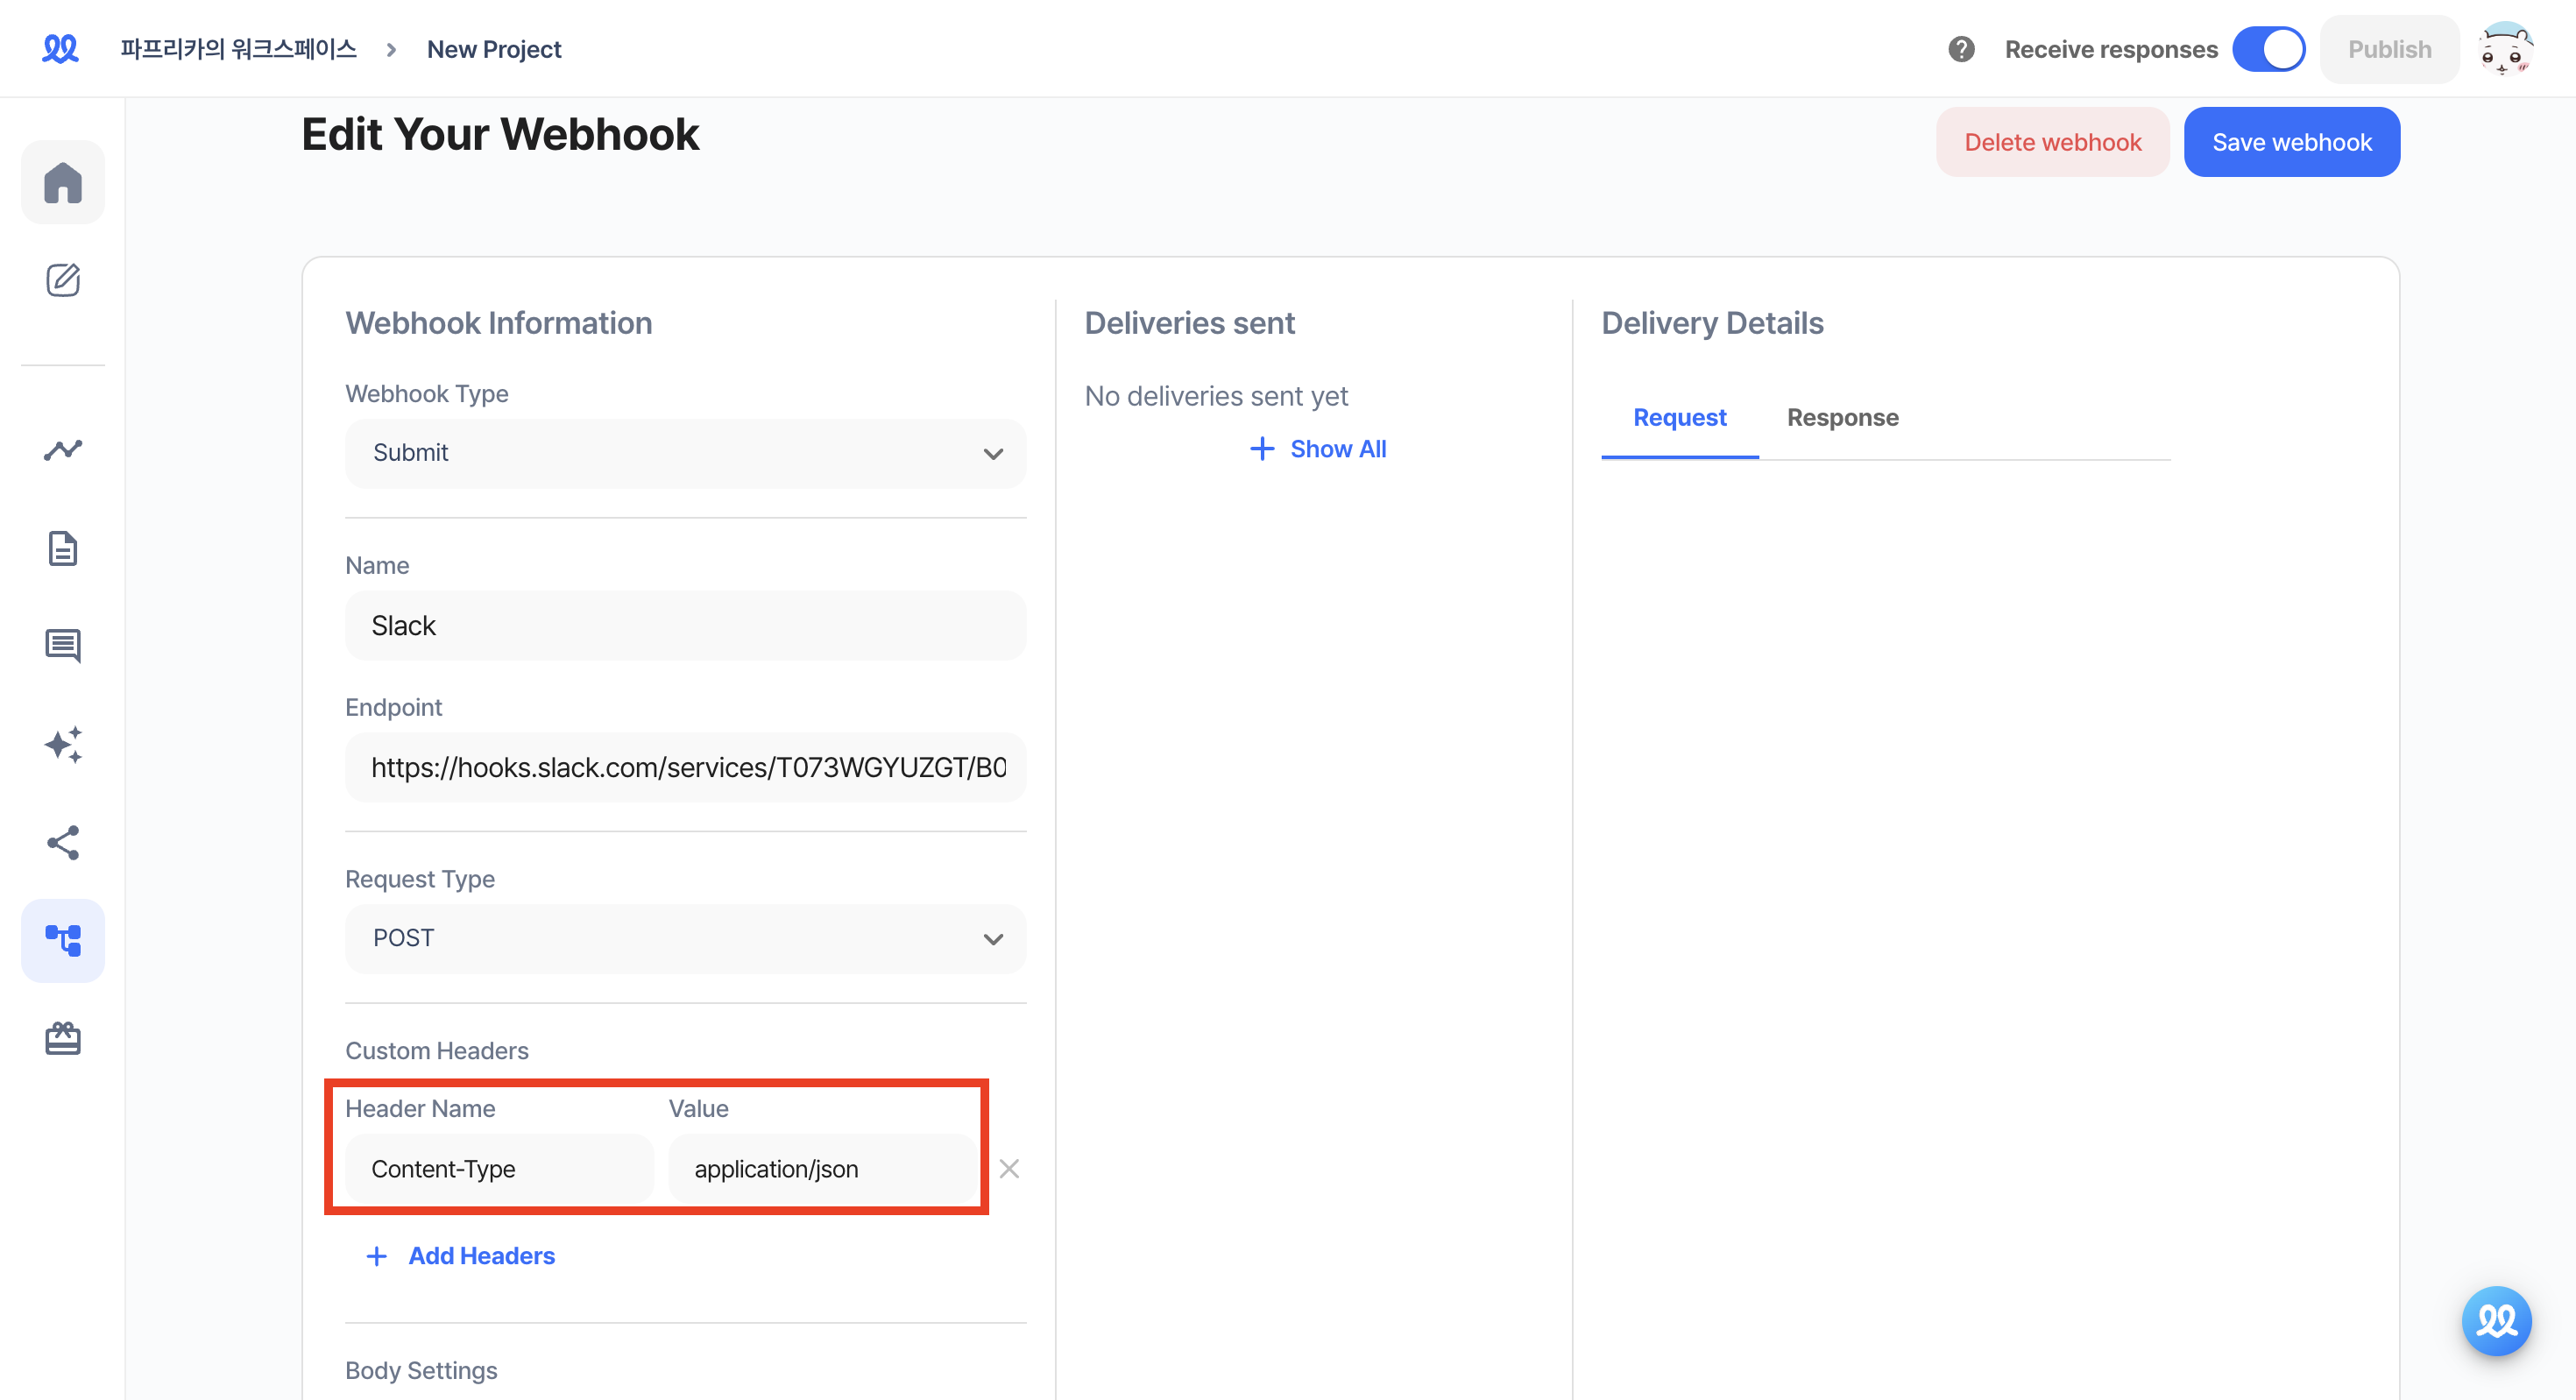
Custom Header: You can customize Key-Value pairs freely.
- Header Name: Typically, 'Content-Type' is used in services like Discord and Slack.
- Value: Typically, 'application/json' is used in services like Discord and Slack.
-
Body Settings:
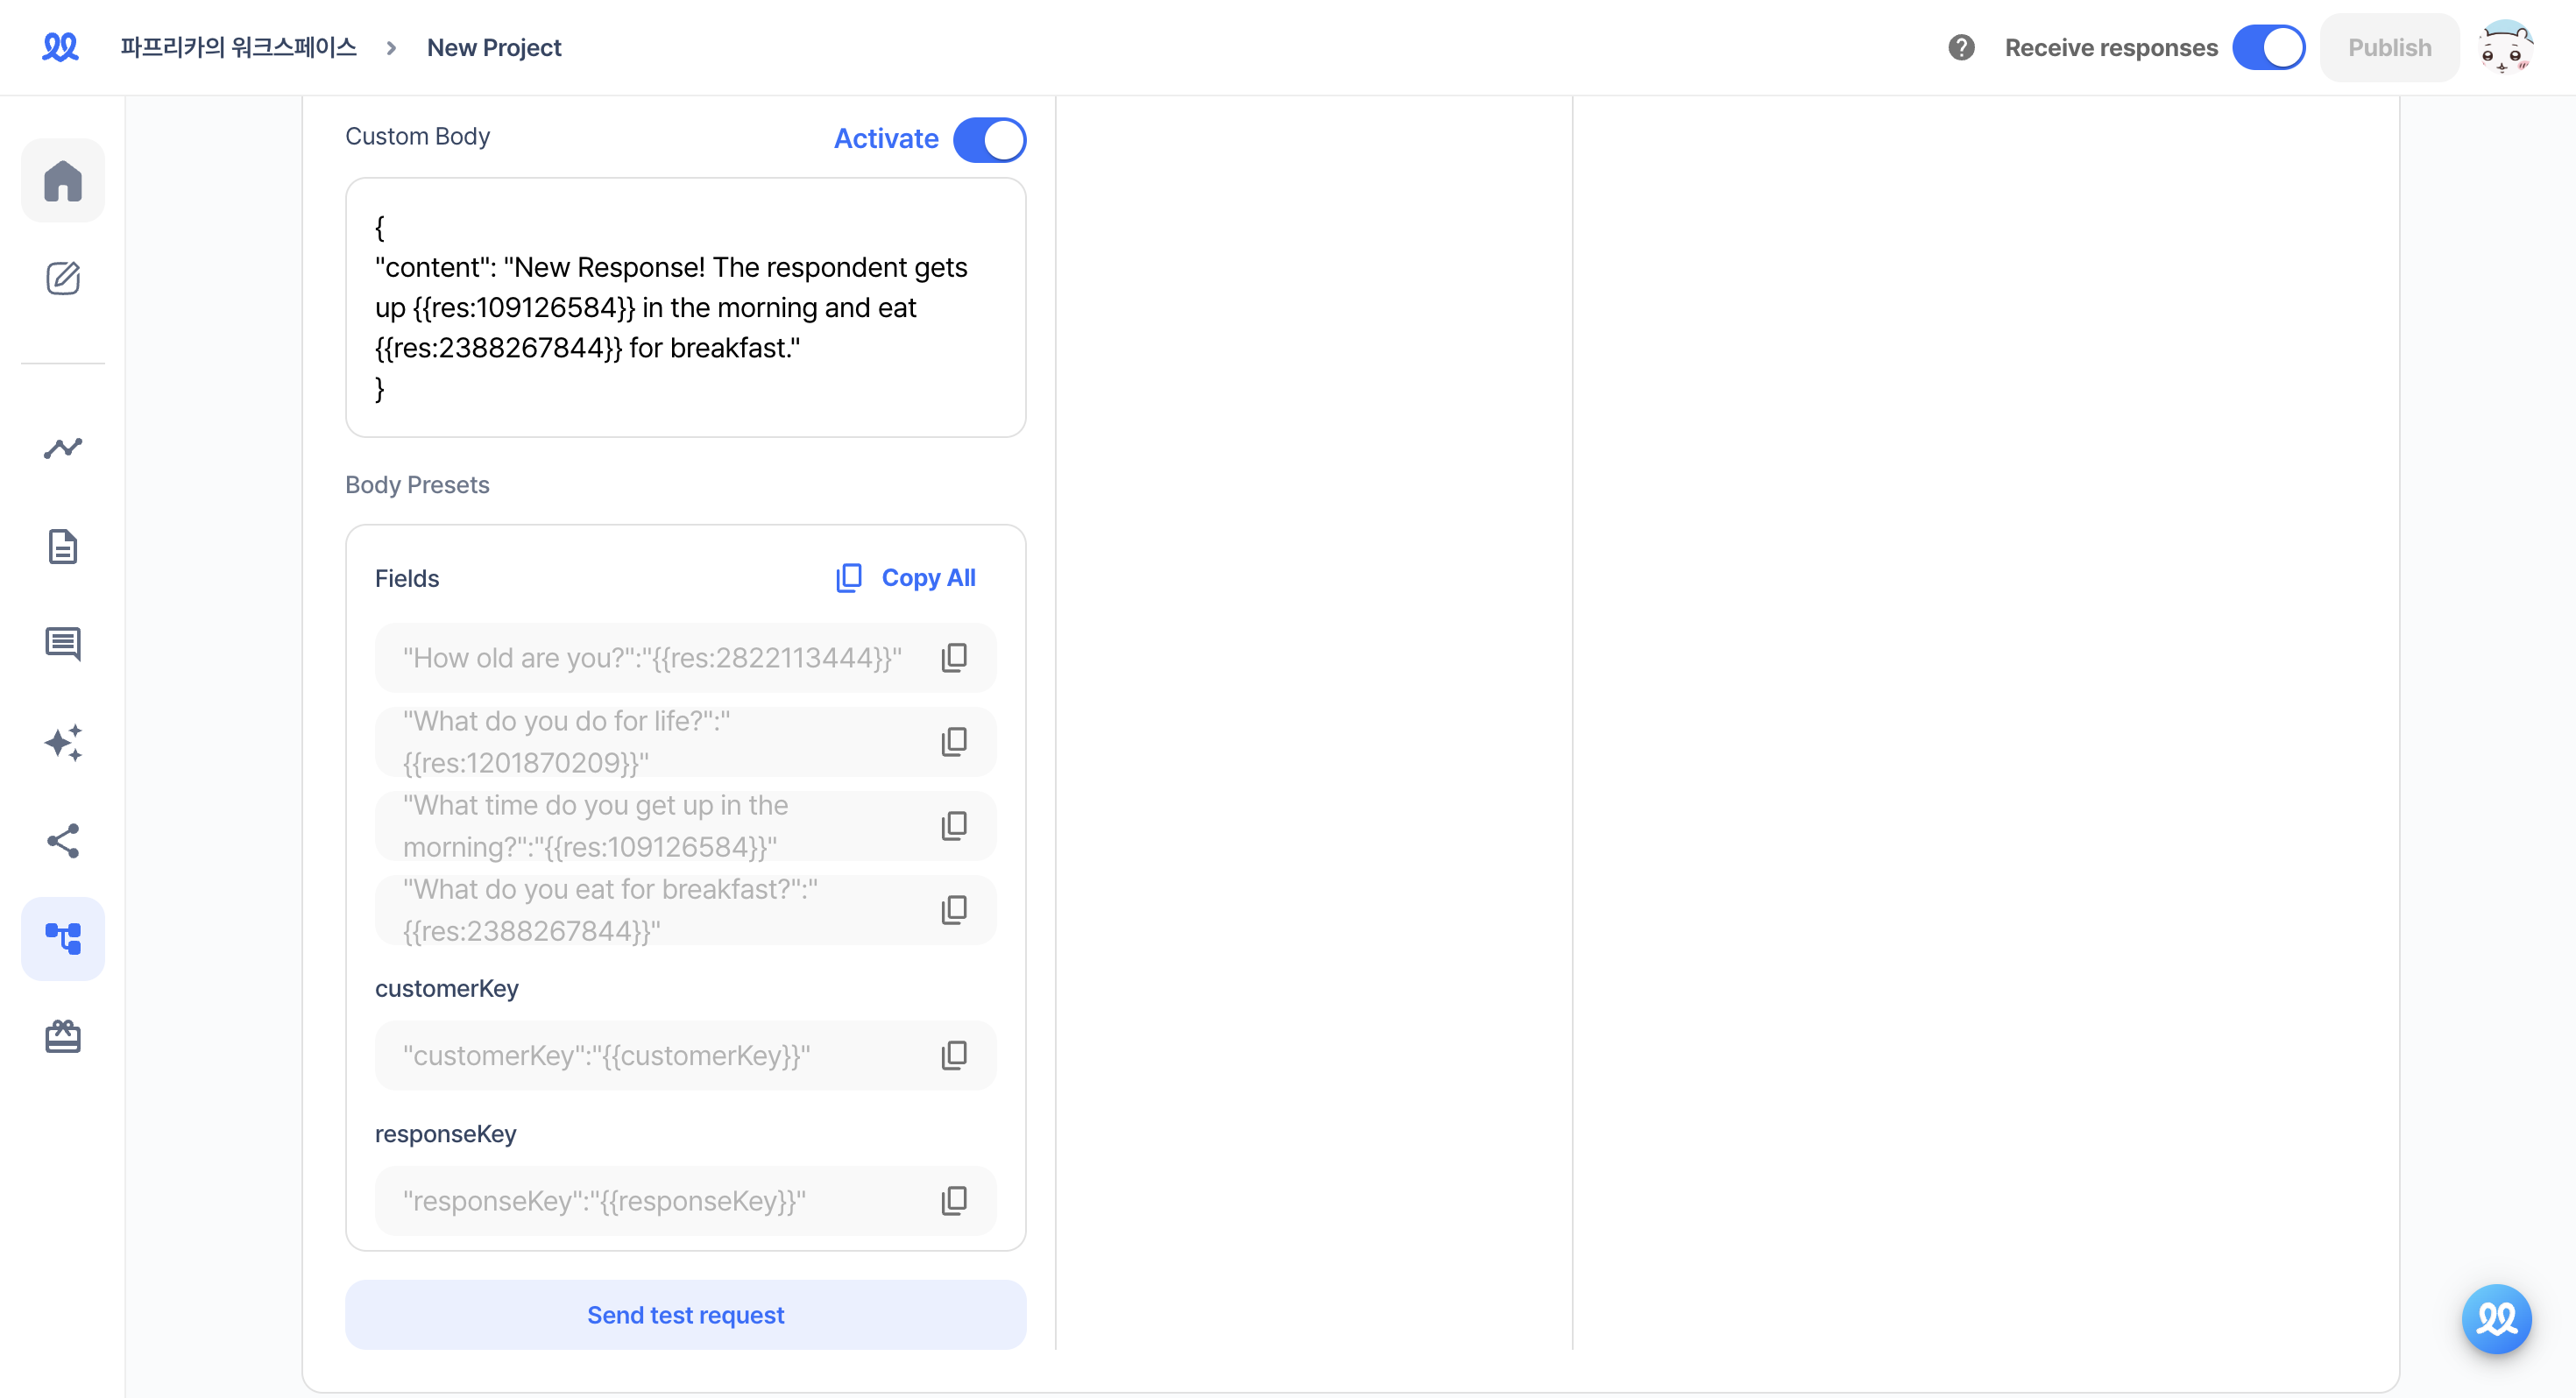
- Custom Body: You can input the contents of the webhook notification using body presets.
- Body Preset: Usually in the format
"":"{{res:response_value}}", you can copy the value inside the quotes and paste it into the custom body.- Field: You can identify the response to a specific field.
- If you add a ‘hidden field’, you can copy the preset of the hidden field that appears at the bottom.
- projectKey: You can identify which project it belongs to using the project key.
- customerKey: You can identify which respondent it belongs to using the customer key.
- In this case, you need to add customerKey=value to the URL similarly to the hidden field. e.g.,
https://walla.my/v/~~~?source=Instagram&customerKey=Minsu
- In this case, you need to add customerKey=value to the URL similarly to the hidden field. e.g.,
- responseKey: You can identify which response it belongs to using the response key.
- Field: You can identify the response to a specific field.
- If you want to receive notifications of the response content and the type of hidden field, share the survey URL like
https://walla.my/v/fLptDL9bbvlxRvWRTNud?source=Instagram&customerKey=Minsu, and set the body as follows:
{
"content": "A response to the {{projectKey}} survey has arrived! The respondent's birthday is {{res:2865092957}}. The CustomerKey of this response is {{customerKey}}, and the ResponseKey is {{responseKey}}. This response was recorded through the hidden field {{hidden:1495742778}}."
}
You can receive such a webhook notification.

Integrating with Discord
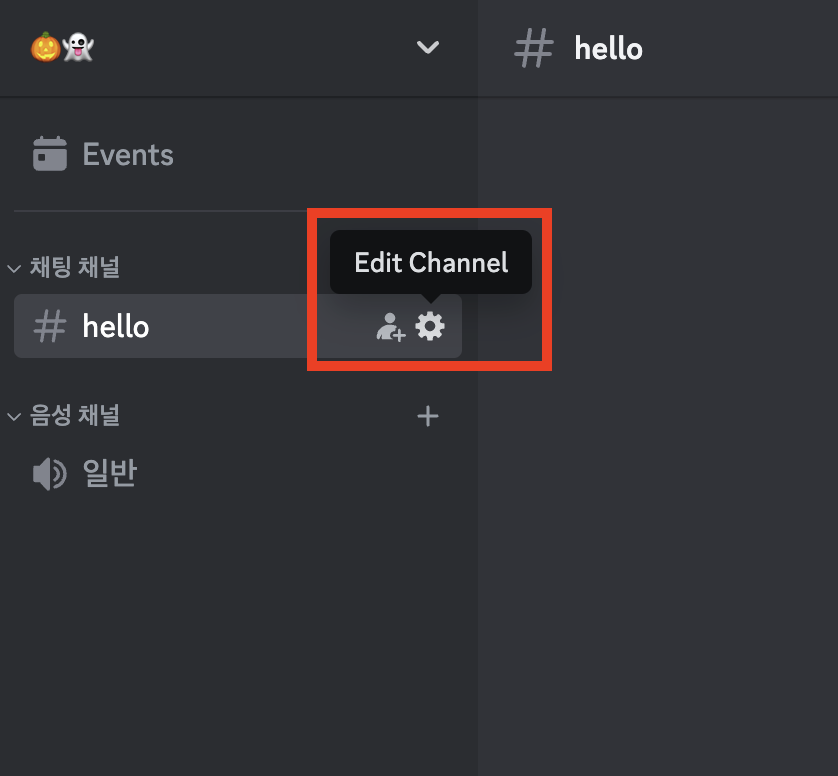
1. Go to 'Edit Channel' of the Discord server where you want to receive notifications.
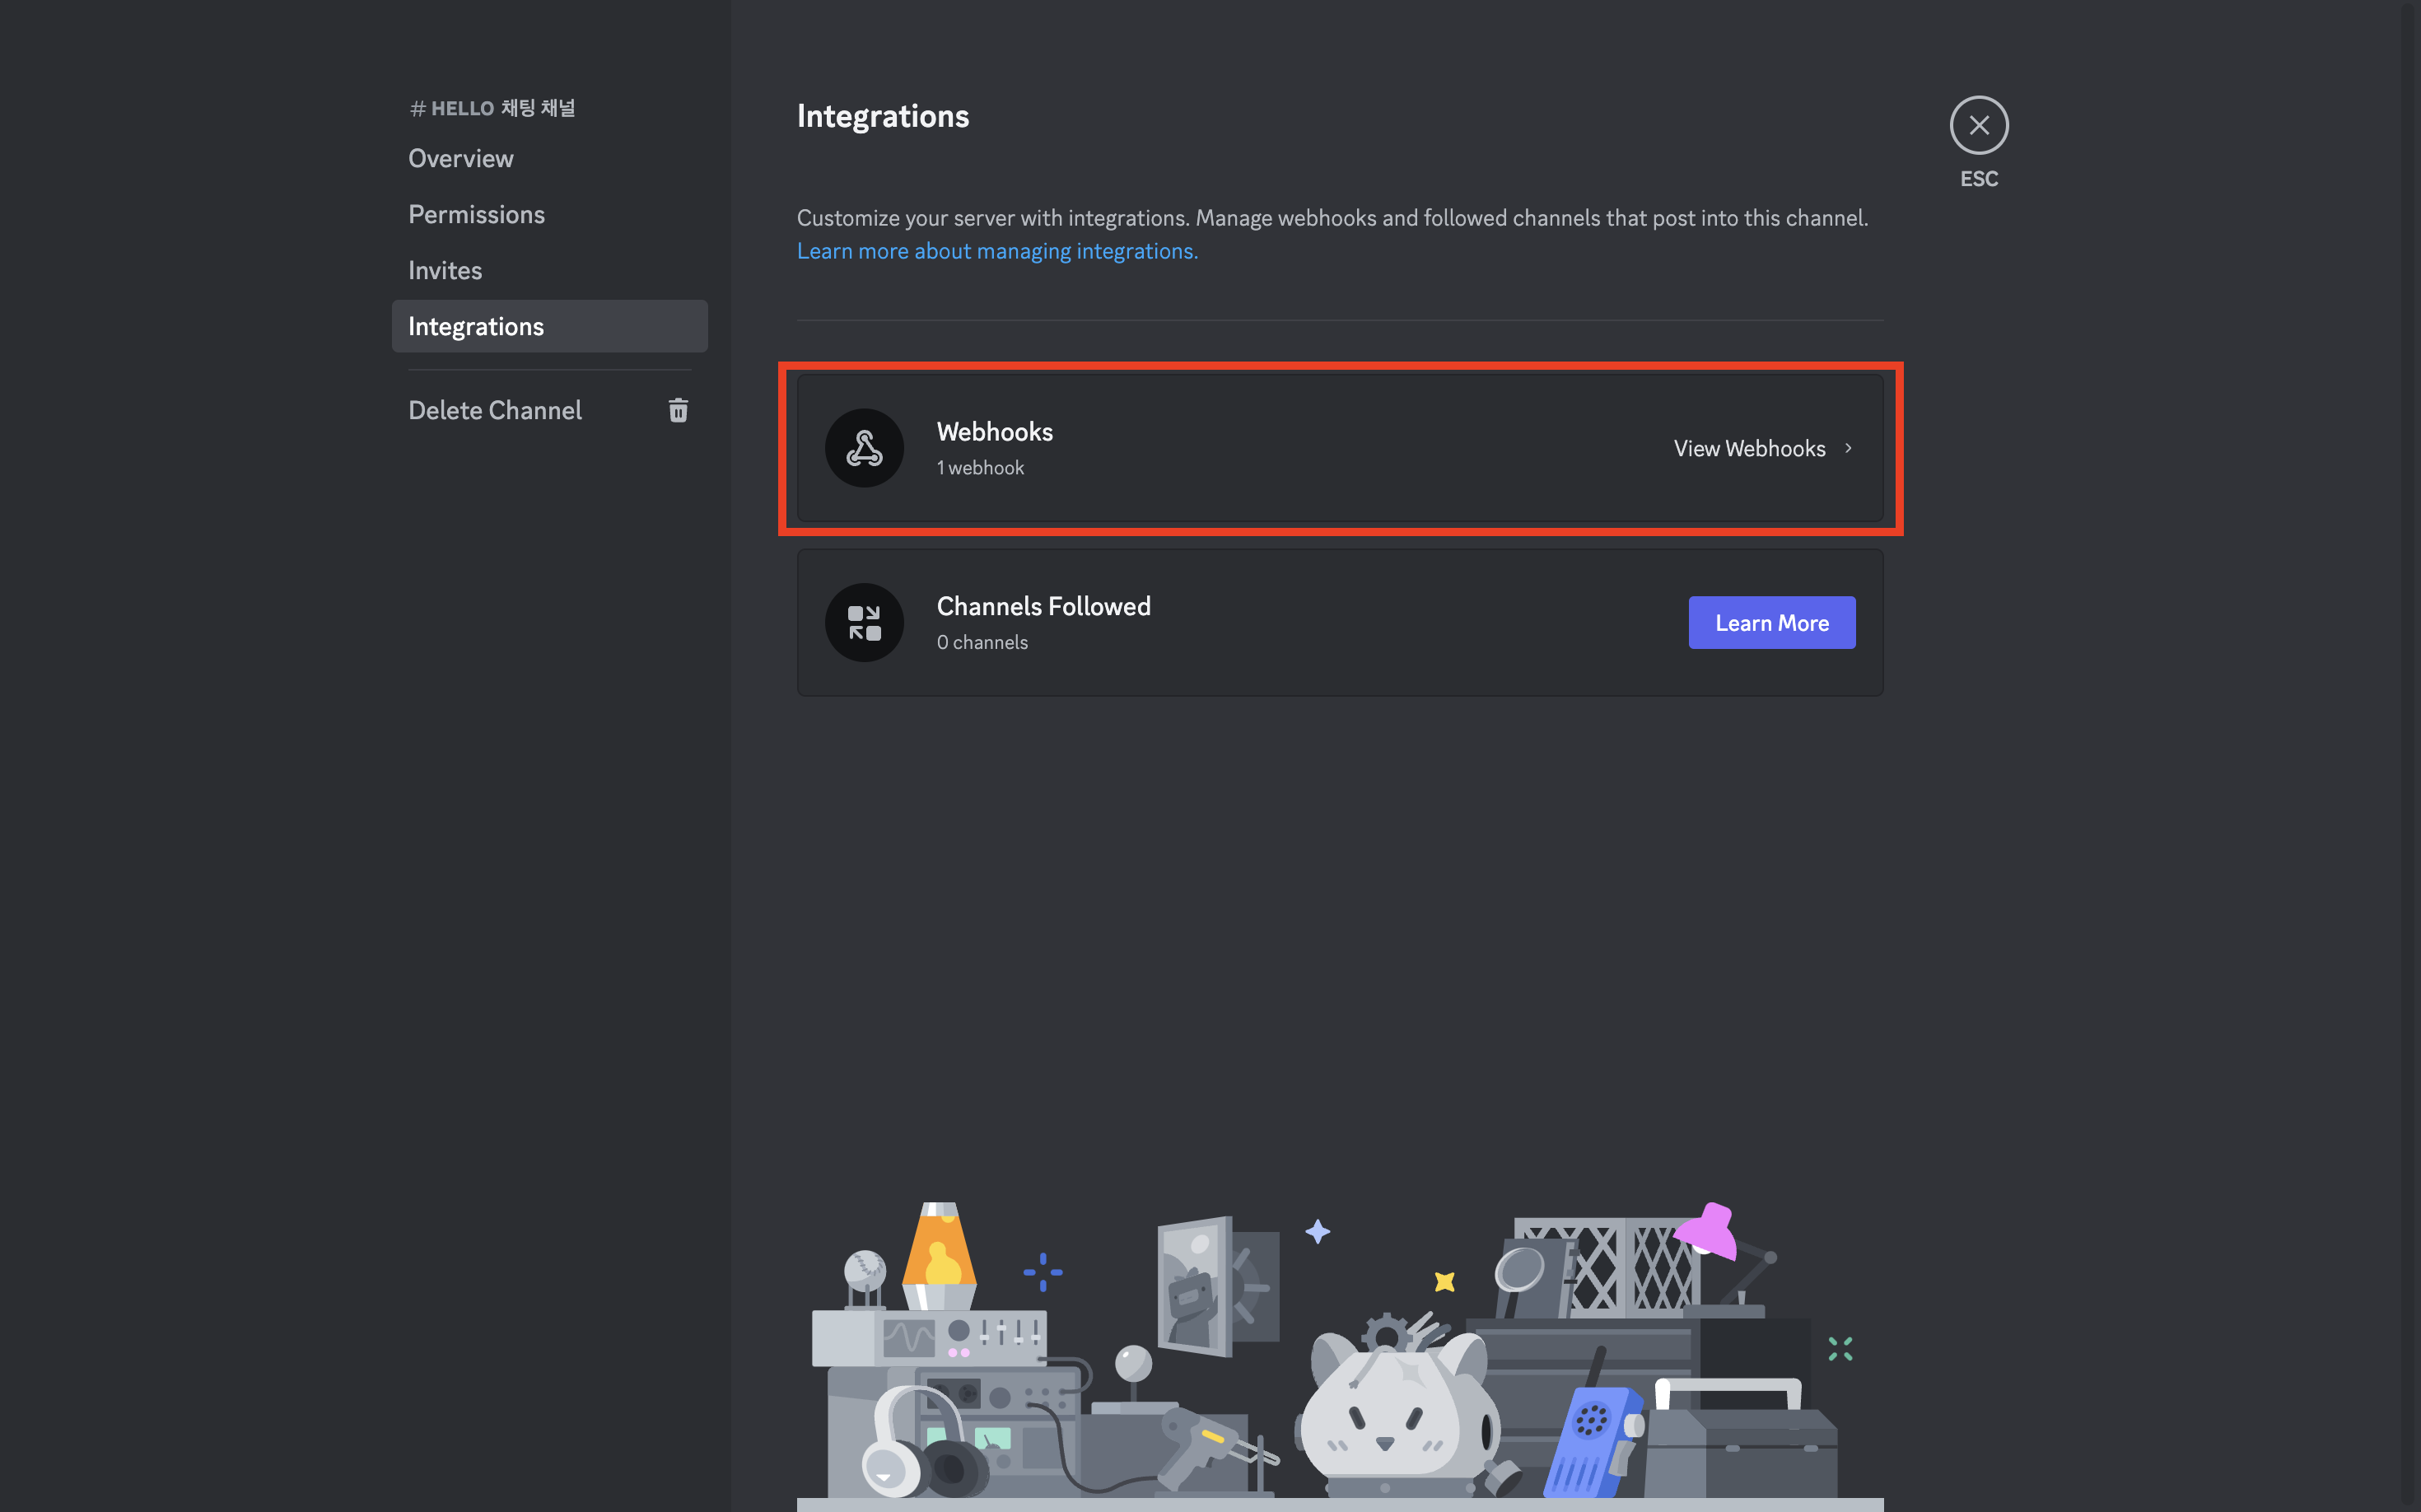
2. Click on 'Integrations' tab and then 'Webhooks'.
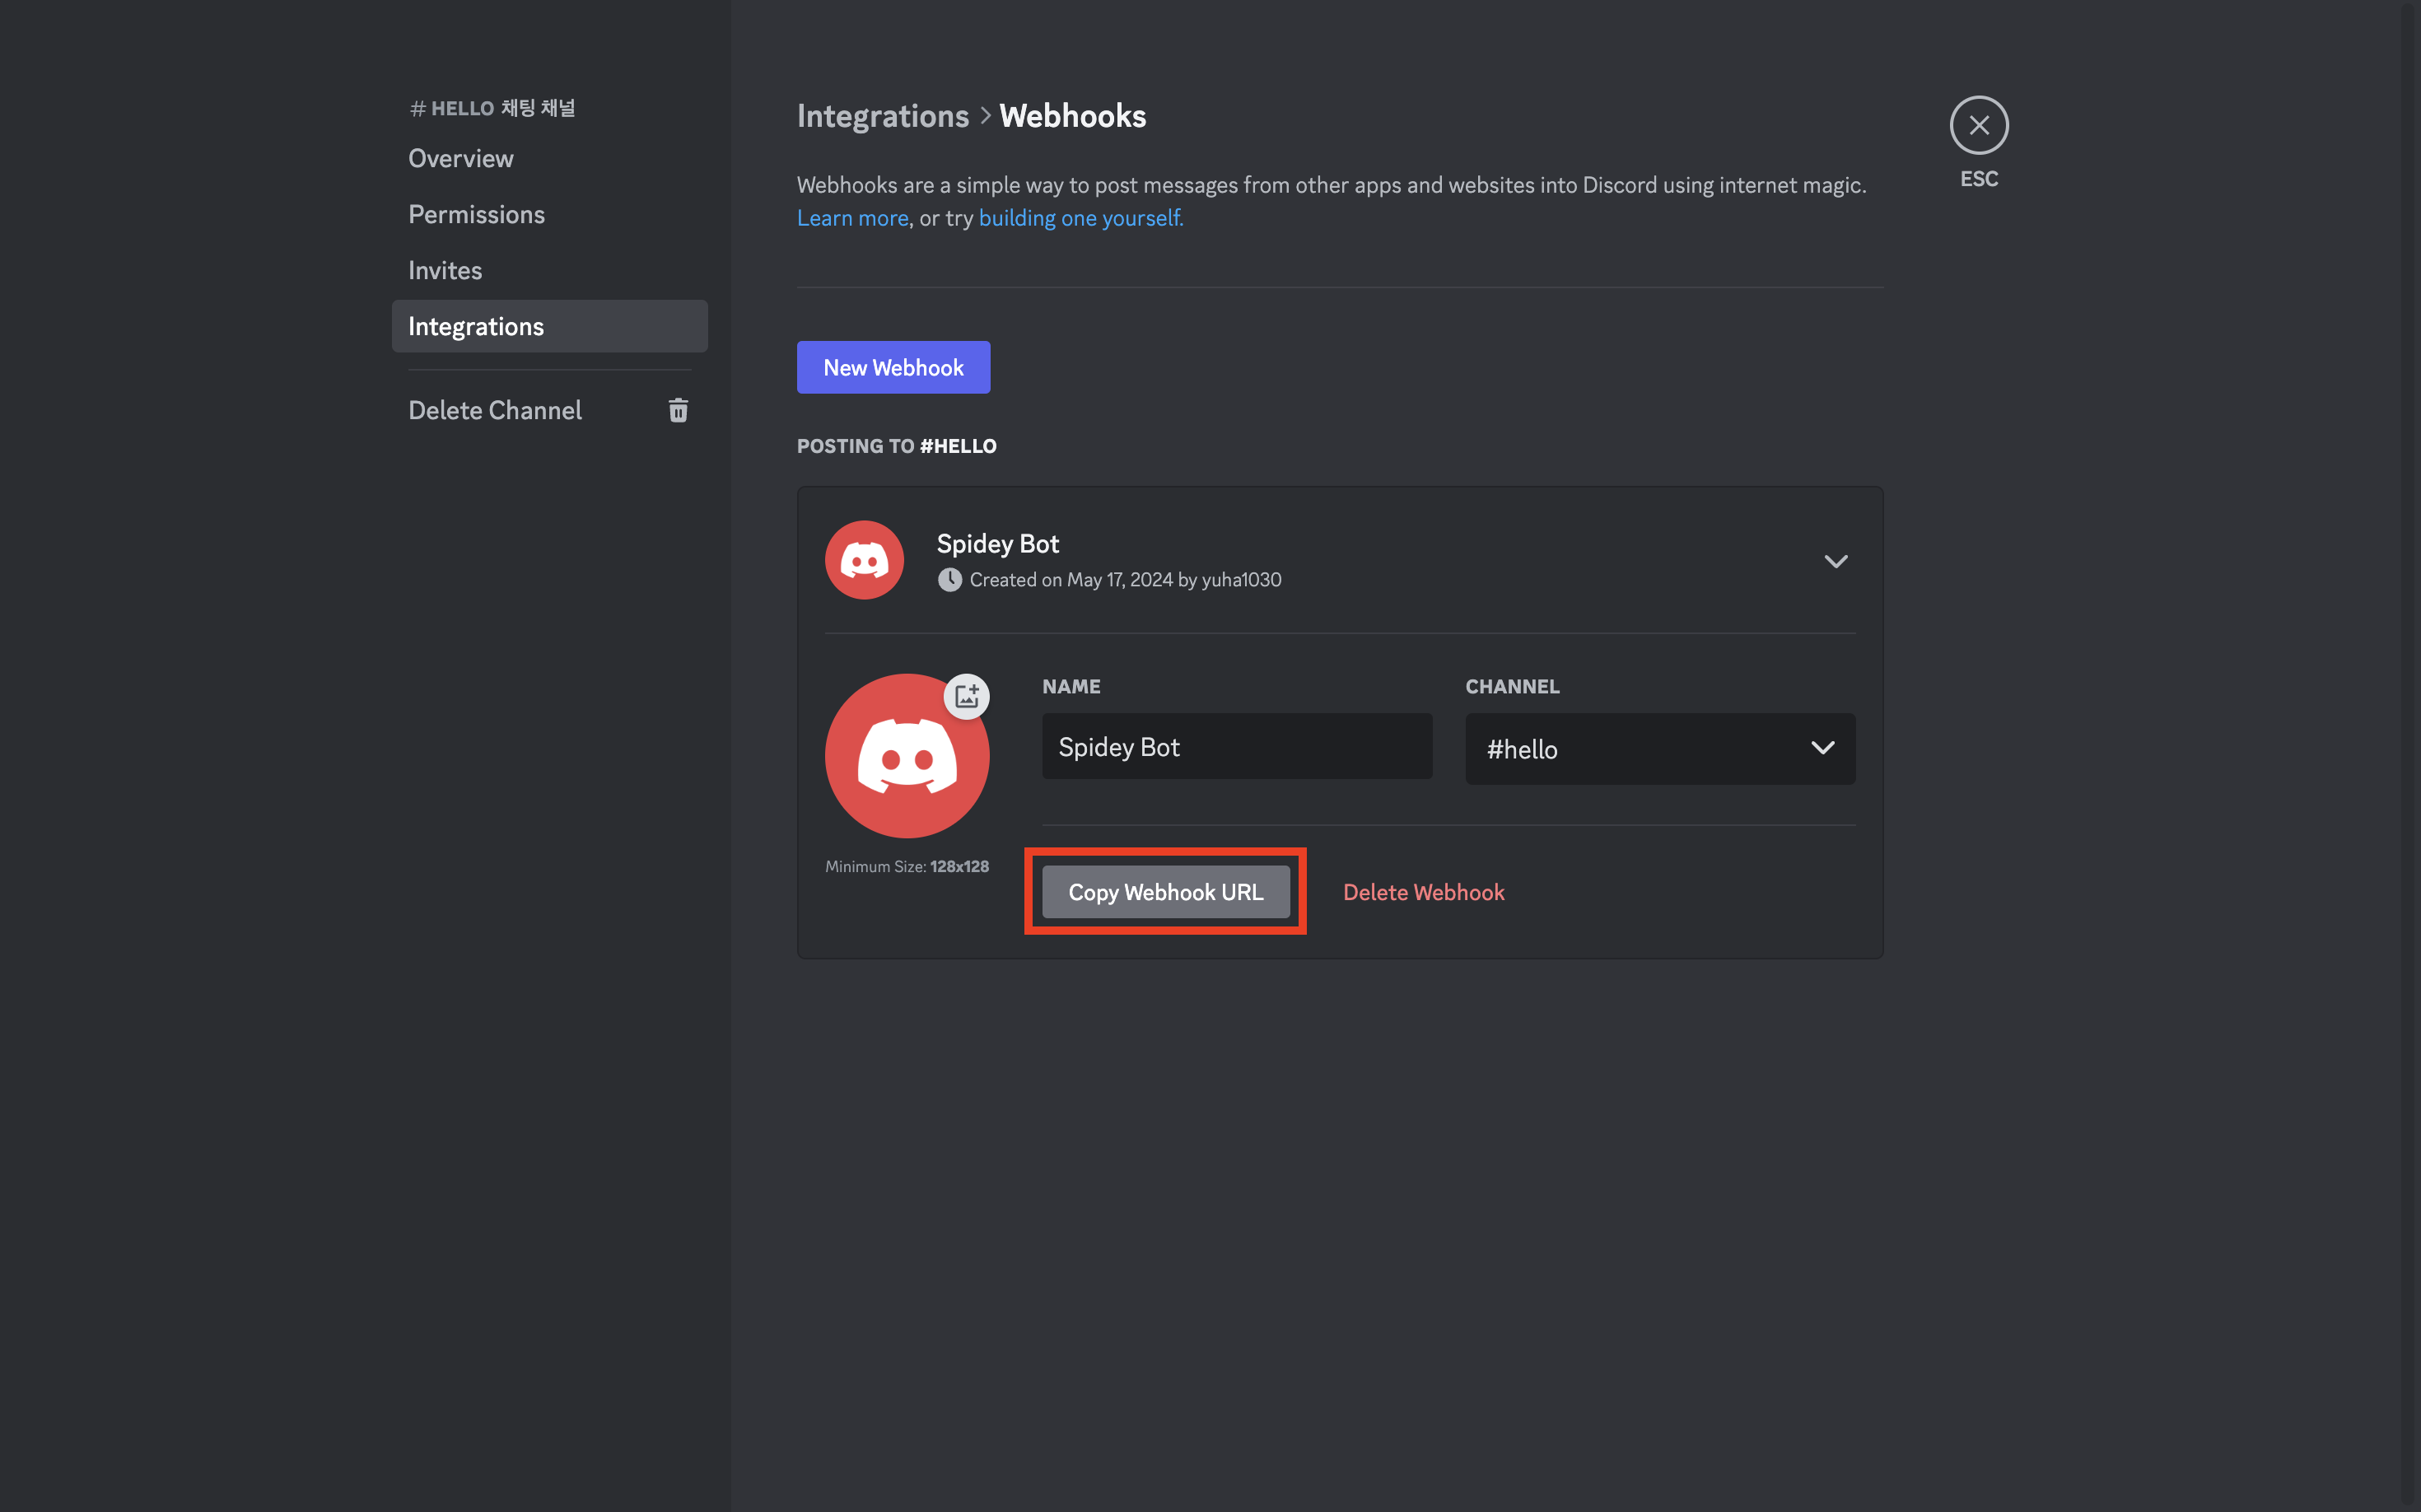
3. Click 'Copy Webhook URL'.
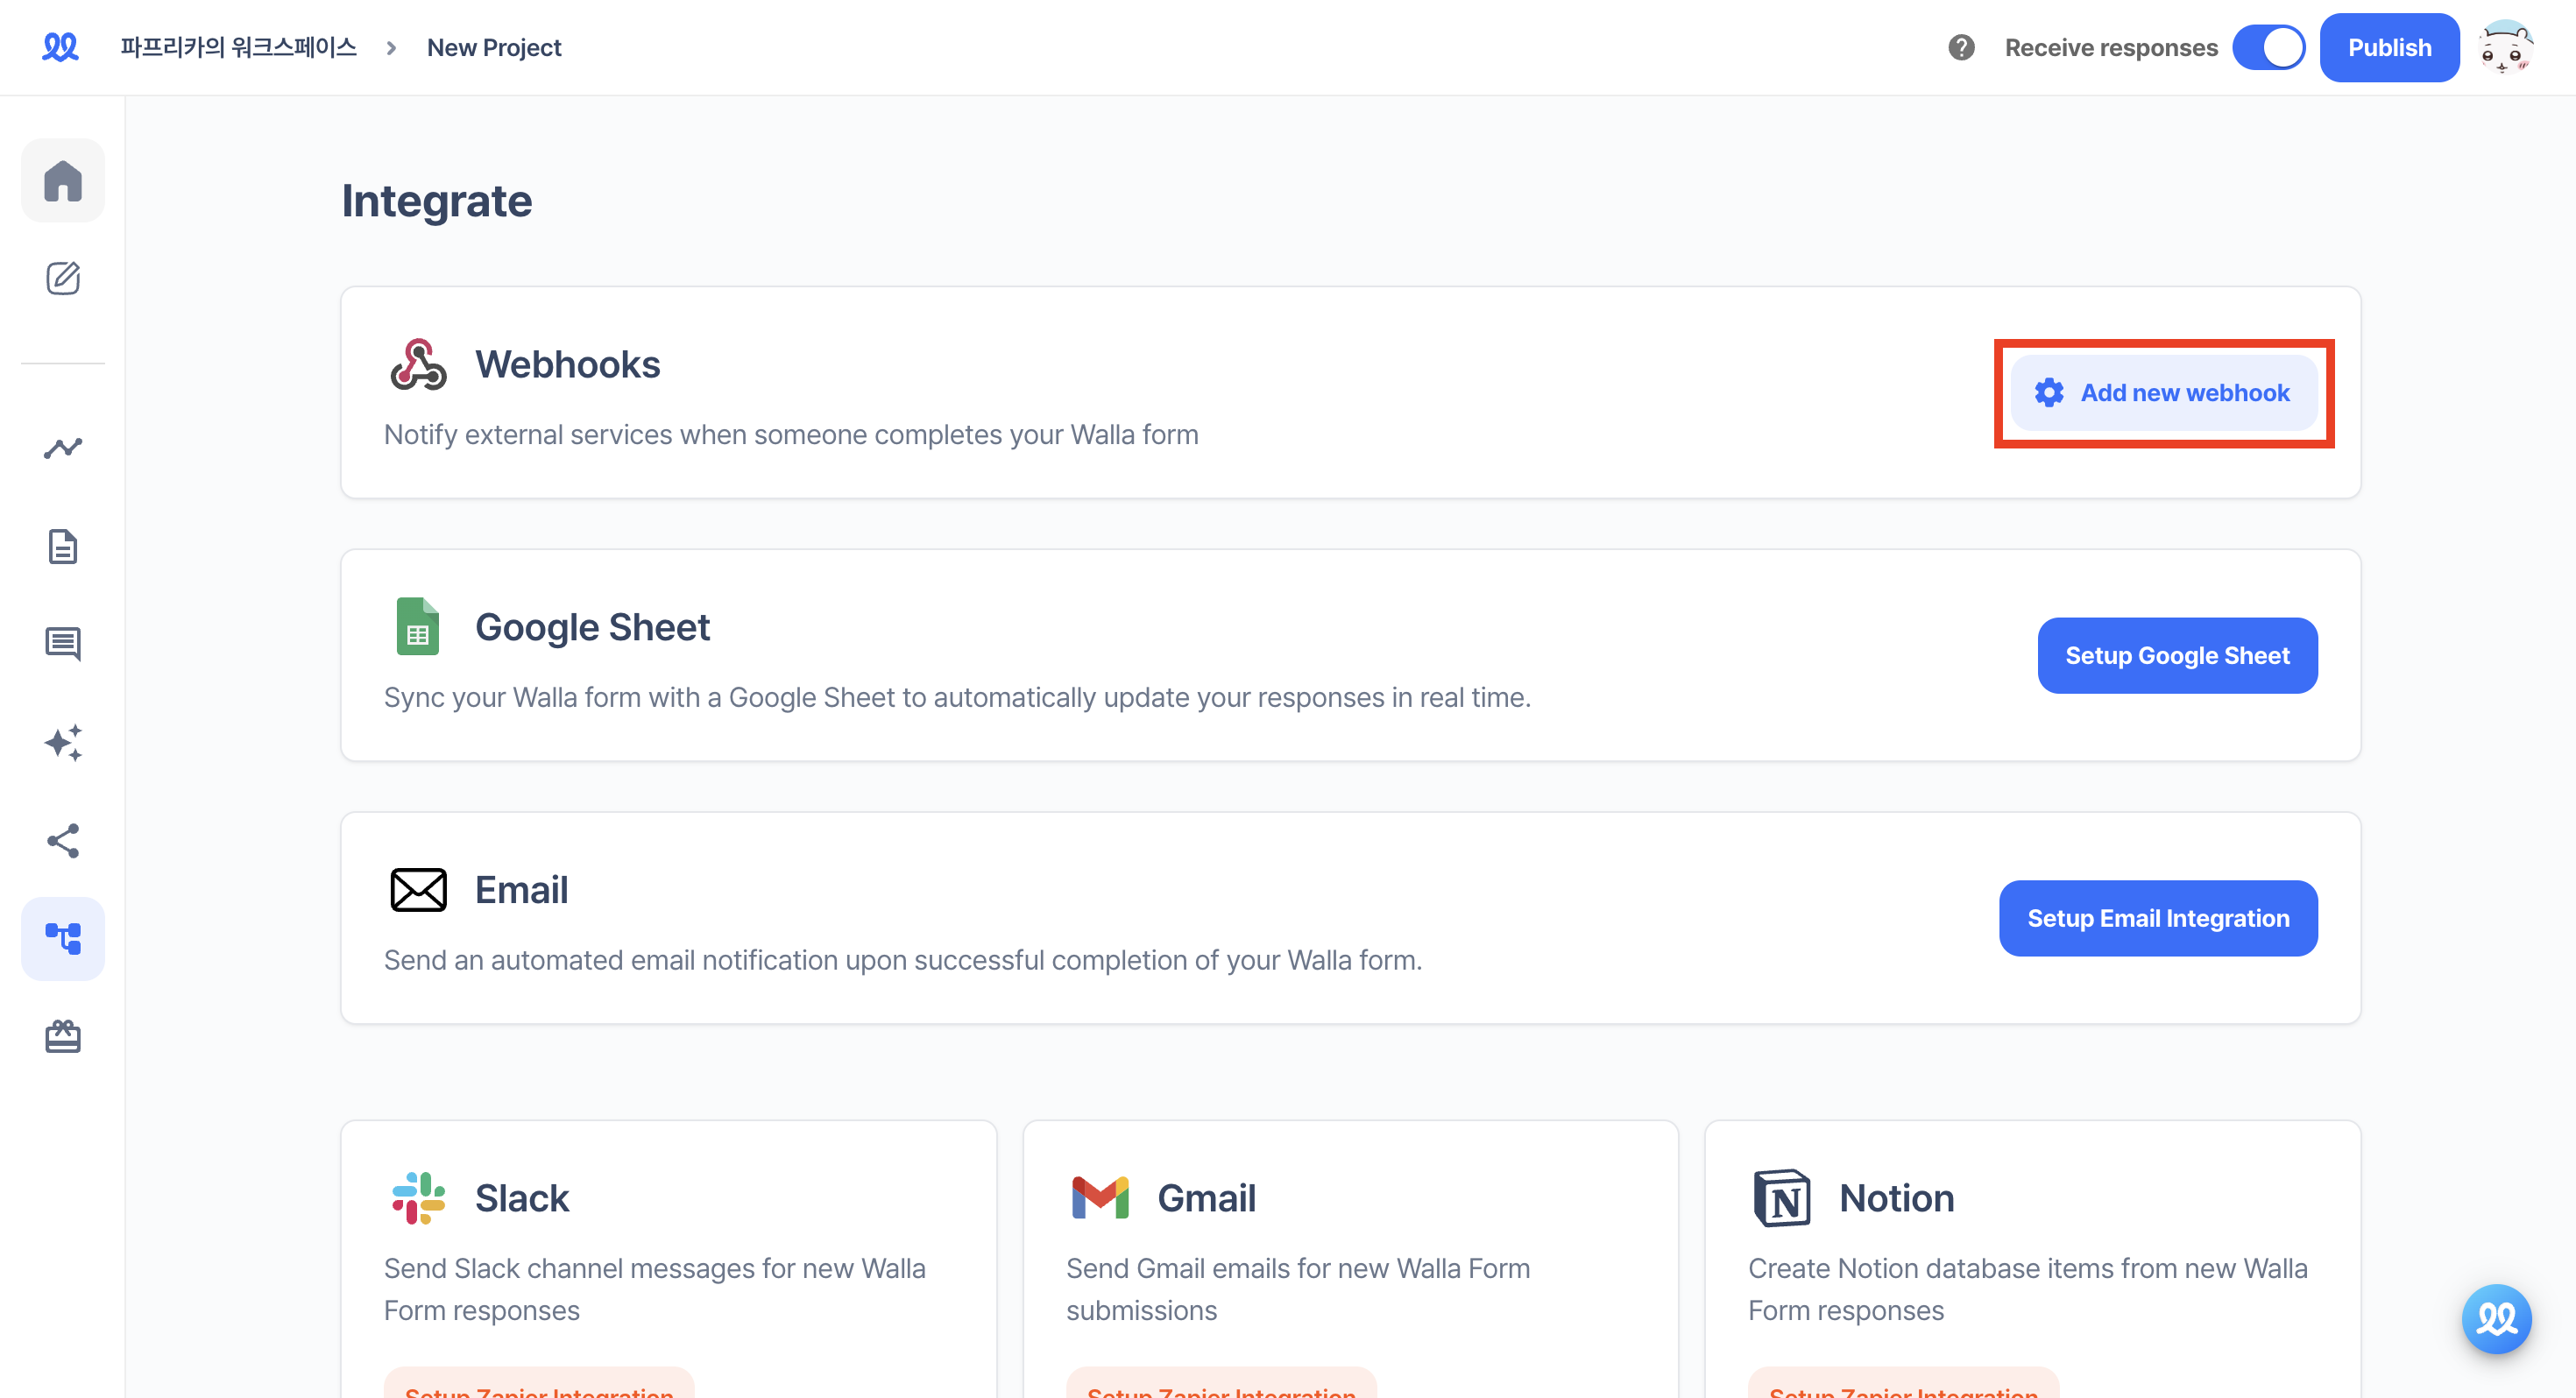
4. Go to the 'Integrate' tab in Walla and click on 'Add new Webhooks'.
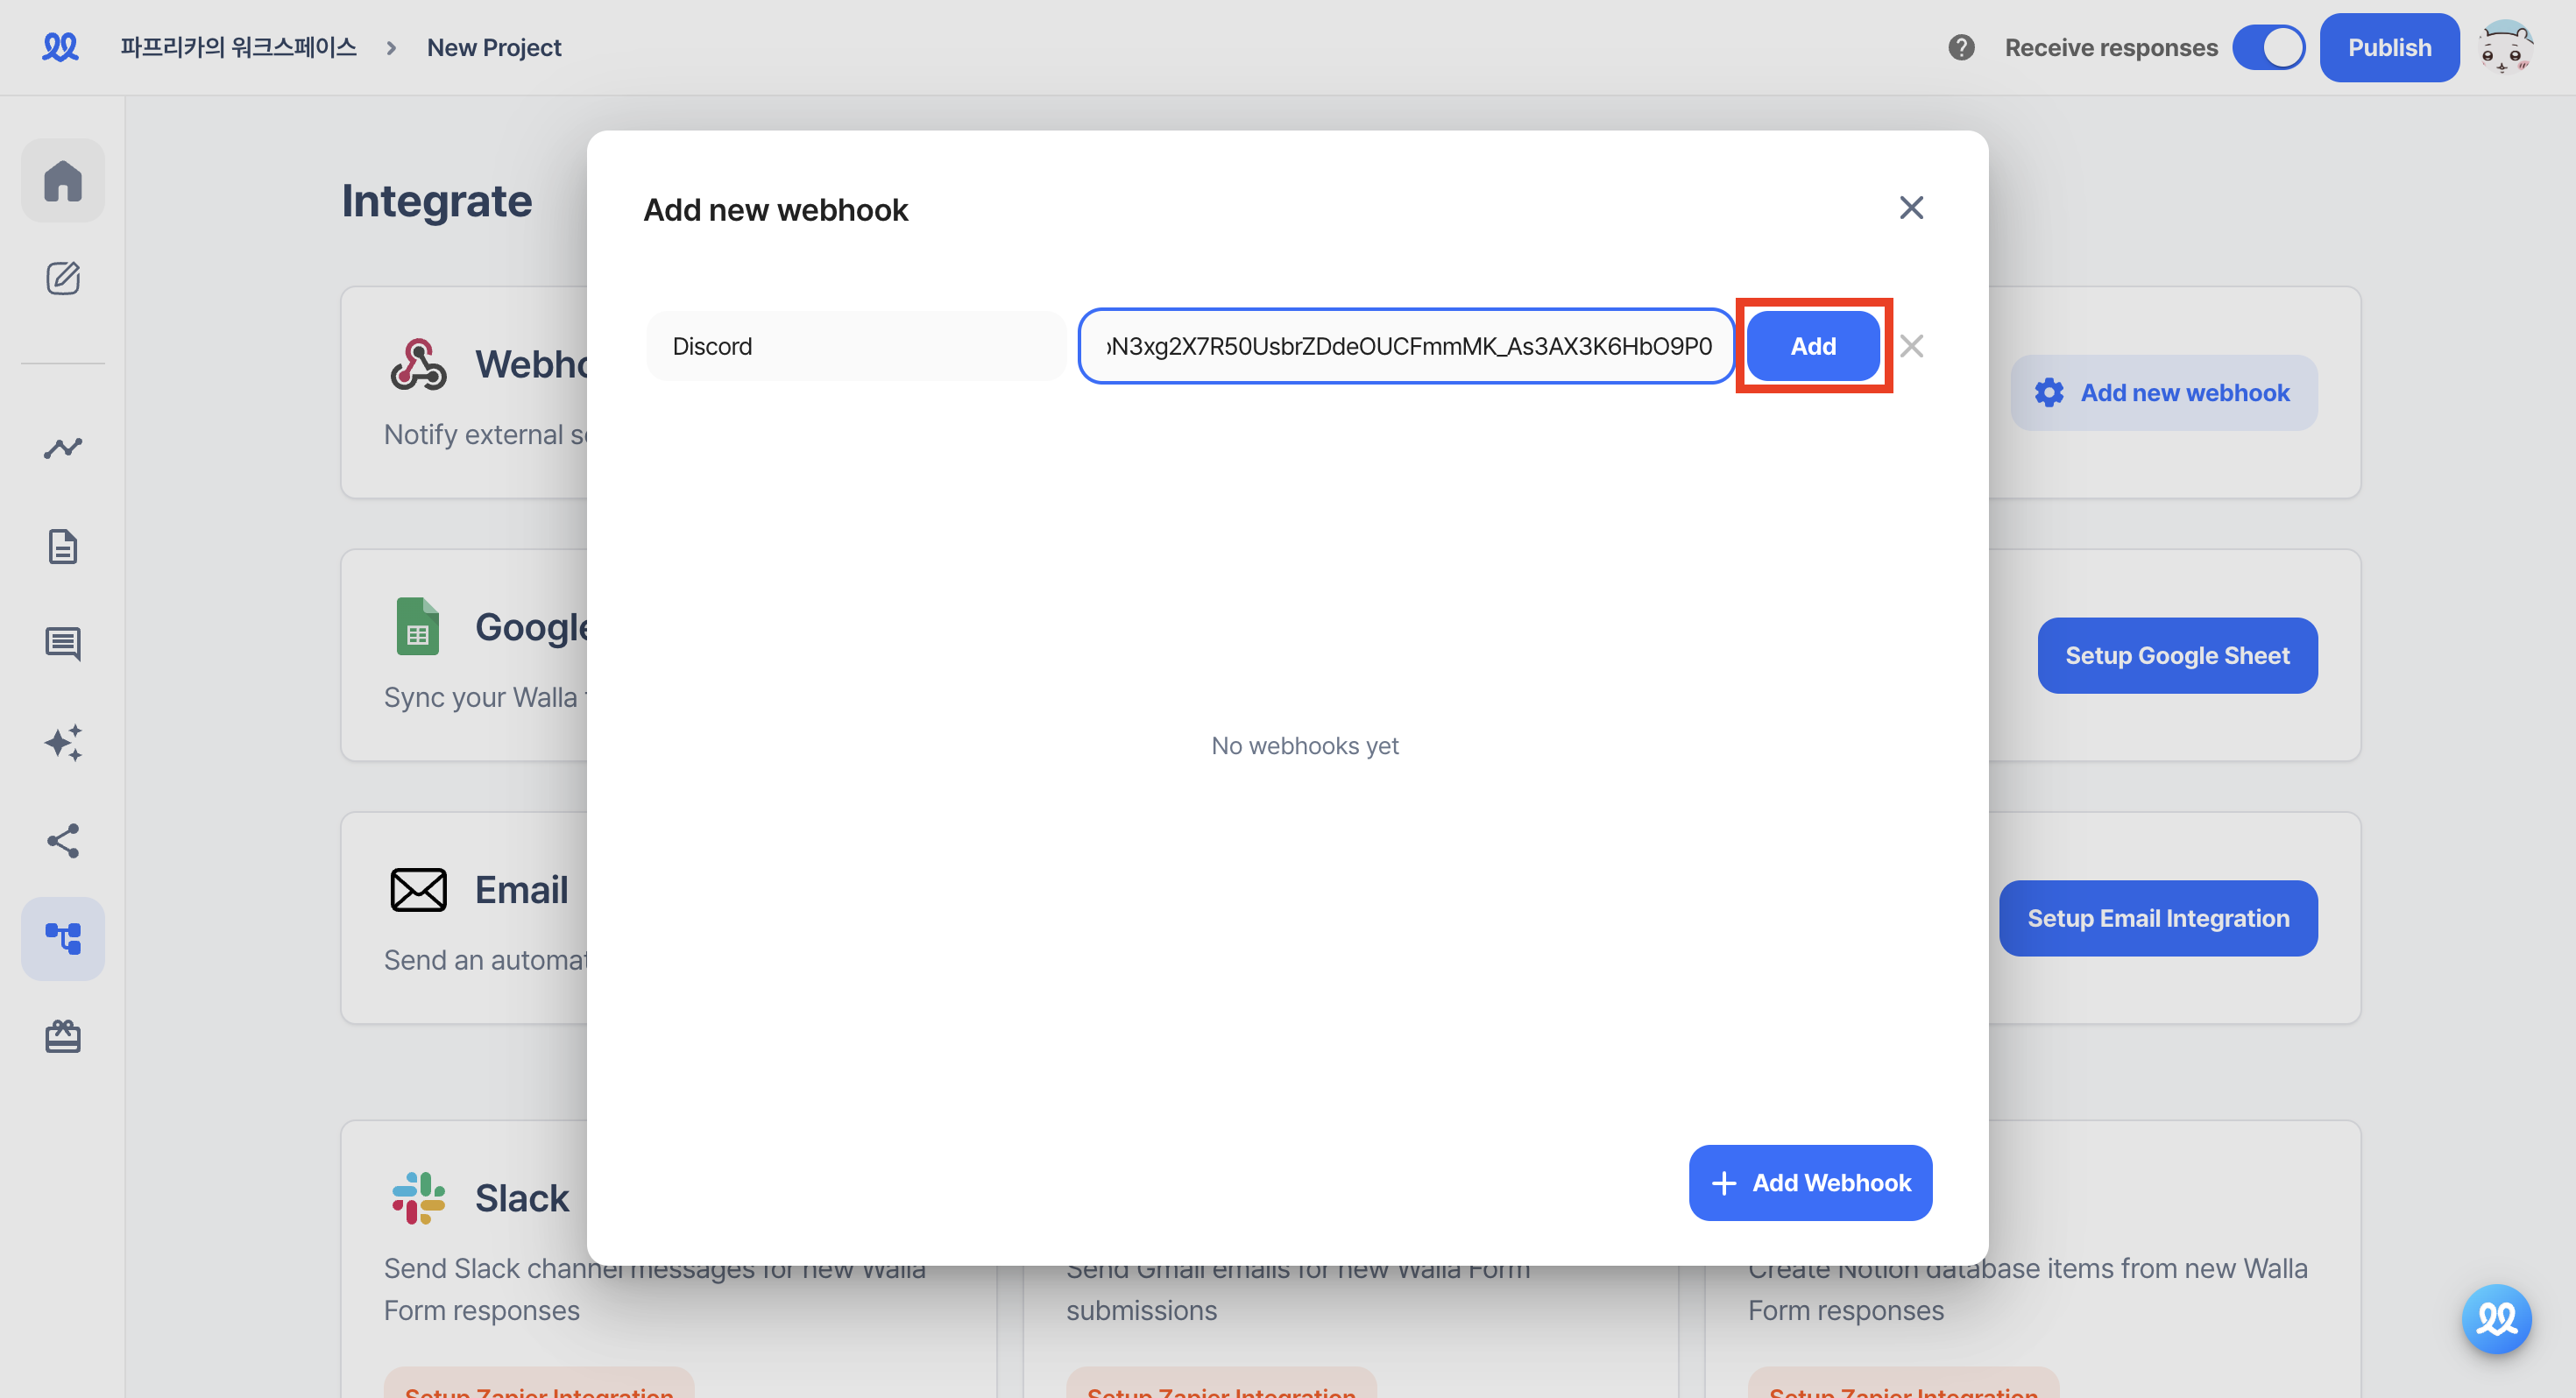
5. Paste the URL copied from Discord and click 'Add'.
6. Change the Header Name value to Content-Type and Value to application/json.
7. Activate the Body settings and refer to the preset below to freely compose the content you want to receive on Discord.
-
Write the content you want between the double quotes according to the format below.
-
If you want to receive response details, paste
{{res:~~}}from the preset. -
If you have set hidden fields, you can also receive the hidden field content in the notification.
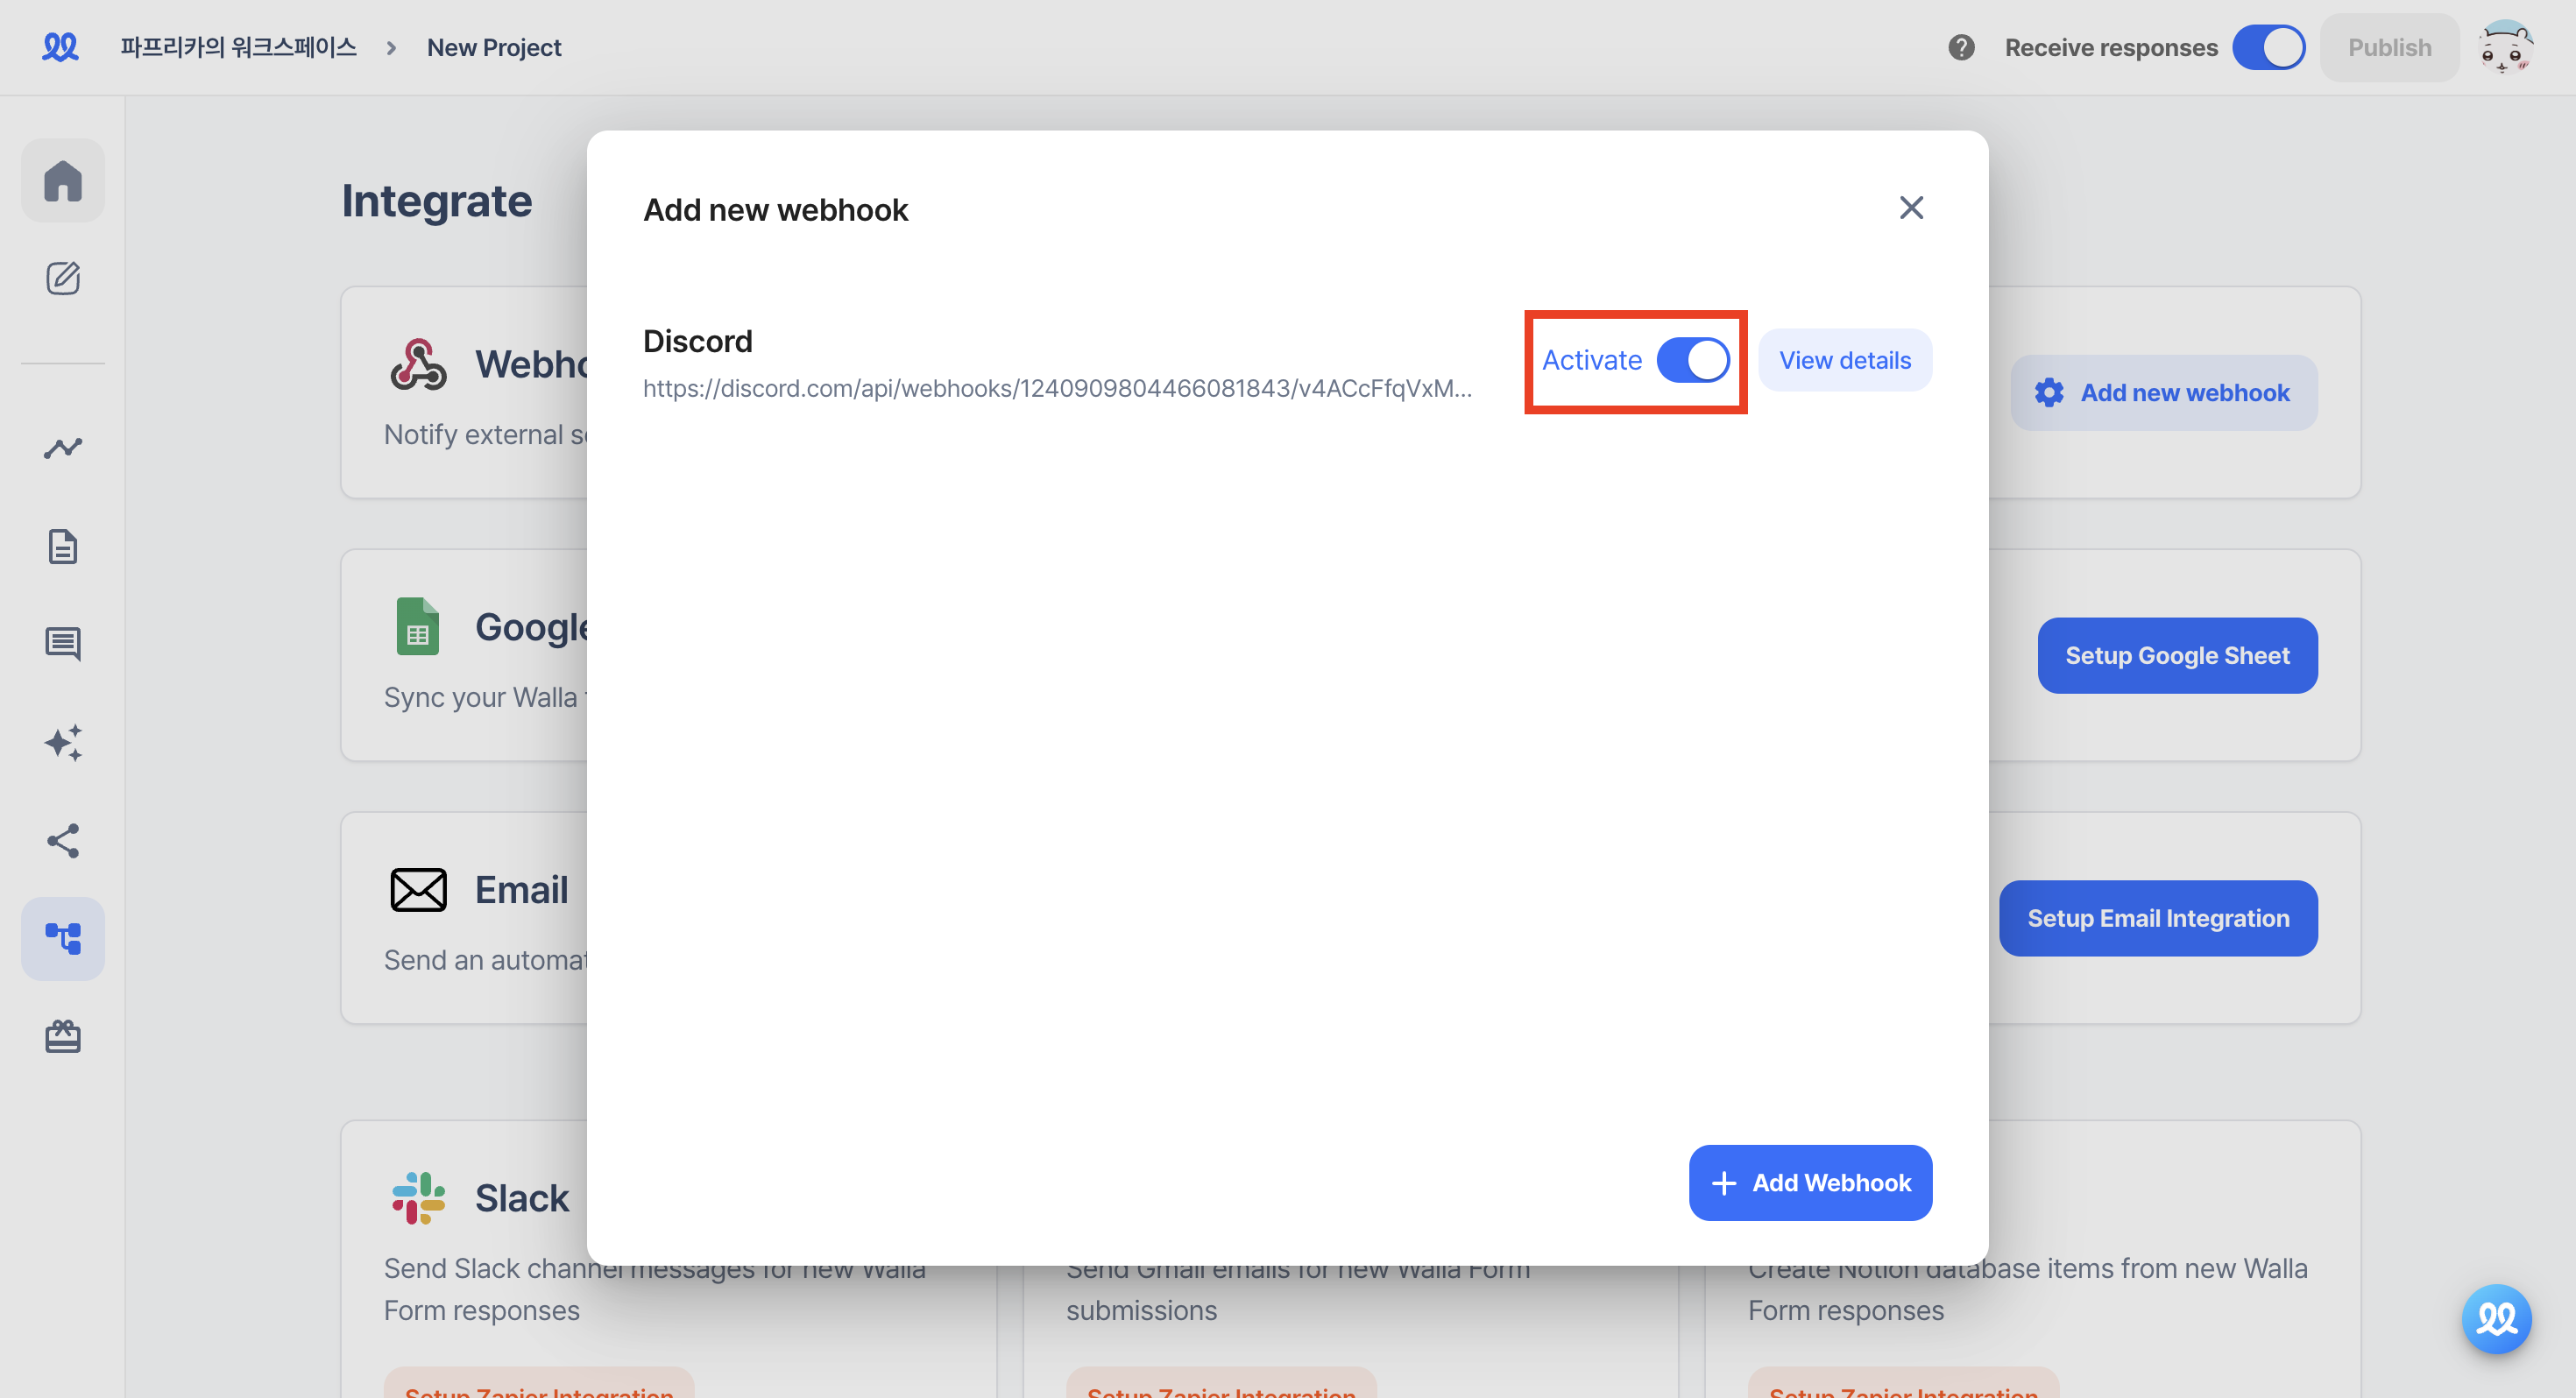
8. Save the changes and activate it in 'Add new webhook'.
9. You will receive notifications on Discord when a response arrives.

Integrating with Slack
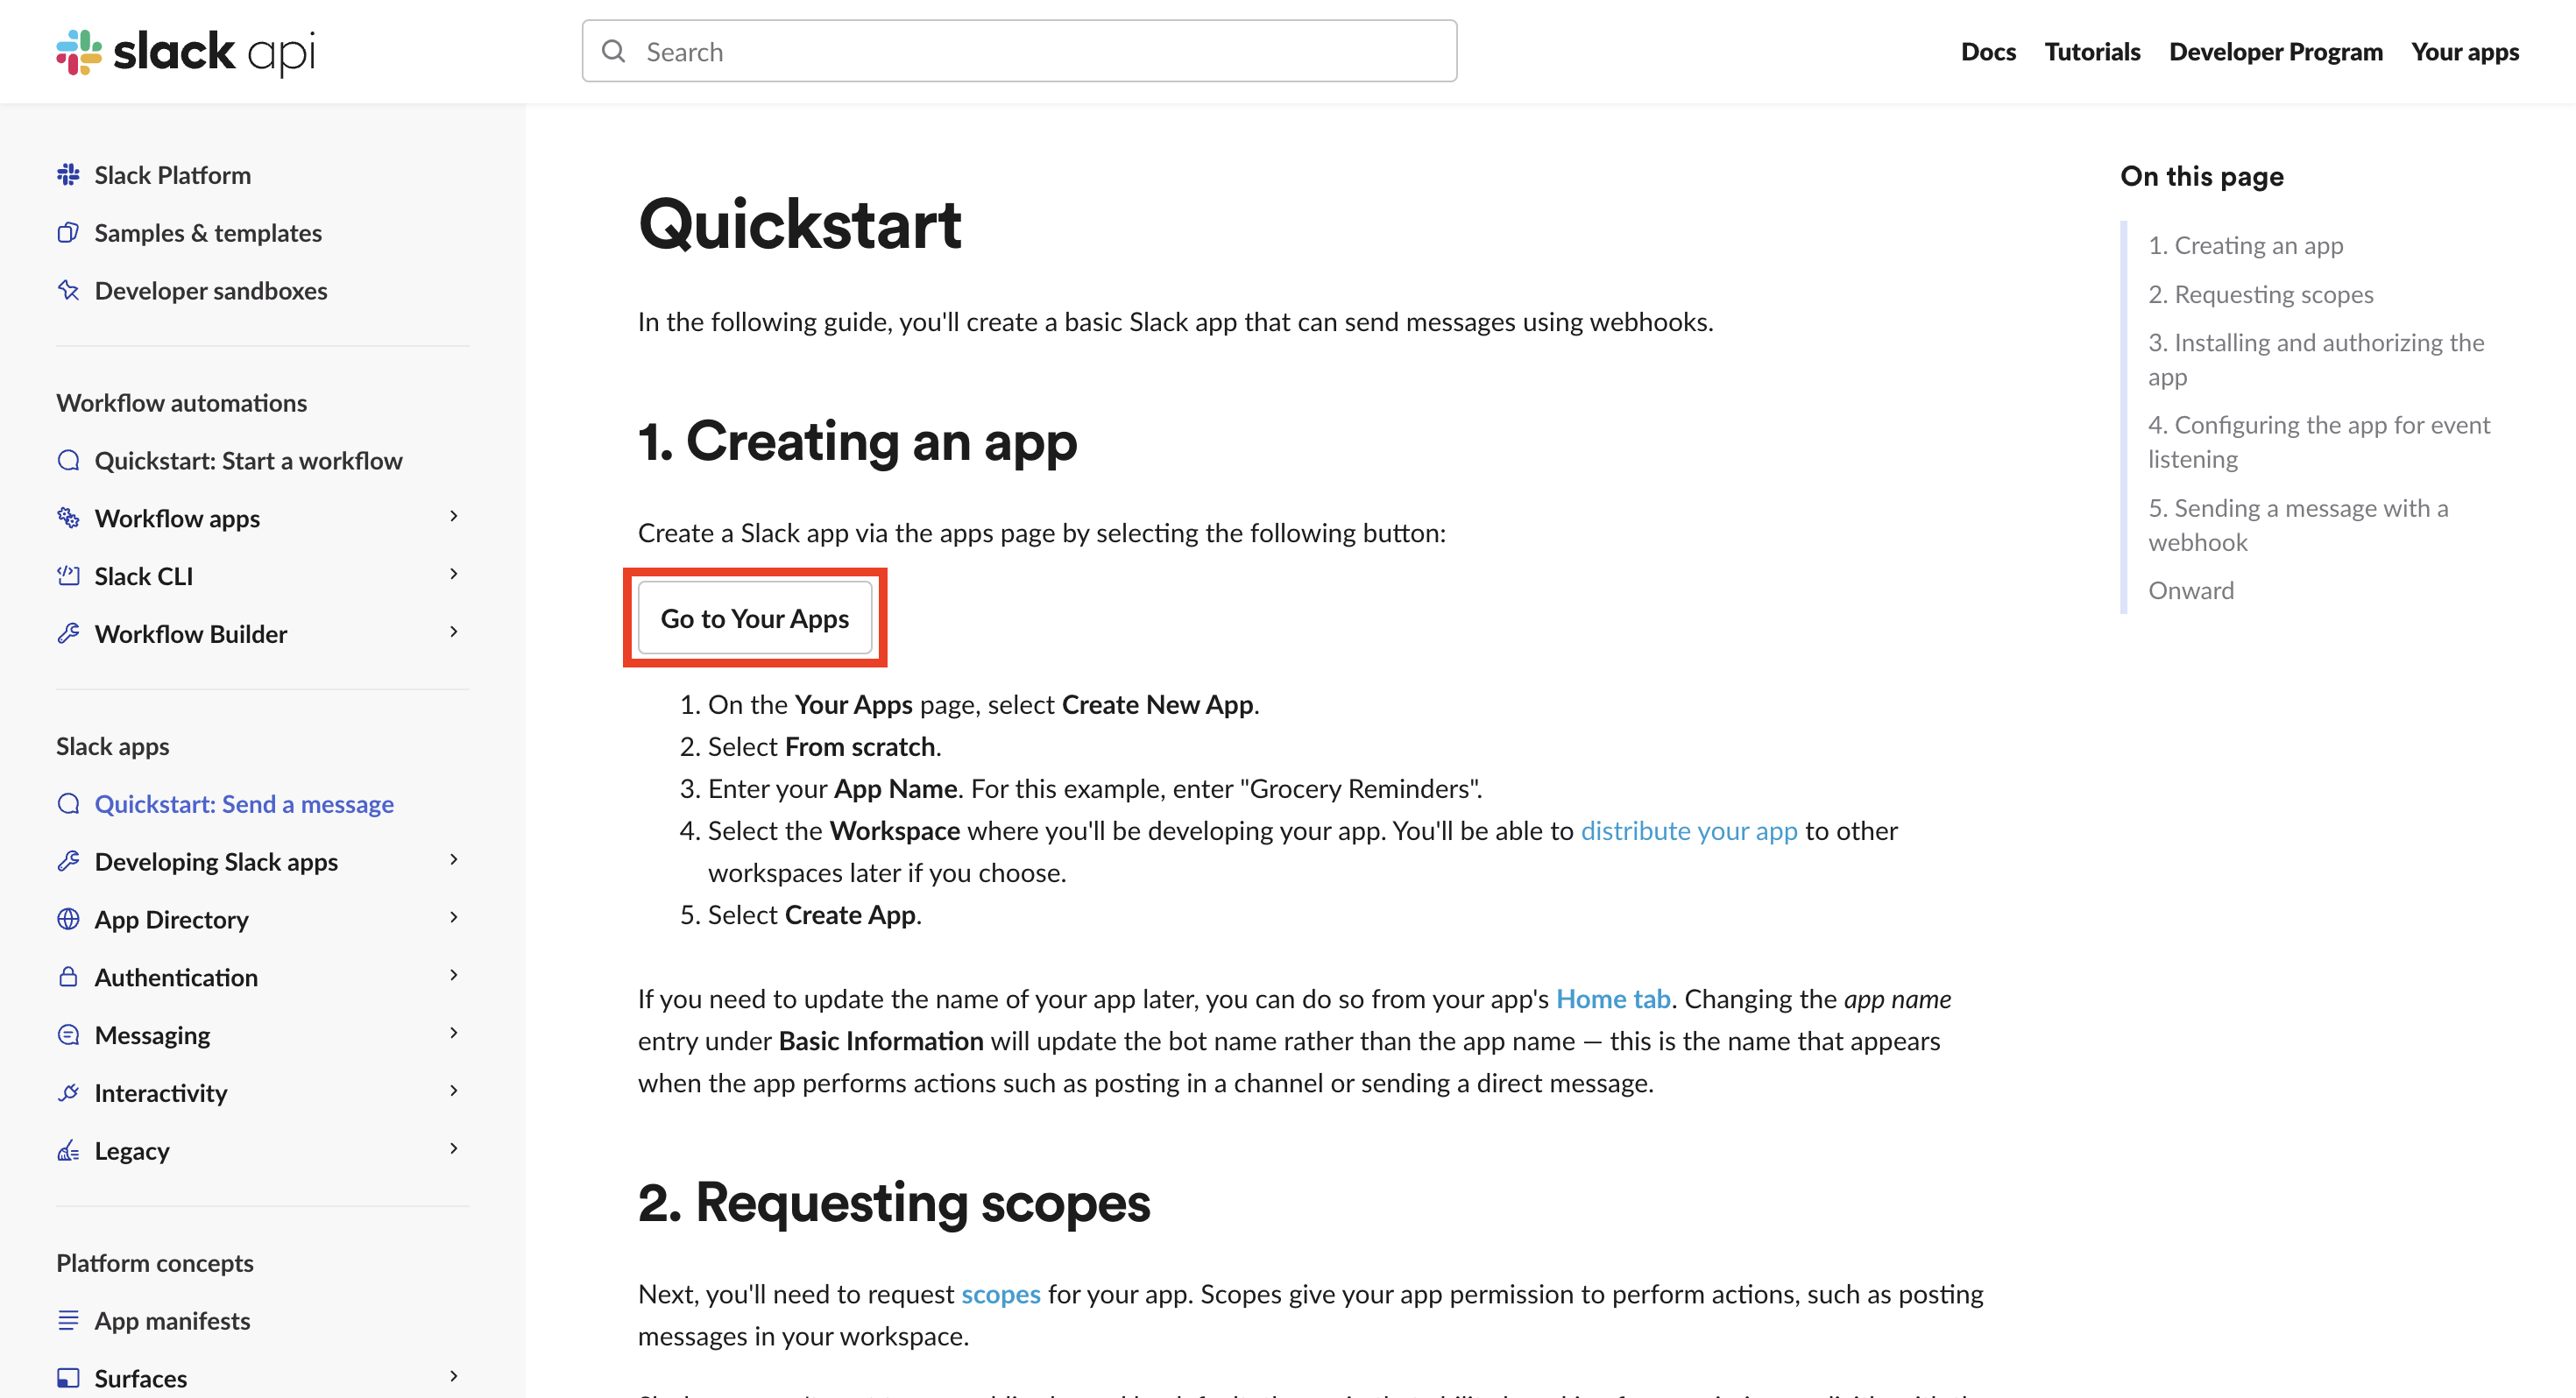
1. Go to https://api.slack.com/start/quickstart (opens in a new tab) and click 'Go to Your Apps'.
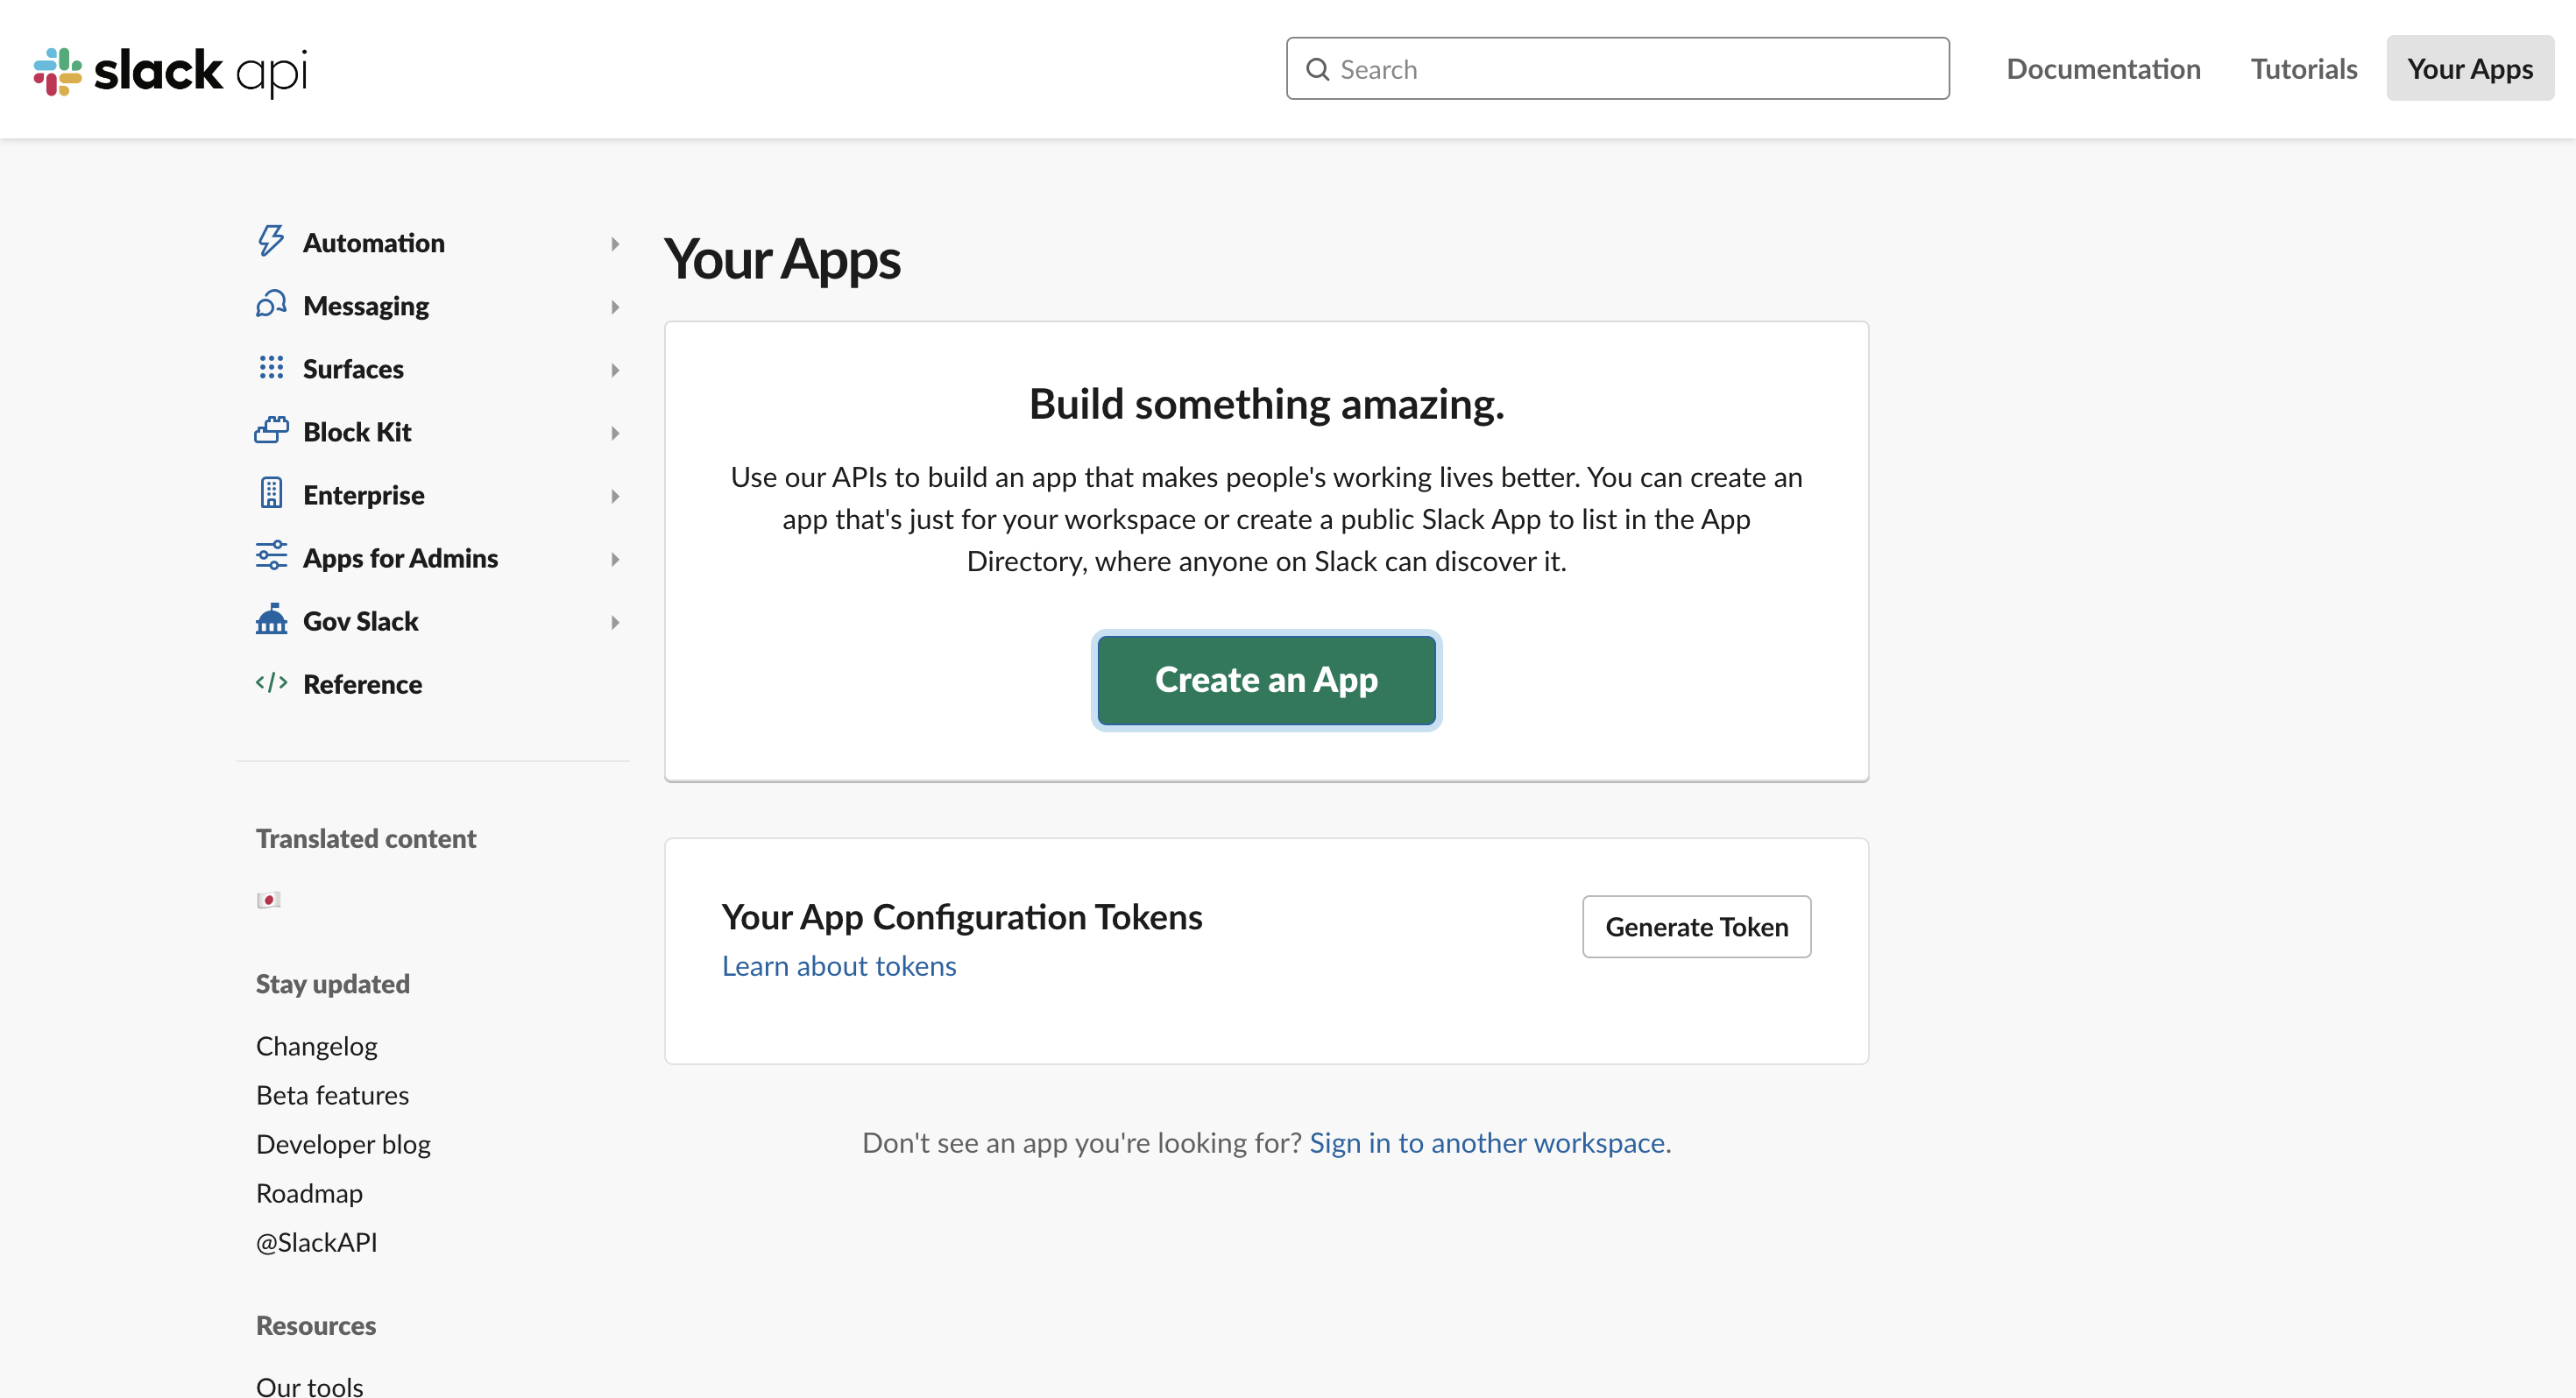
2. Click 'Create an App'.
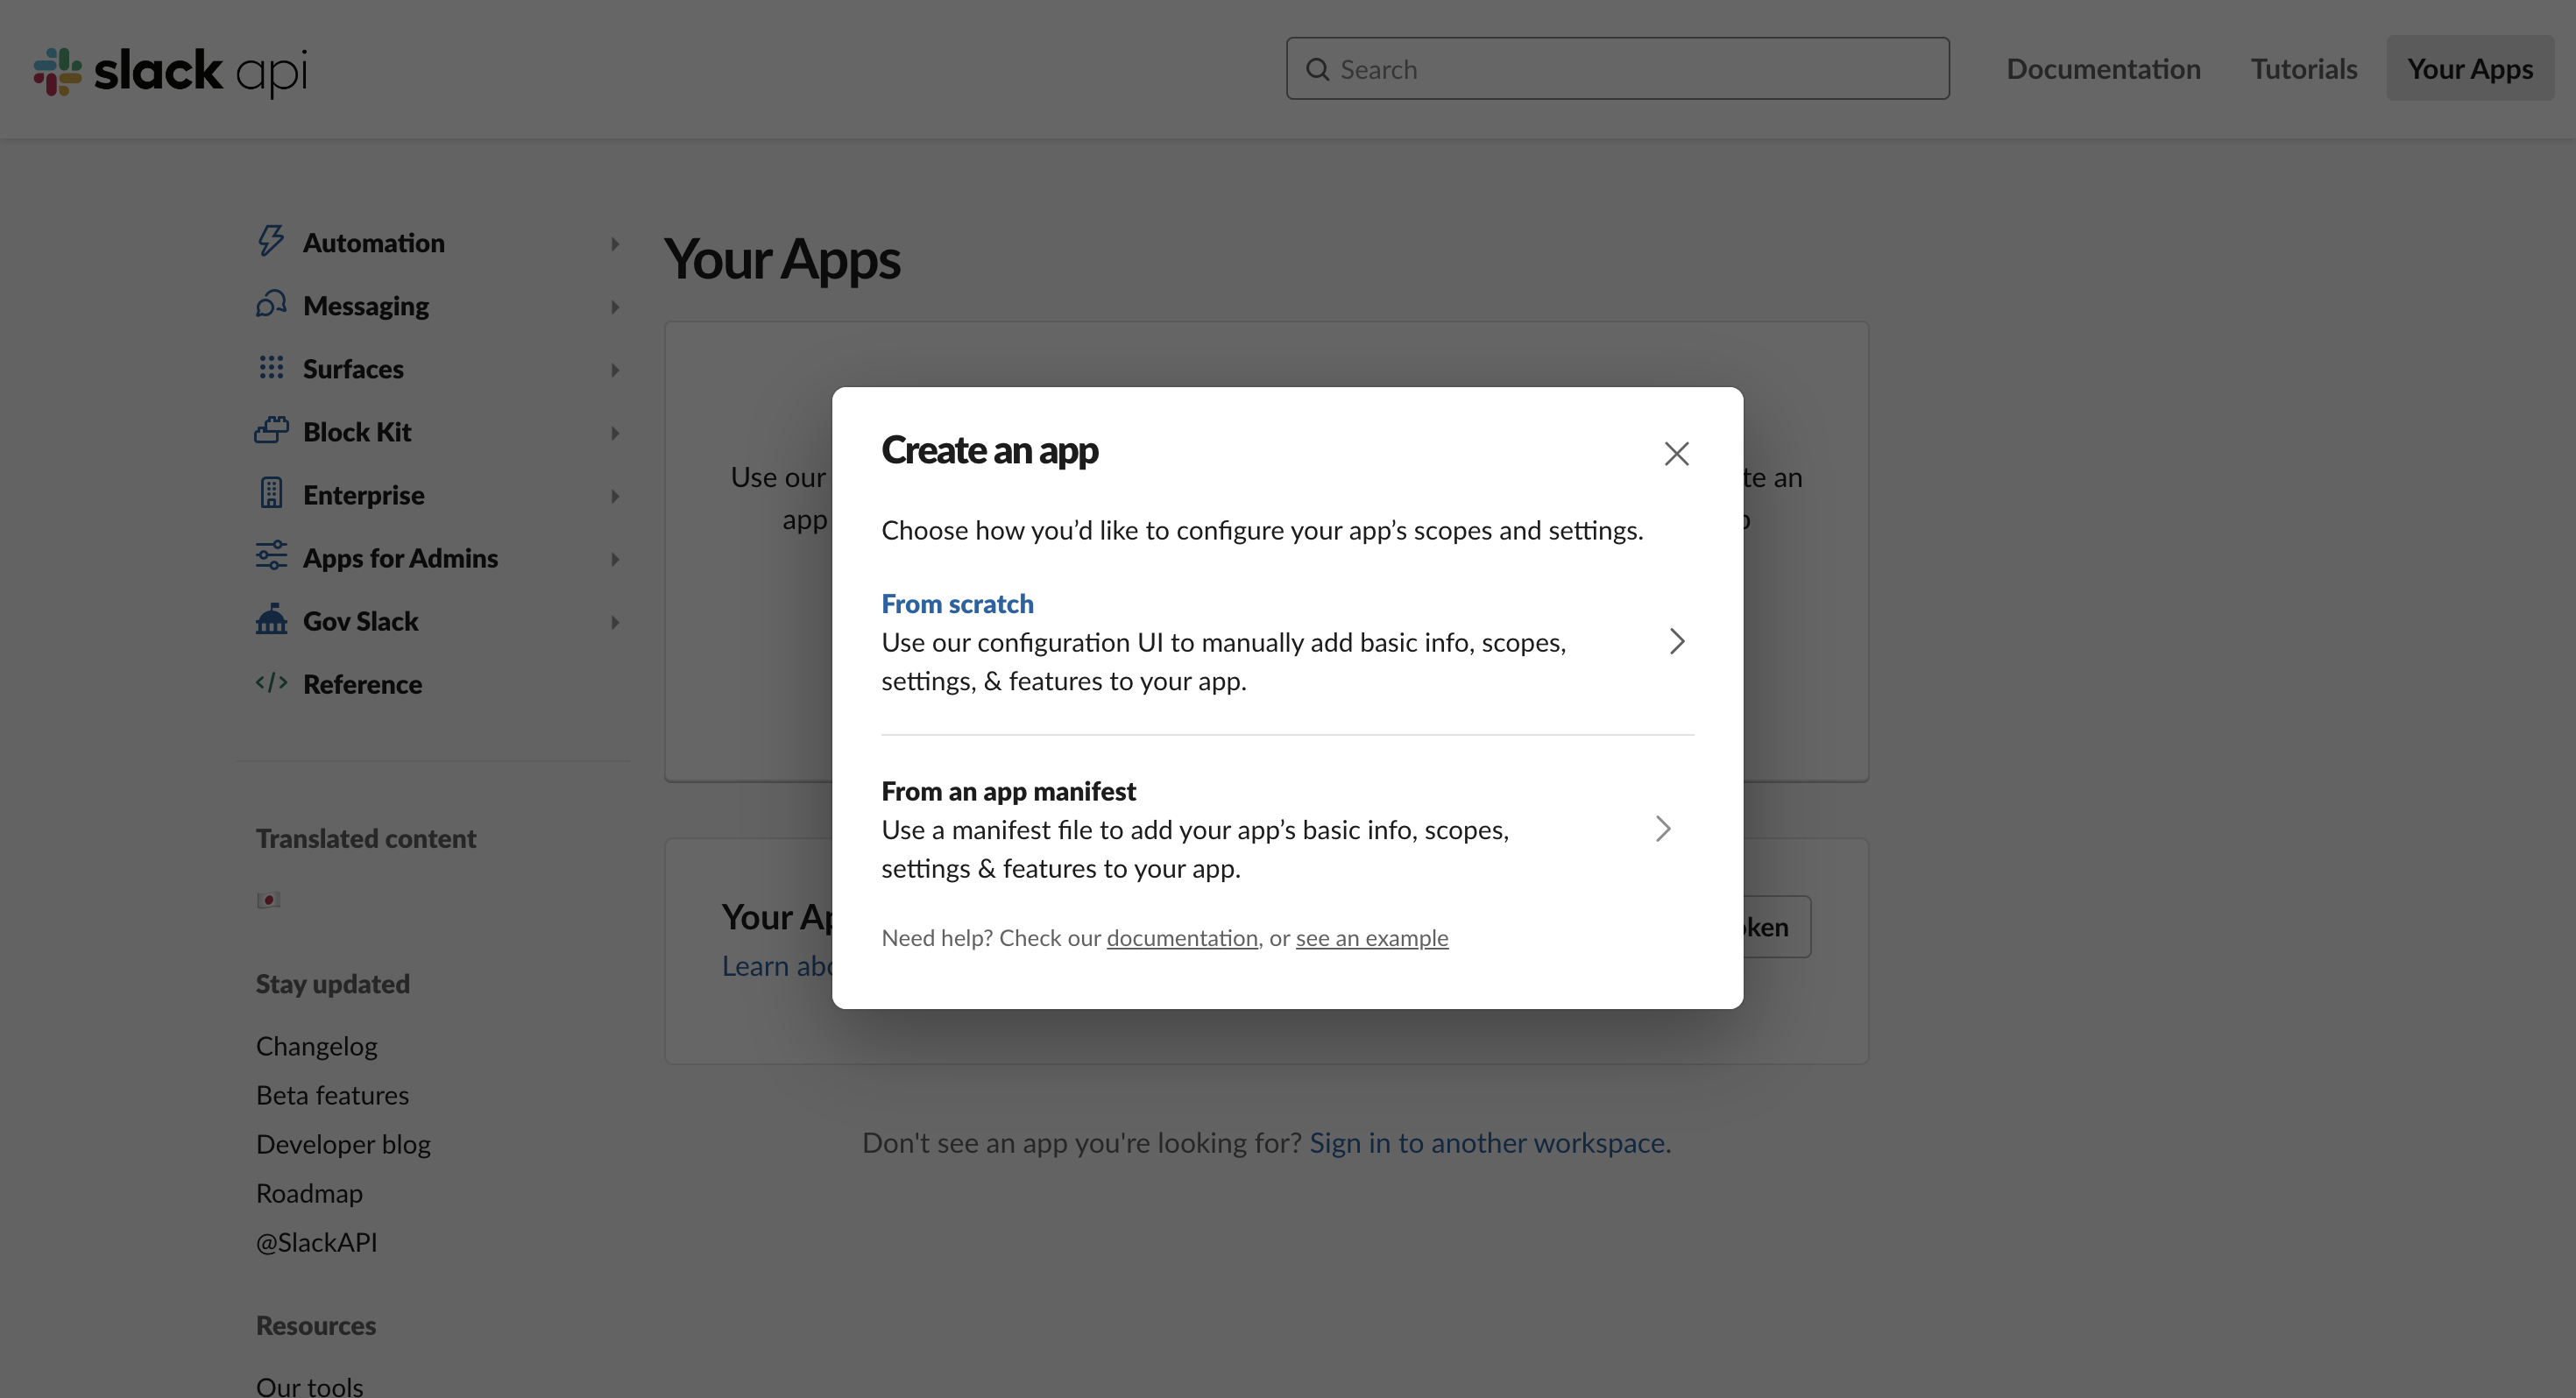
3. Click 'From scratch'.
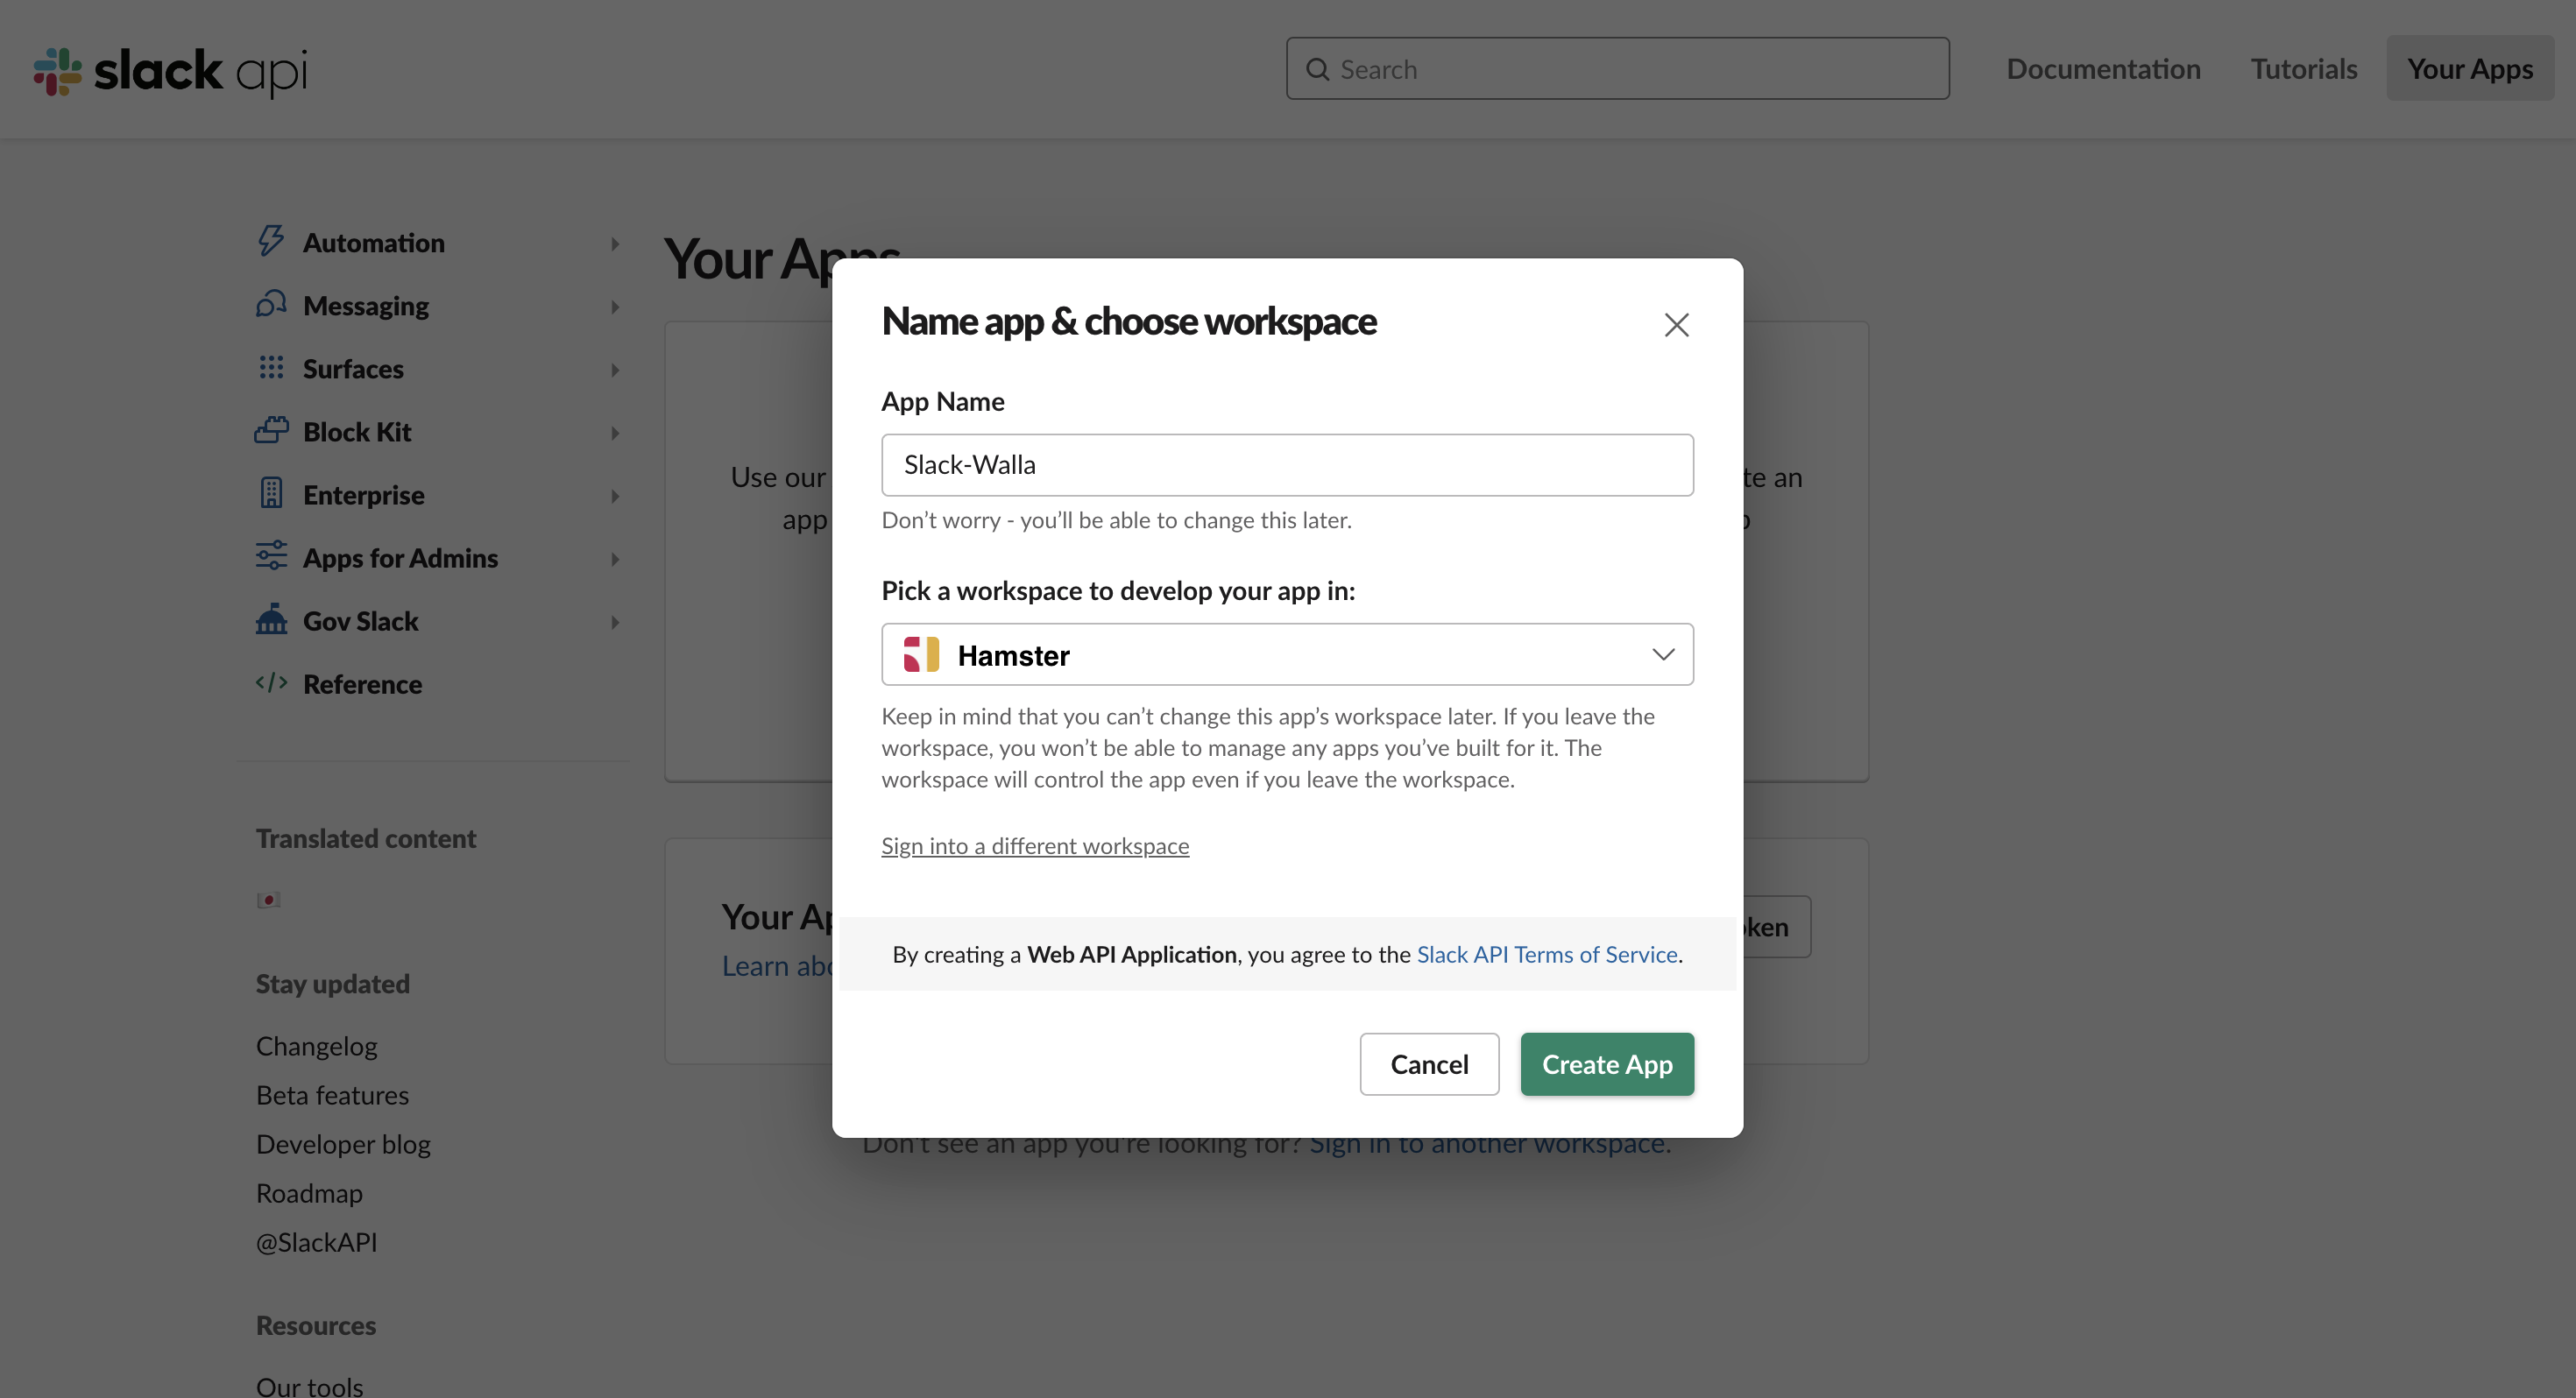
4. Enter the webhook name and select the Slack workspace where you want to receive notifications.
5. Click on 'Incoming Webhooks'.
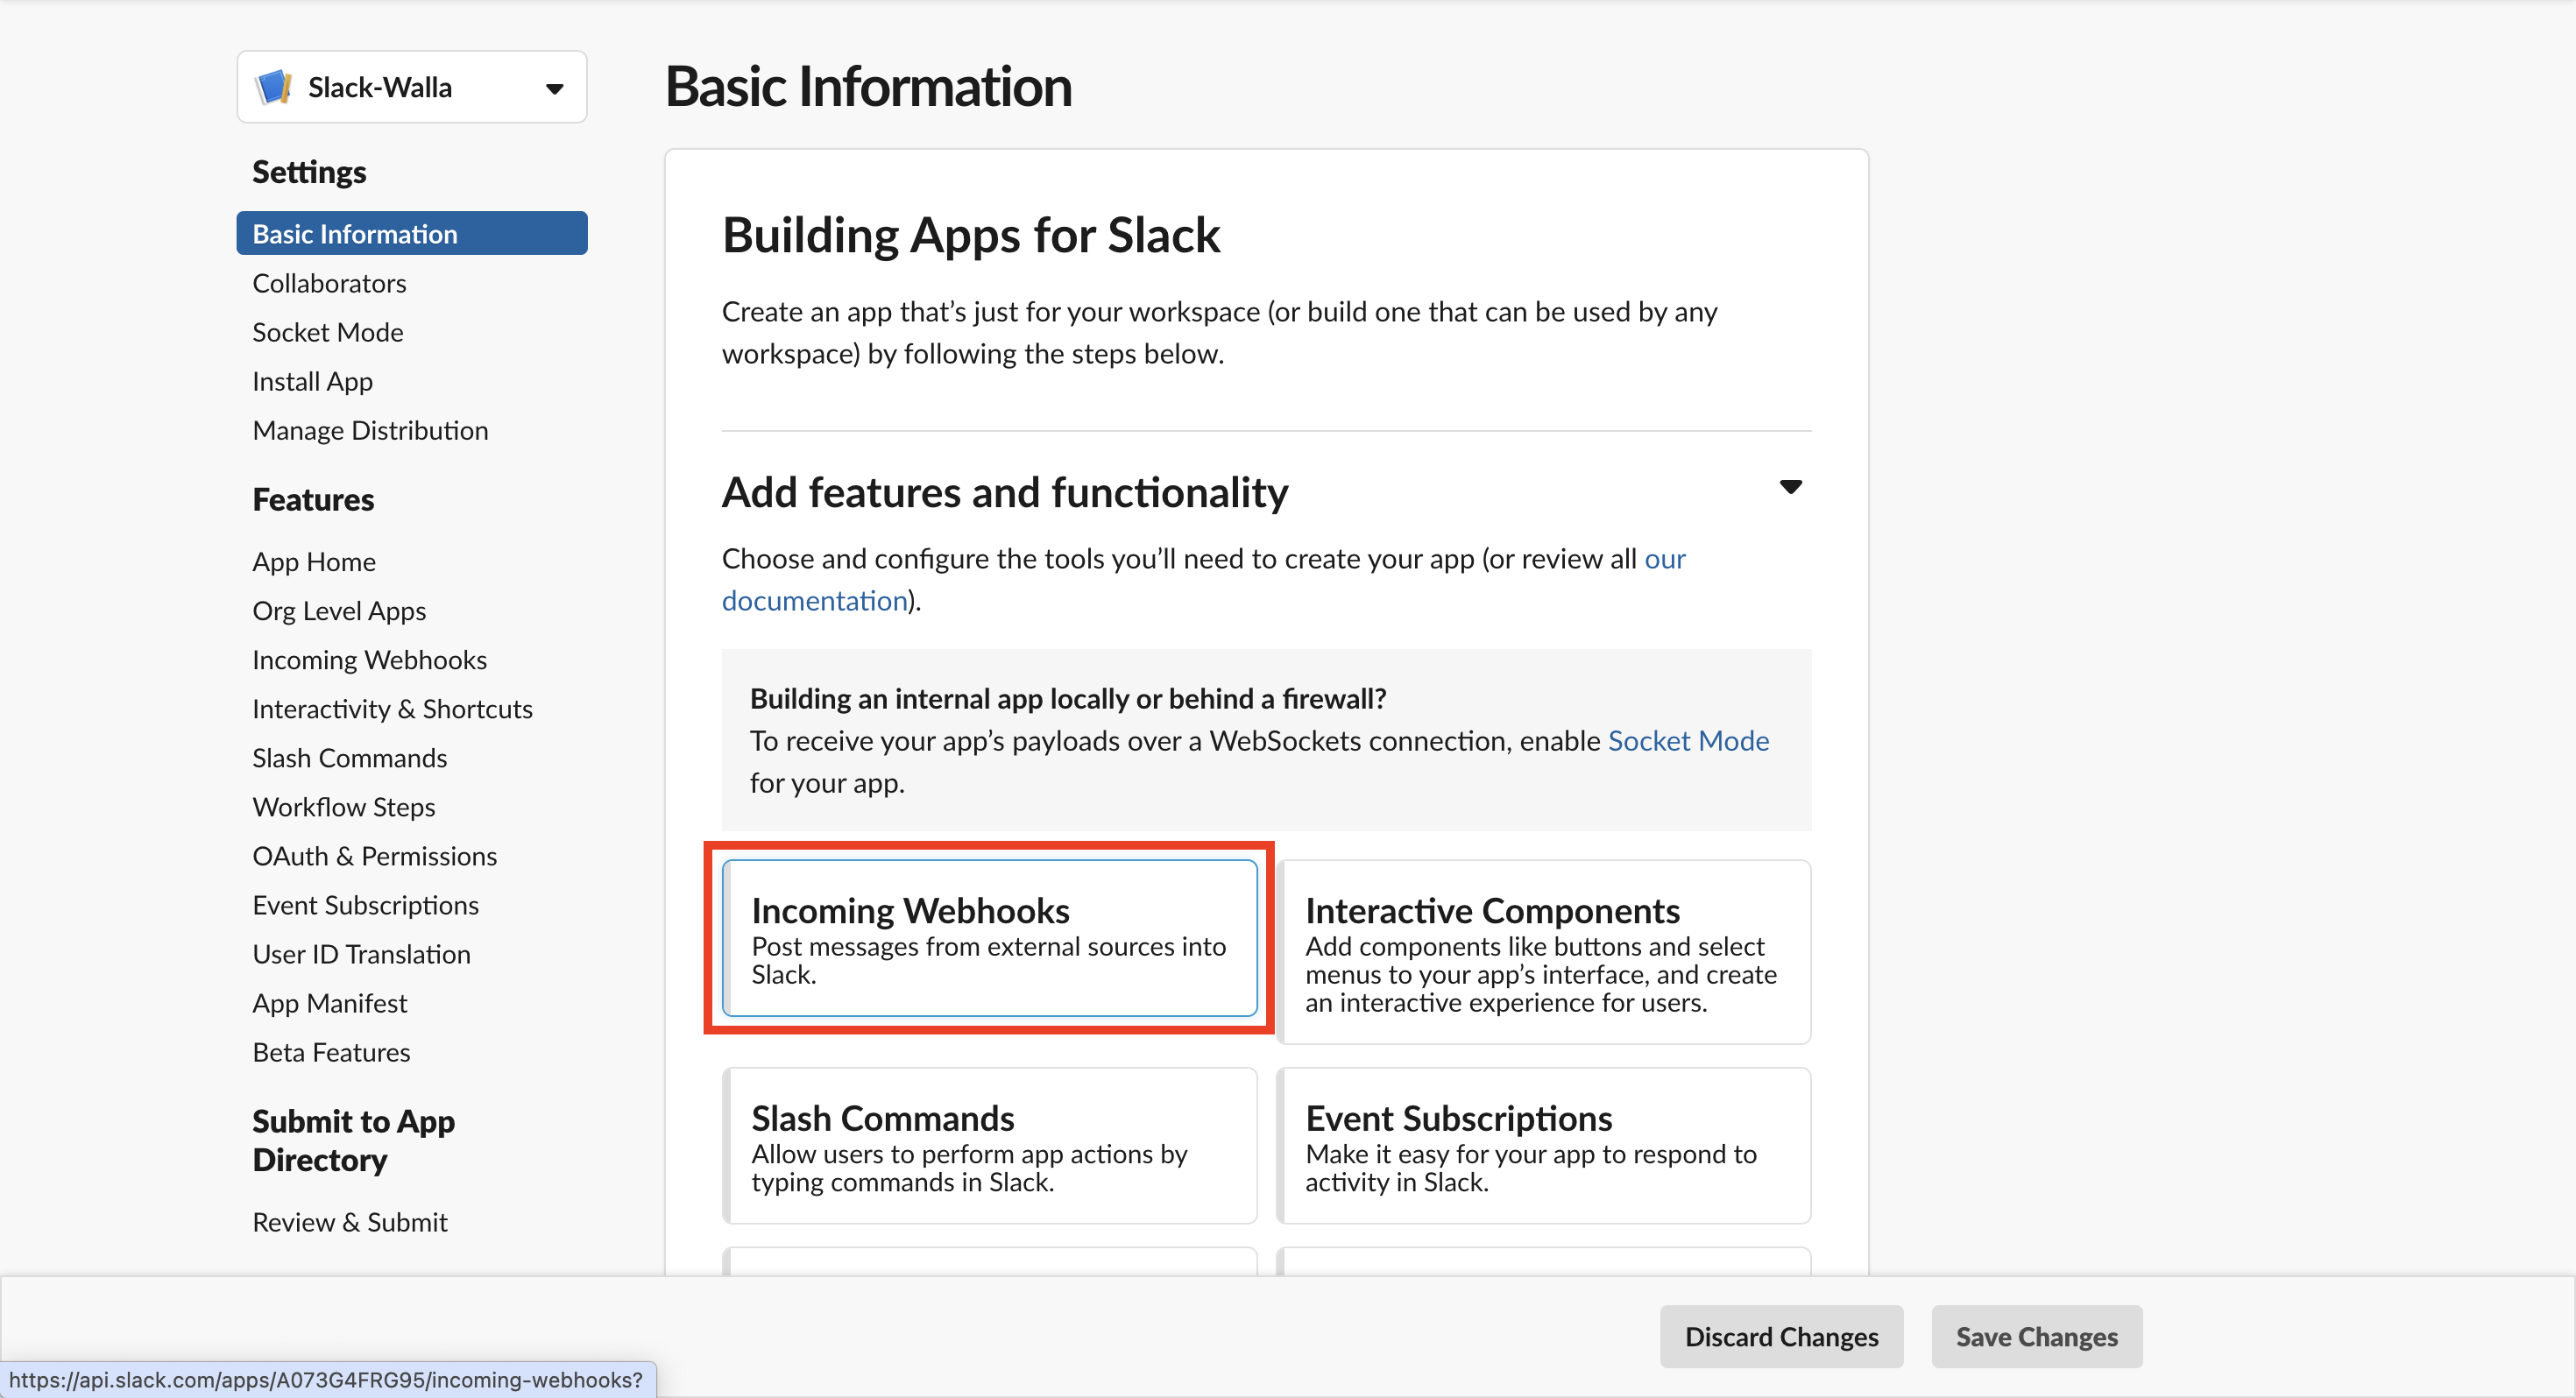
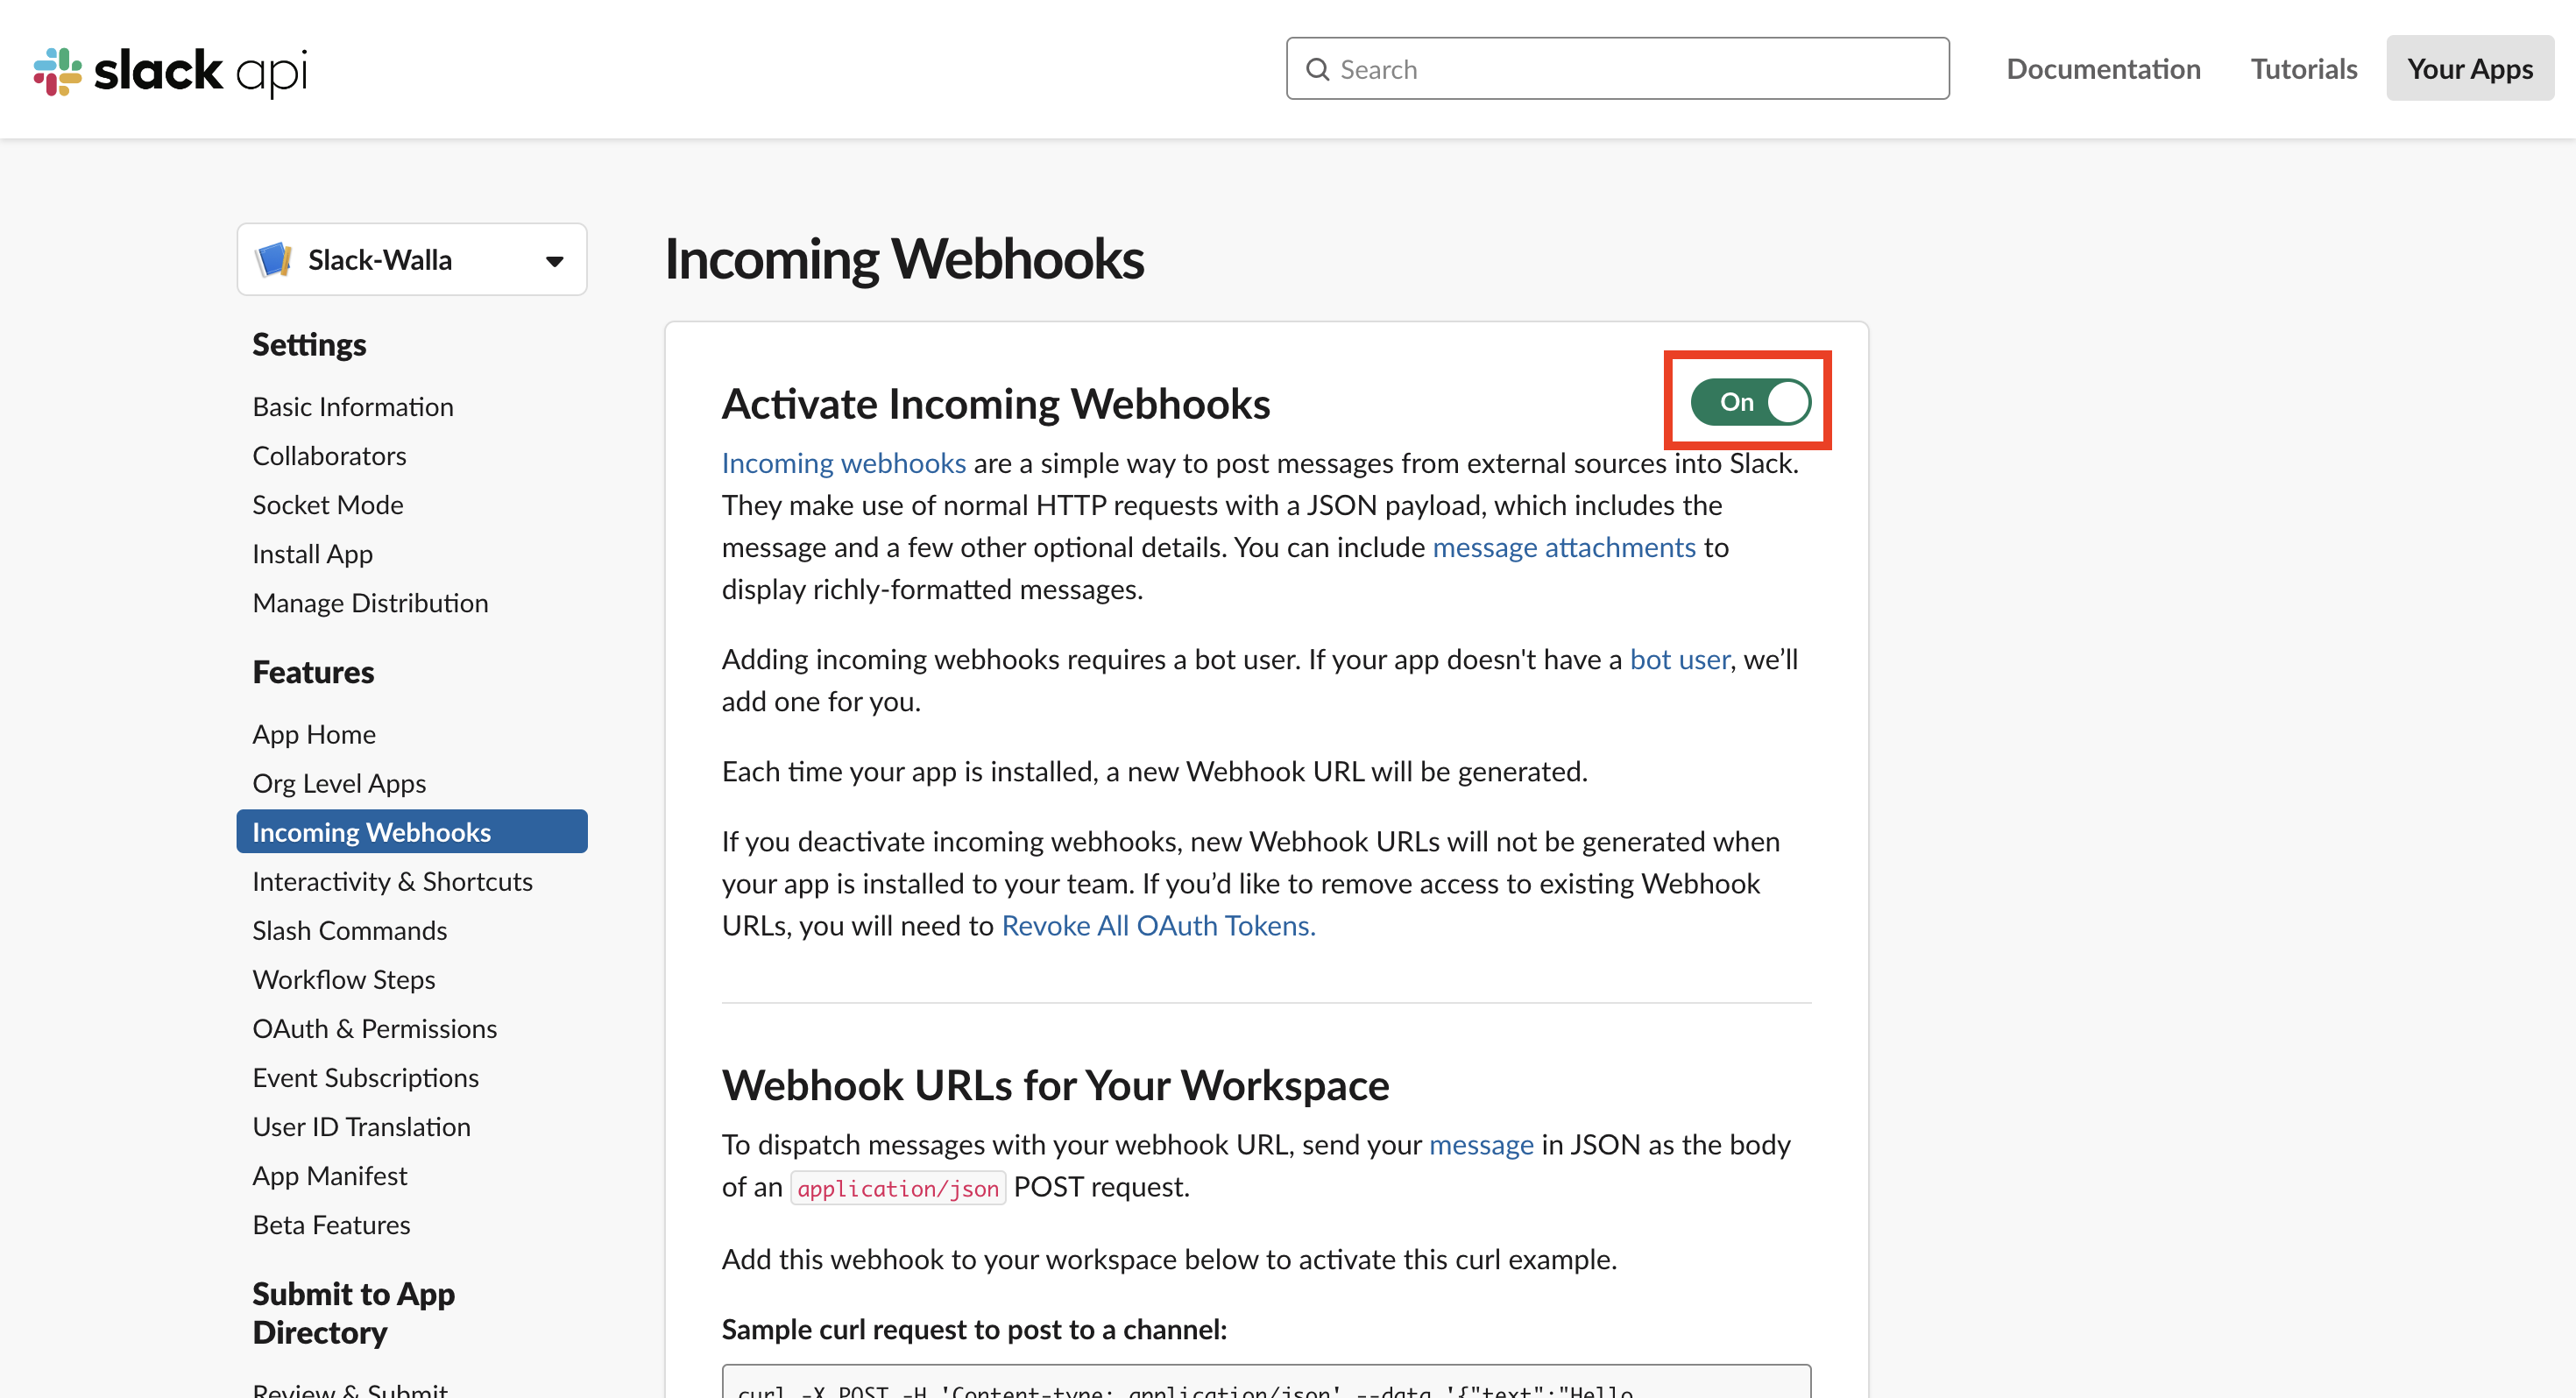
6. Enable the use of webhooks.
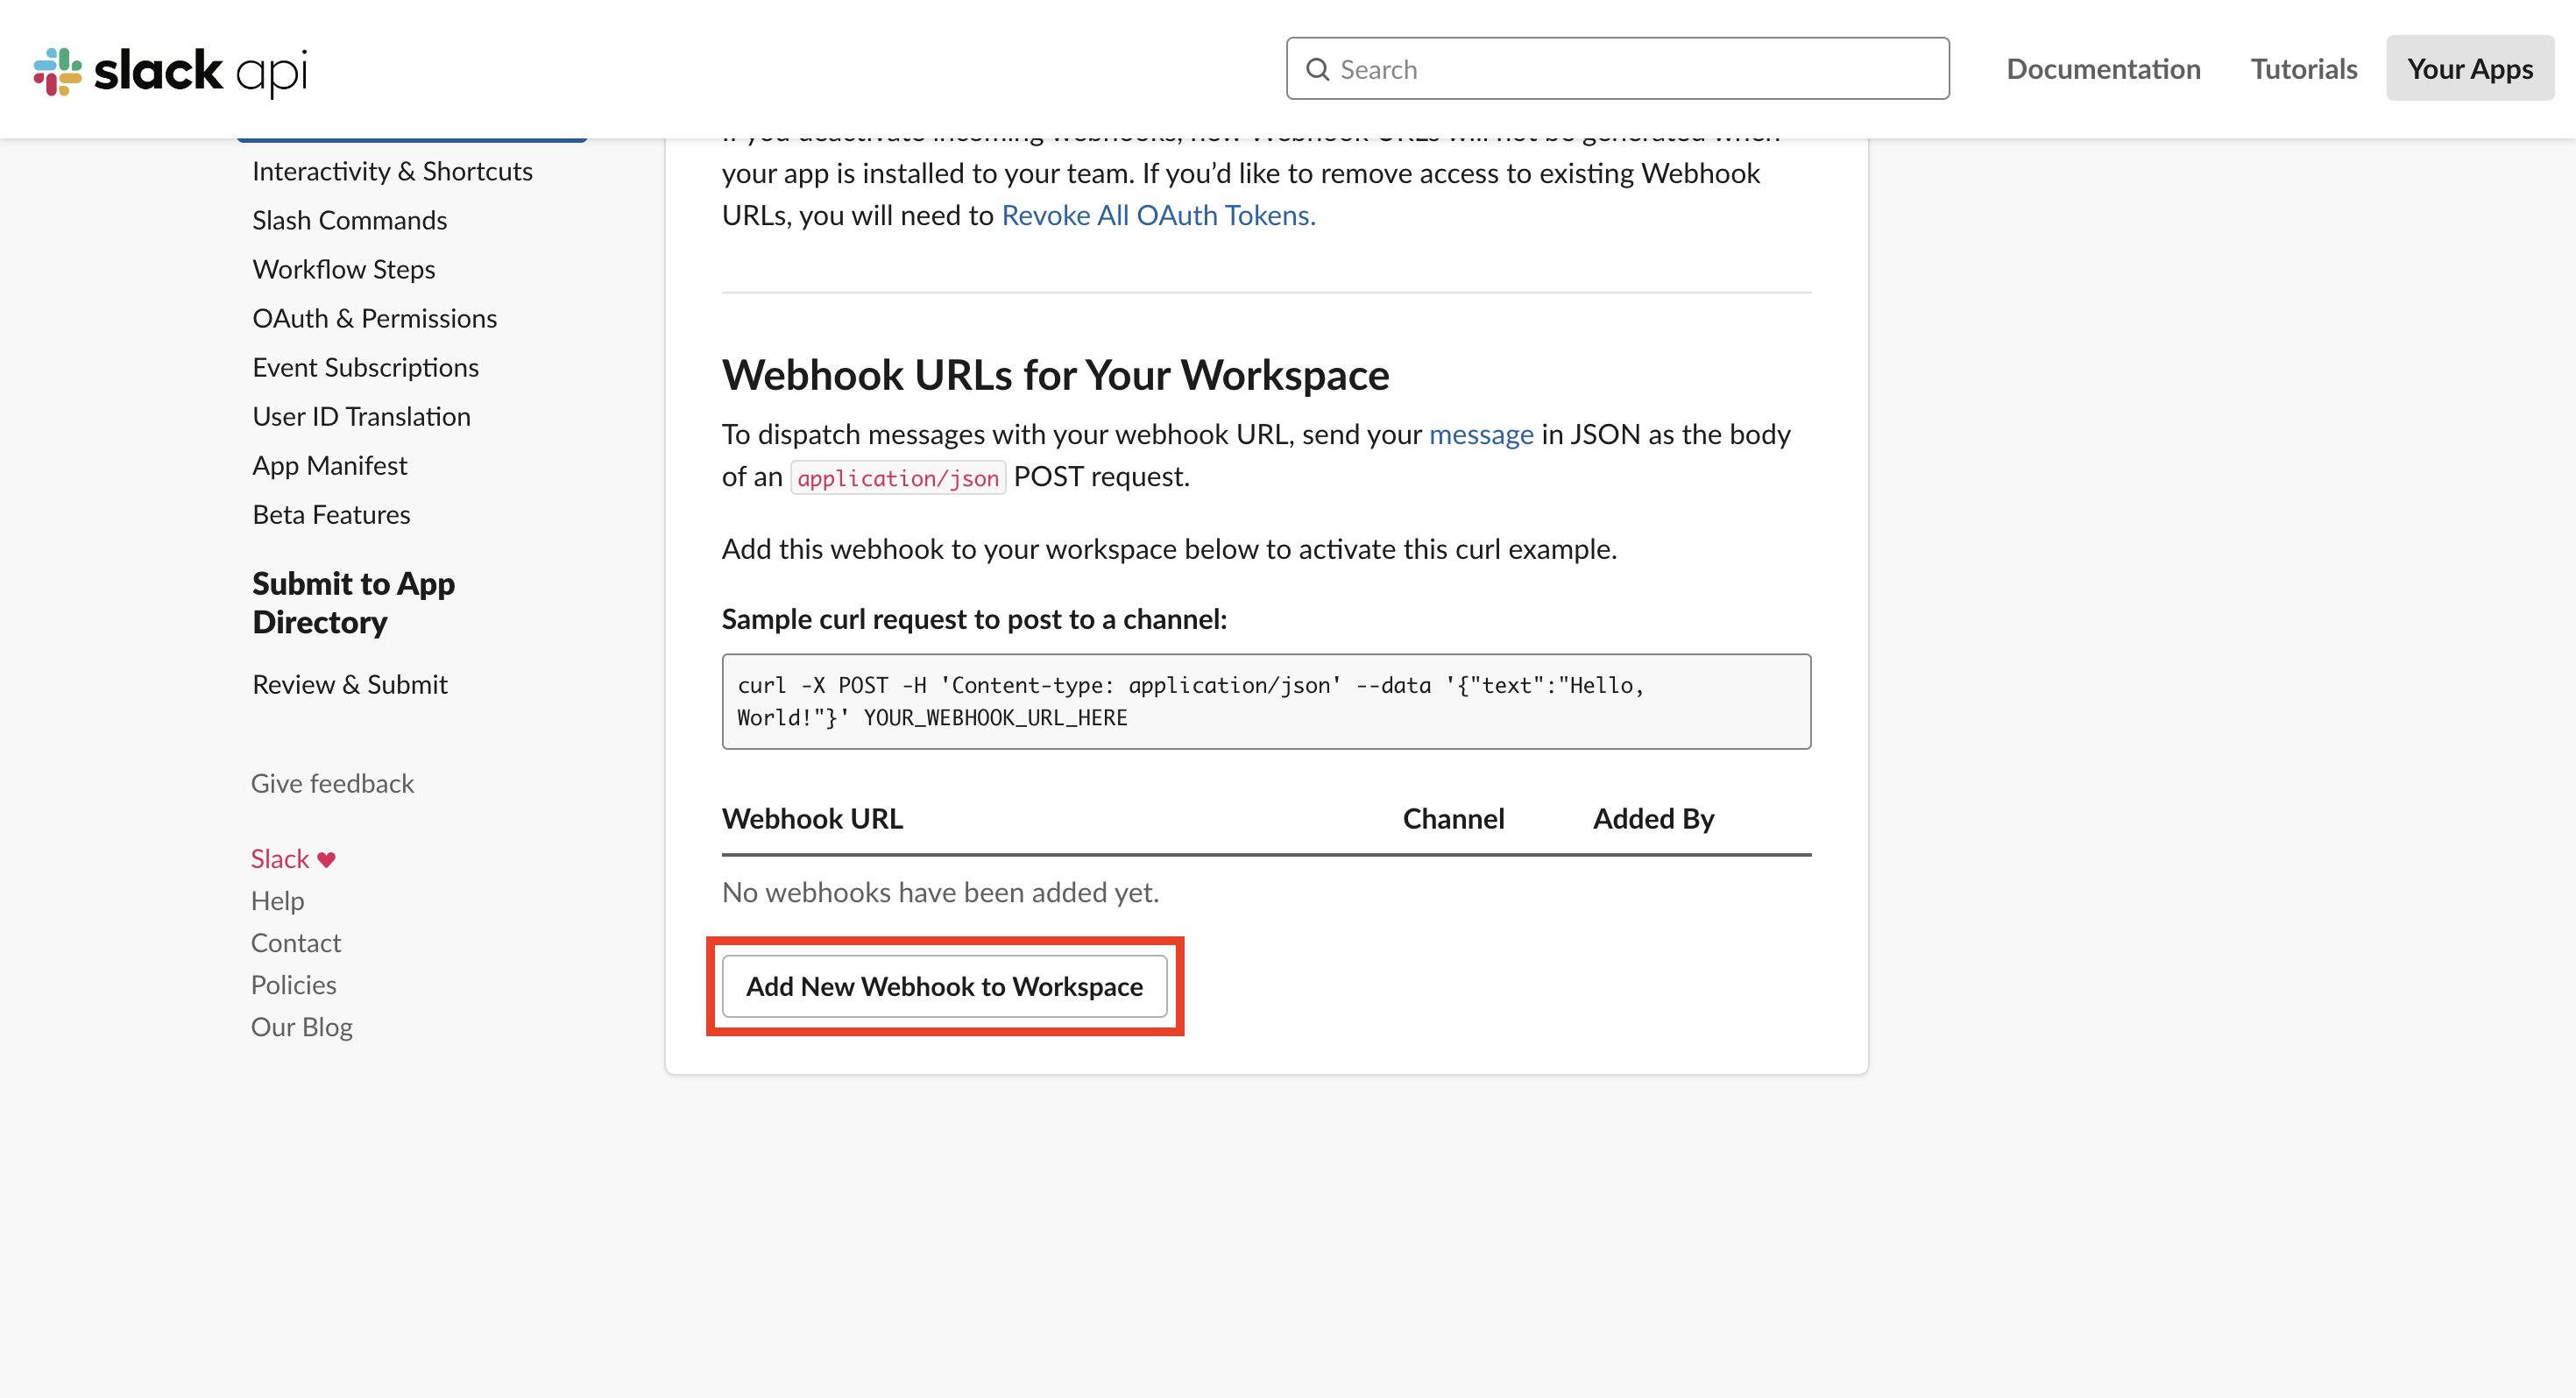
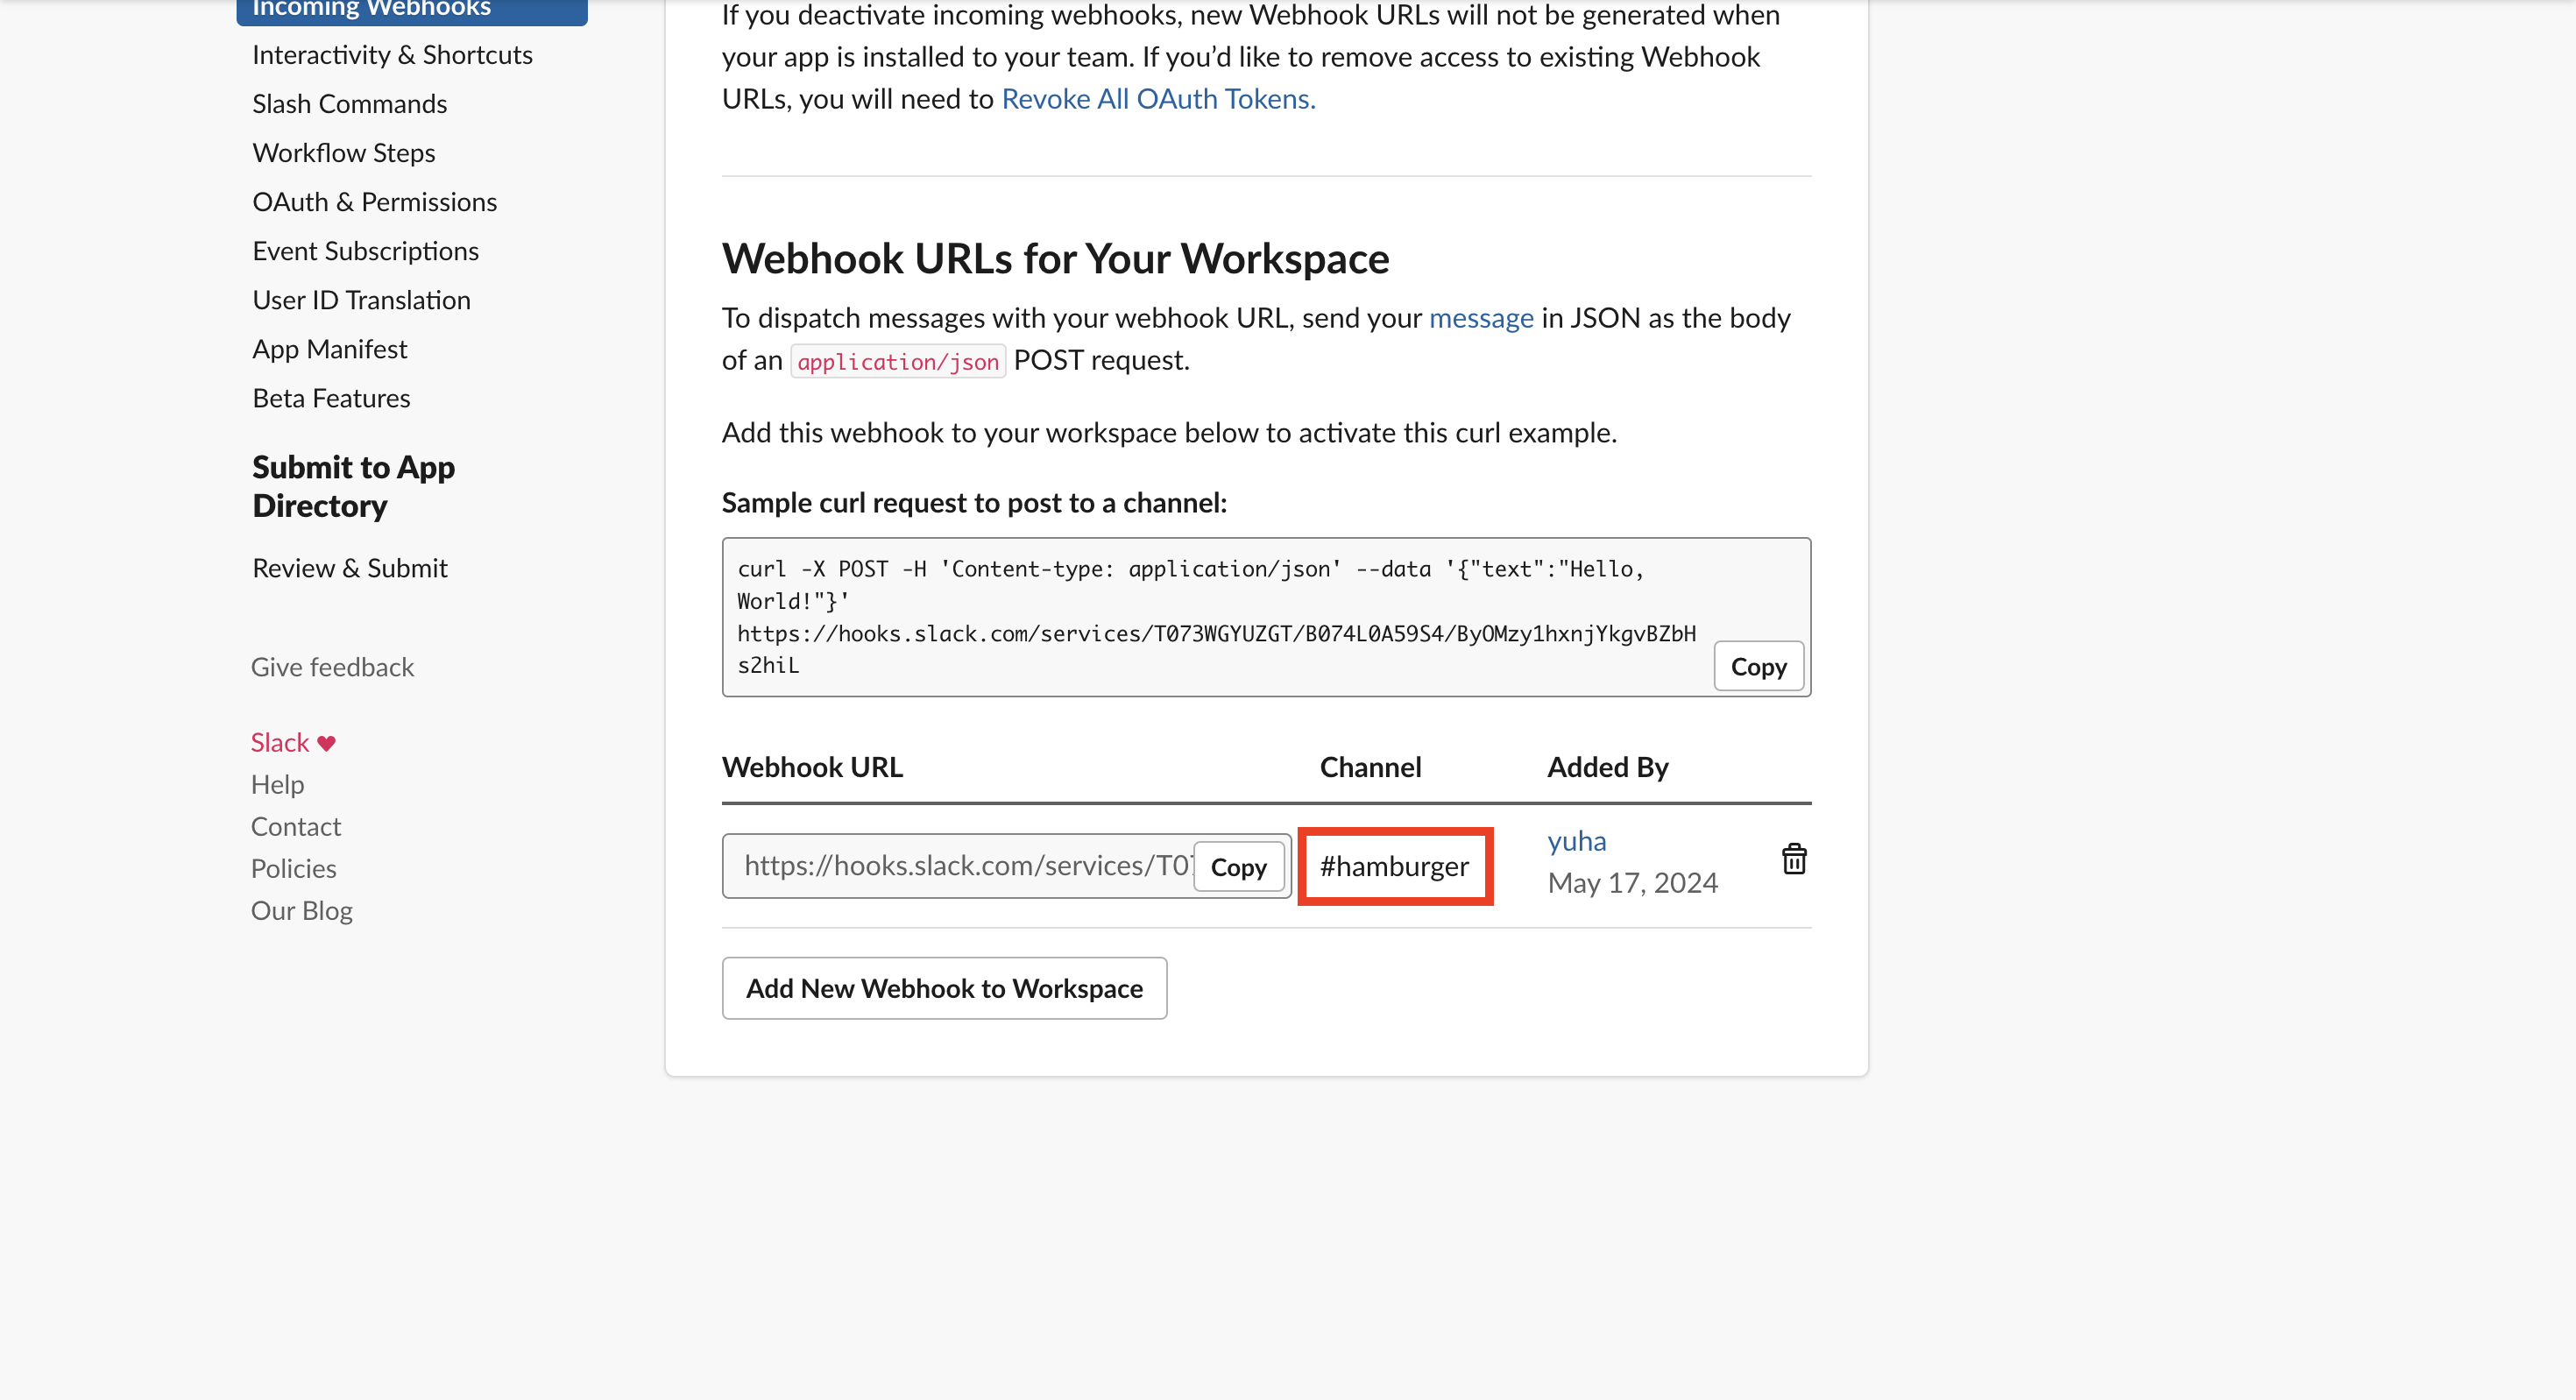
7. Click 'Add New Webhook to Workspace'.
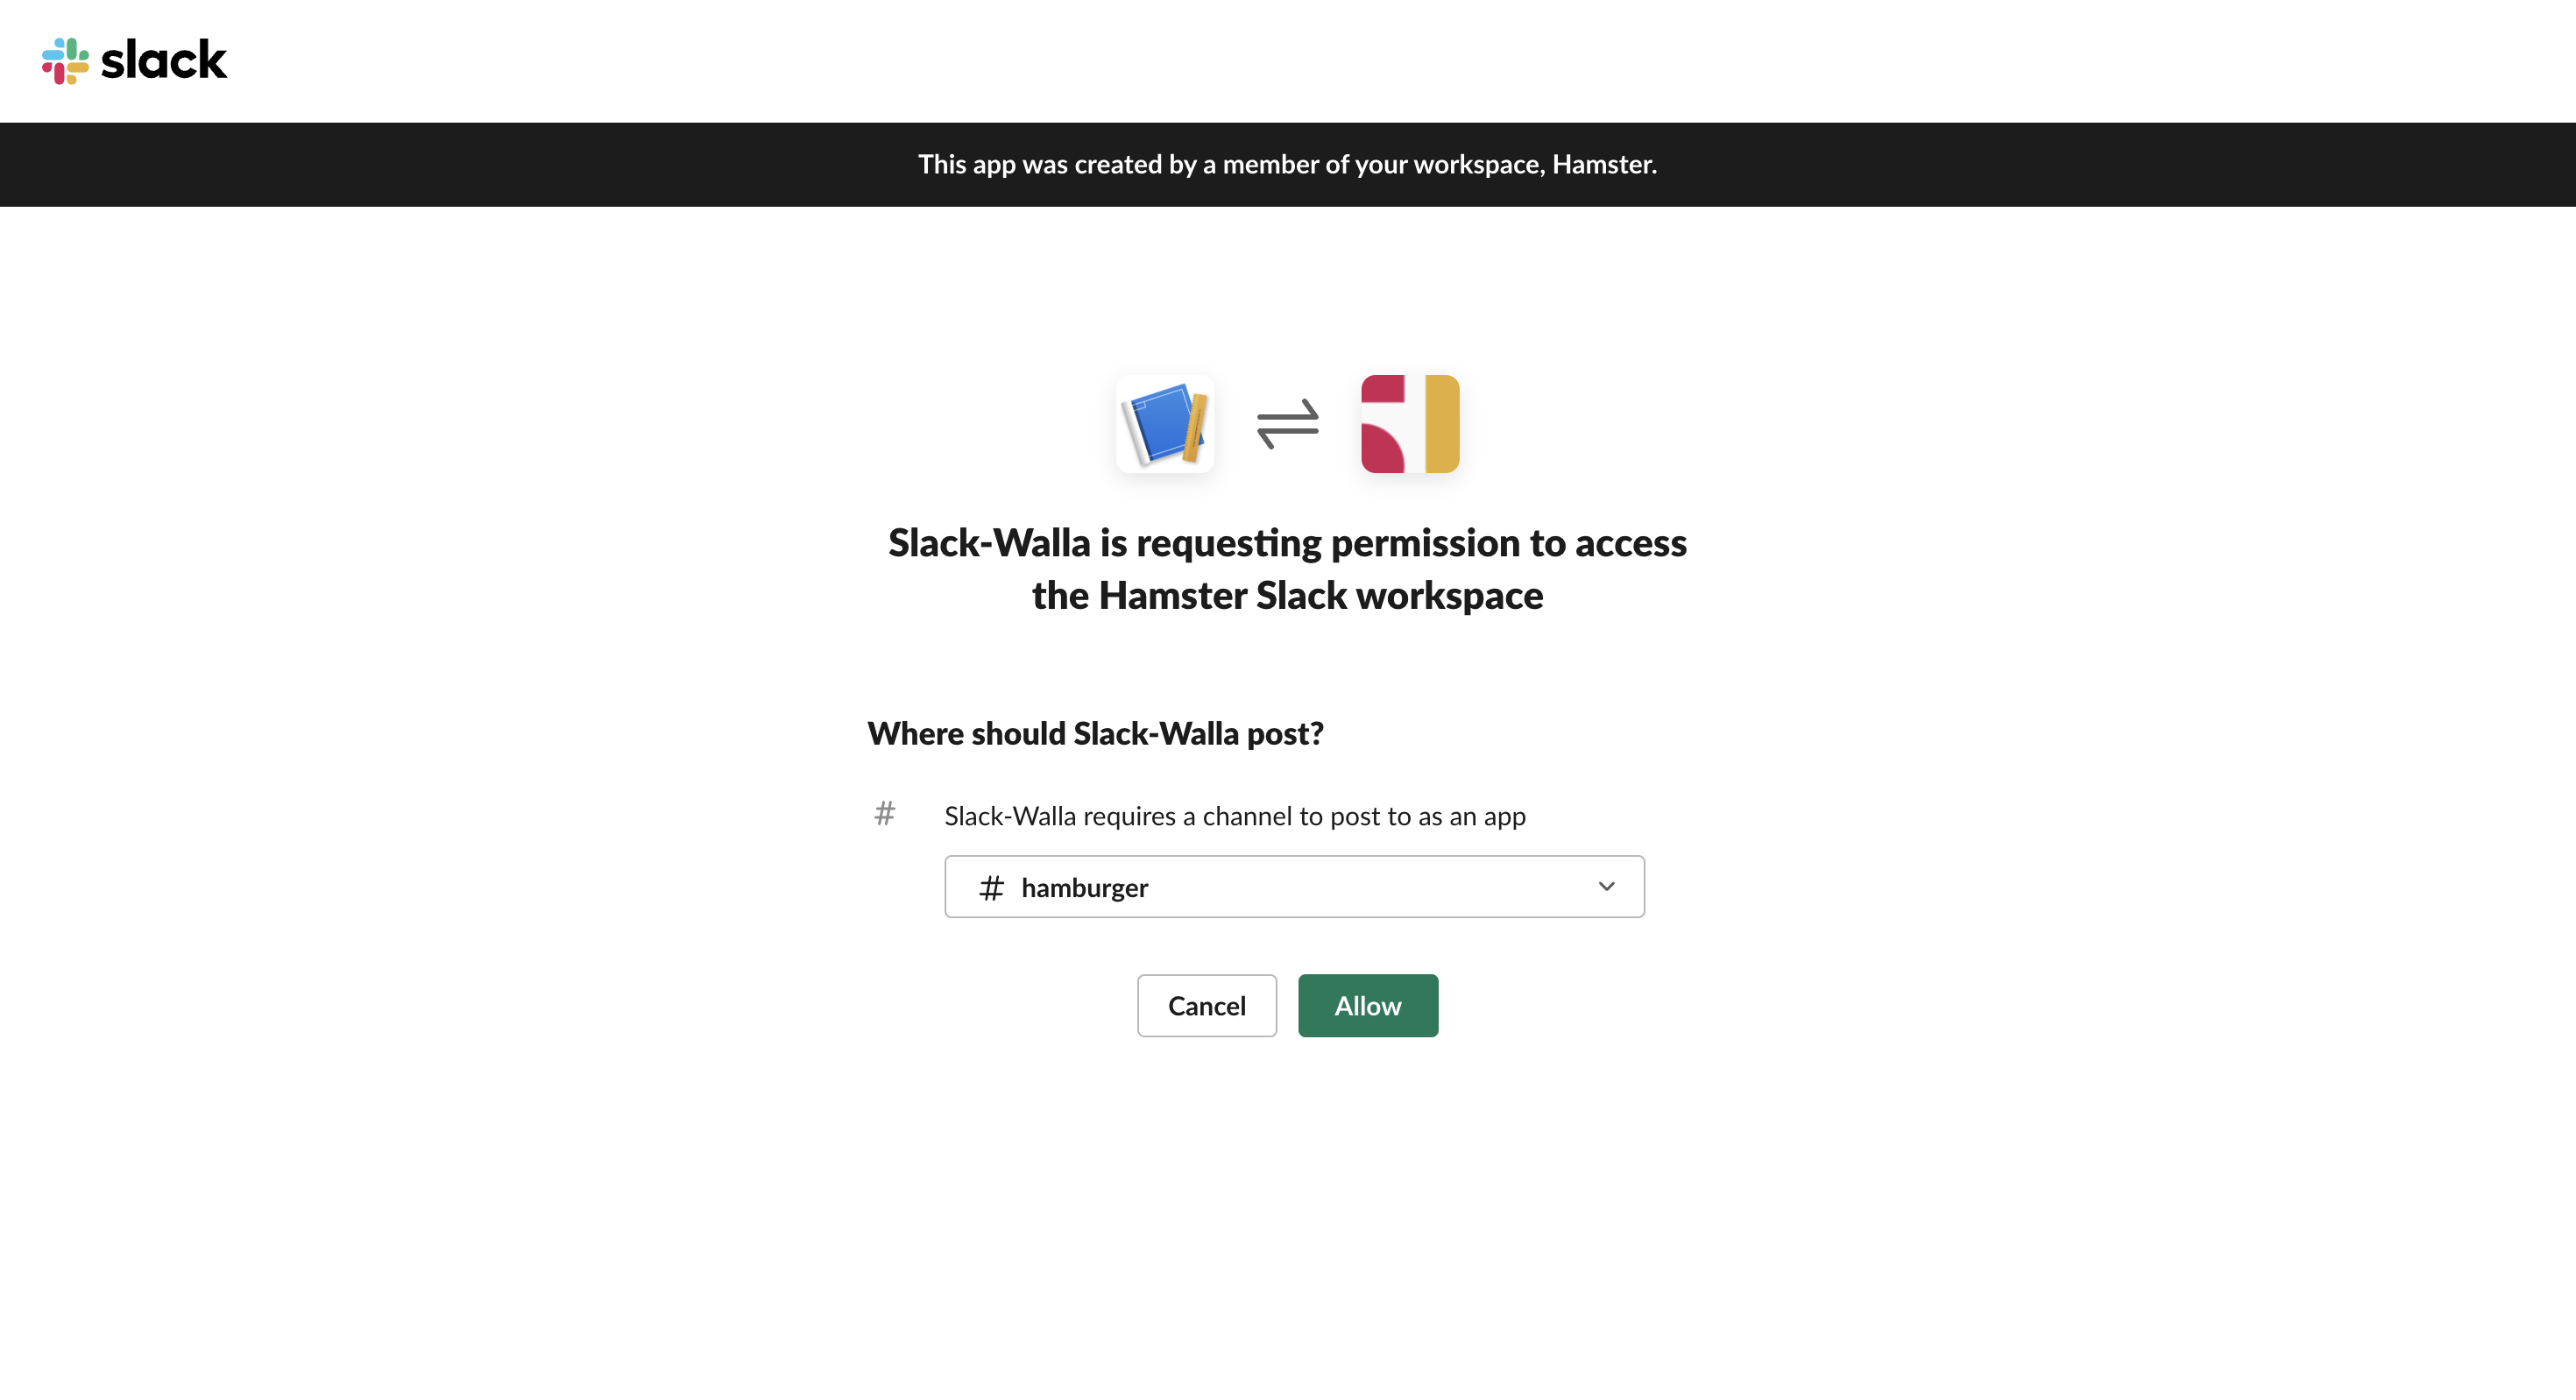
8. Select the channel to receive notifications.
9. Copy the completed webhook URL.
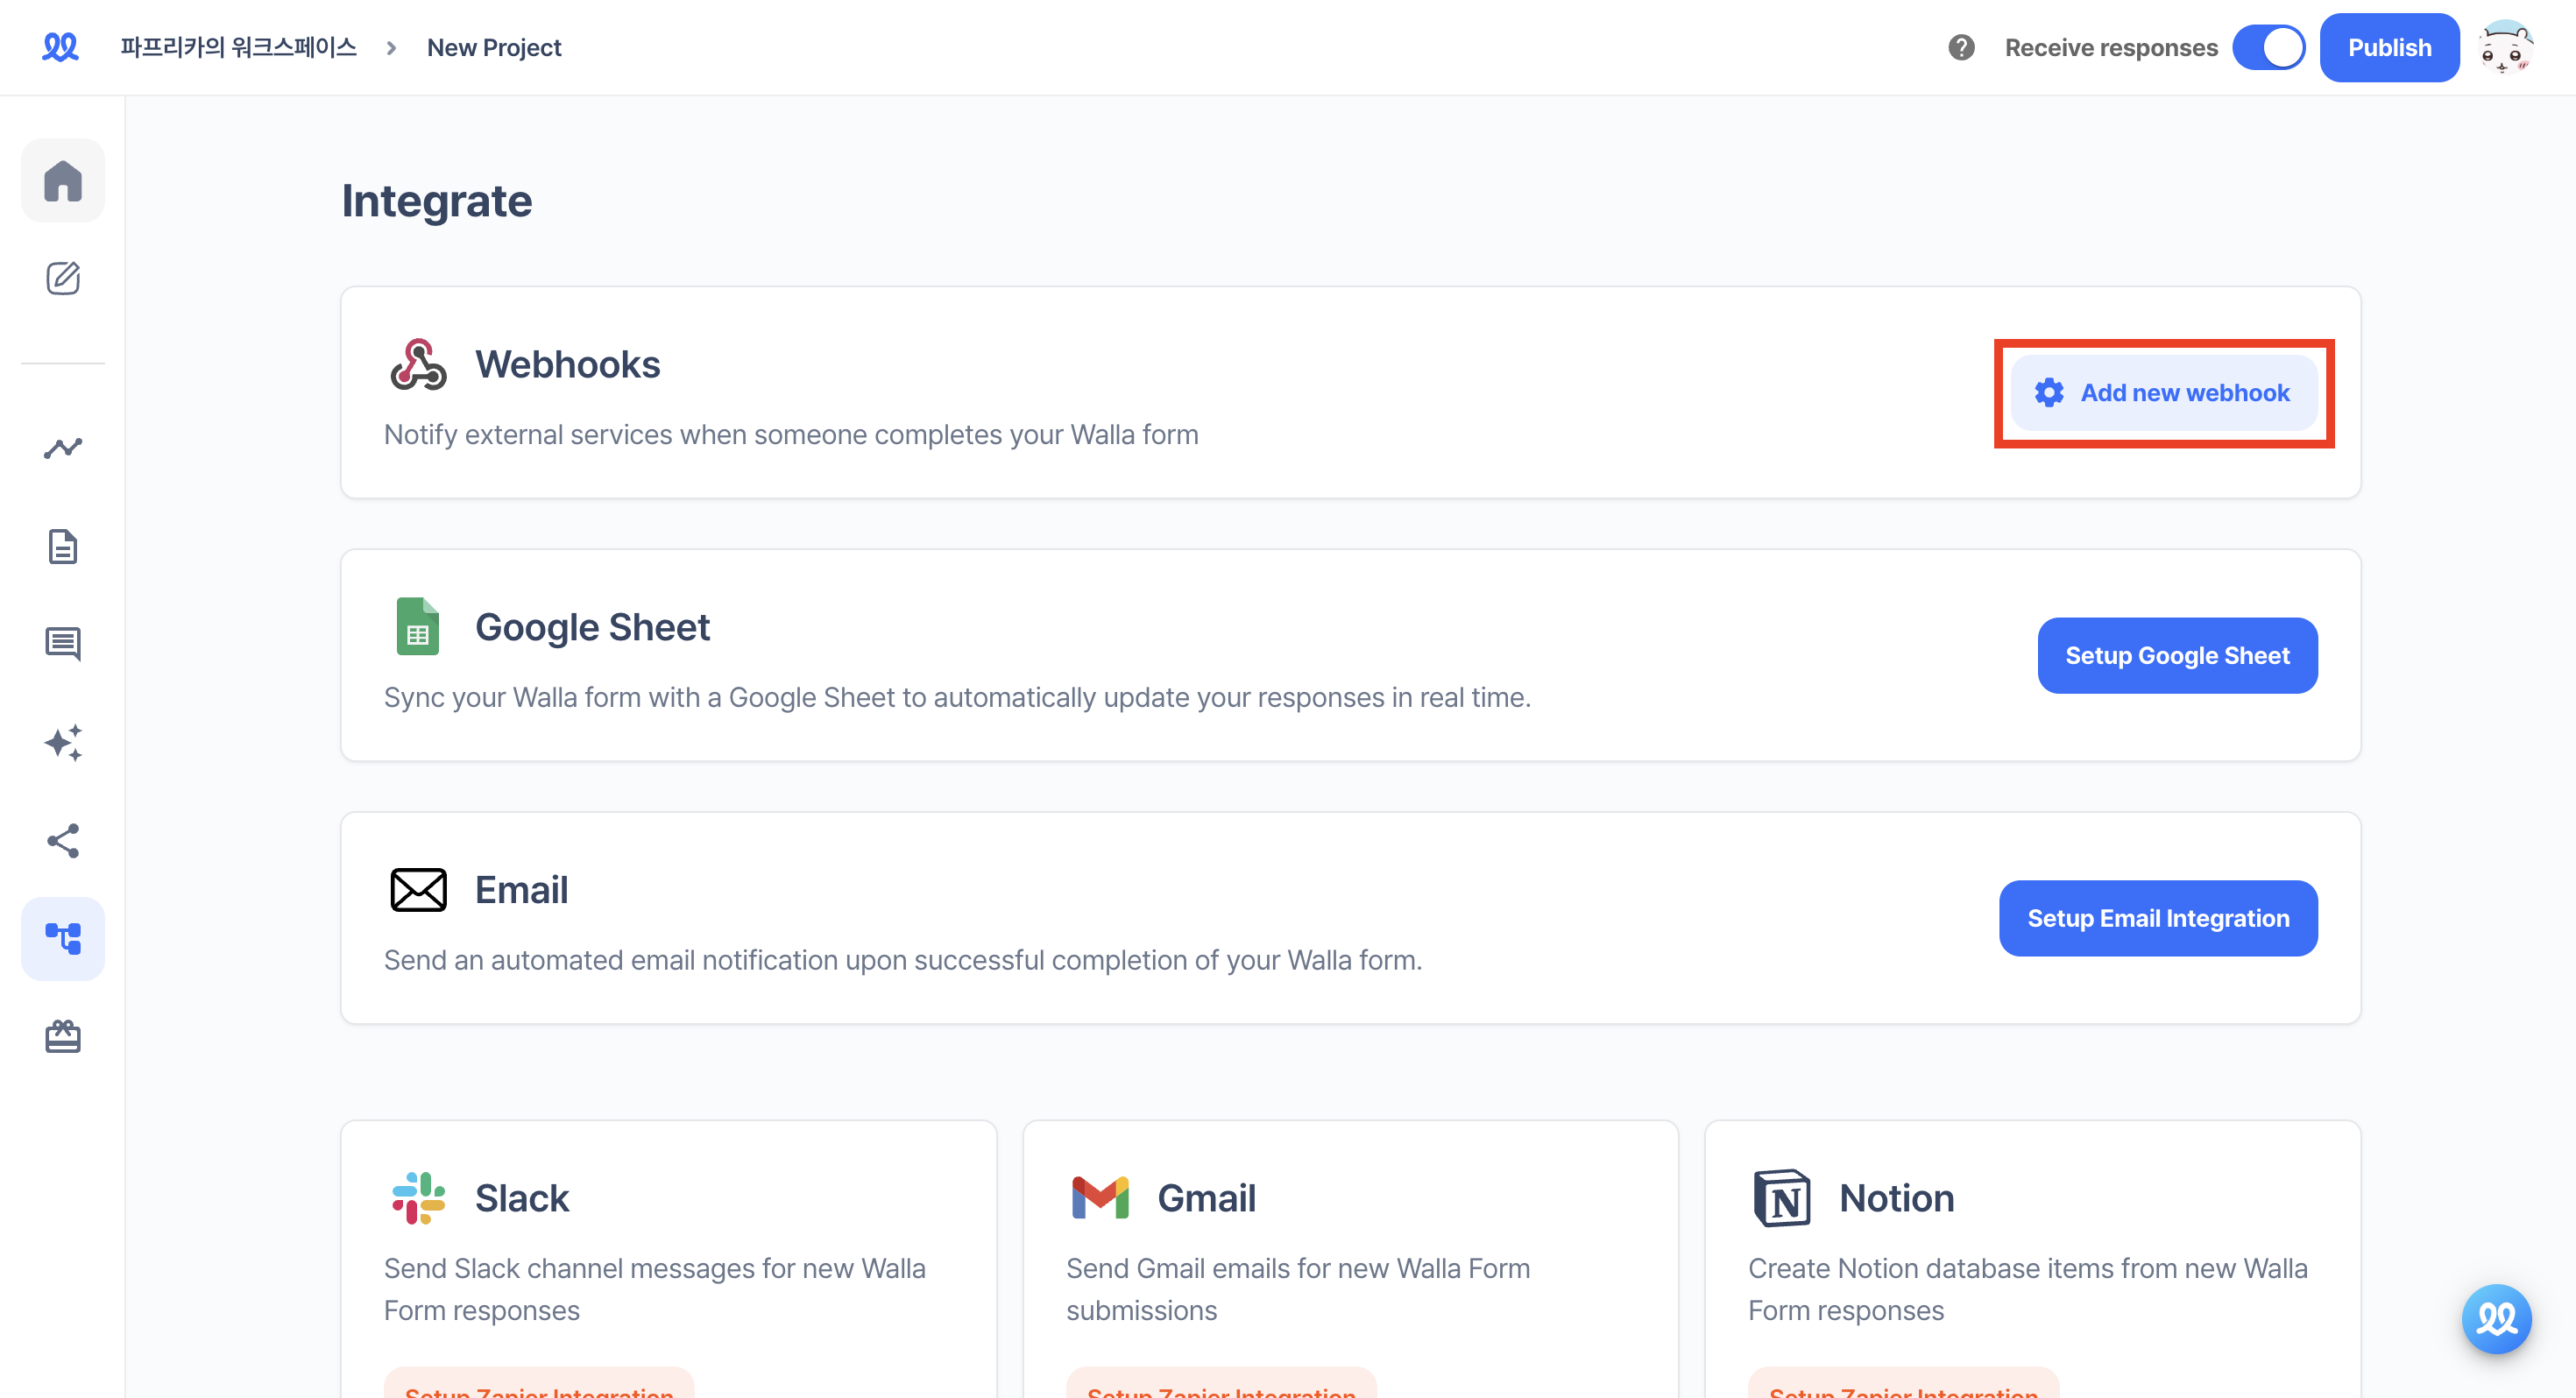
10. Go to the 'Integrate' tab in Walla and click 'Add new webhook'.
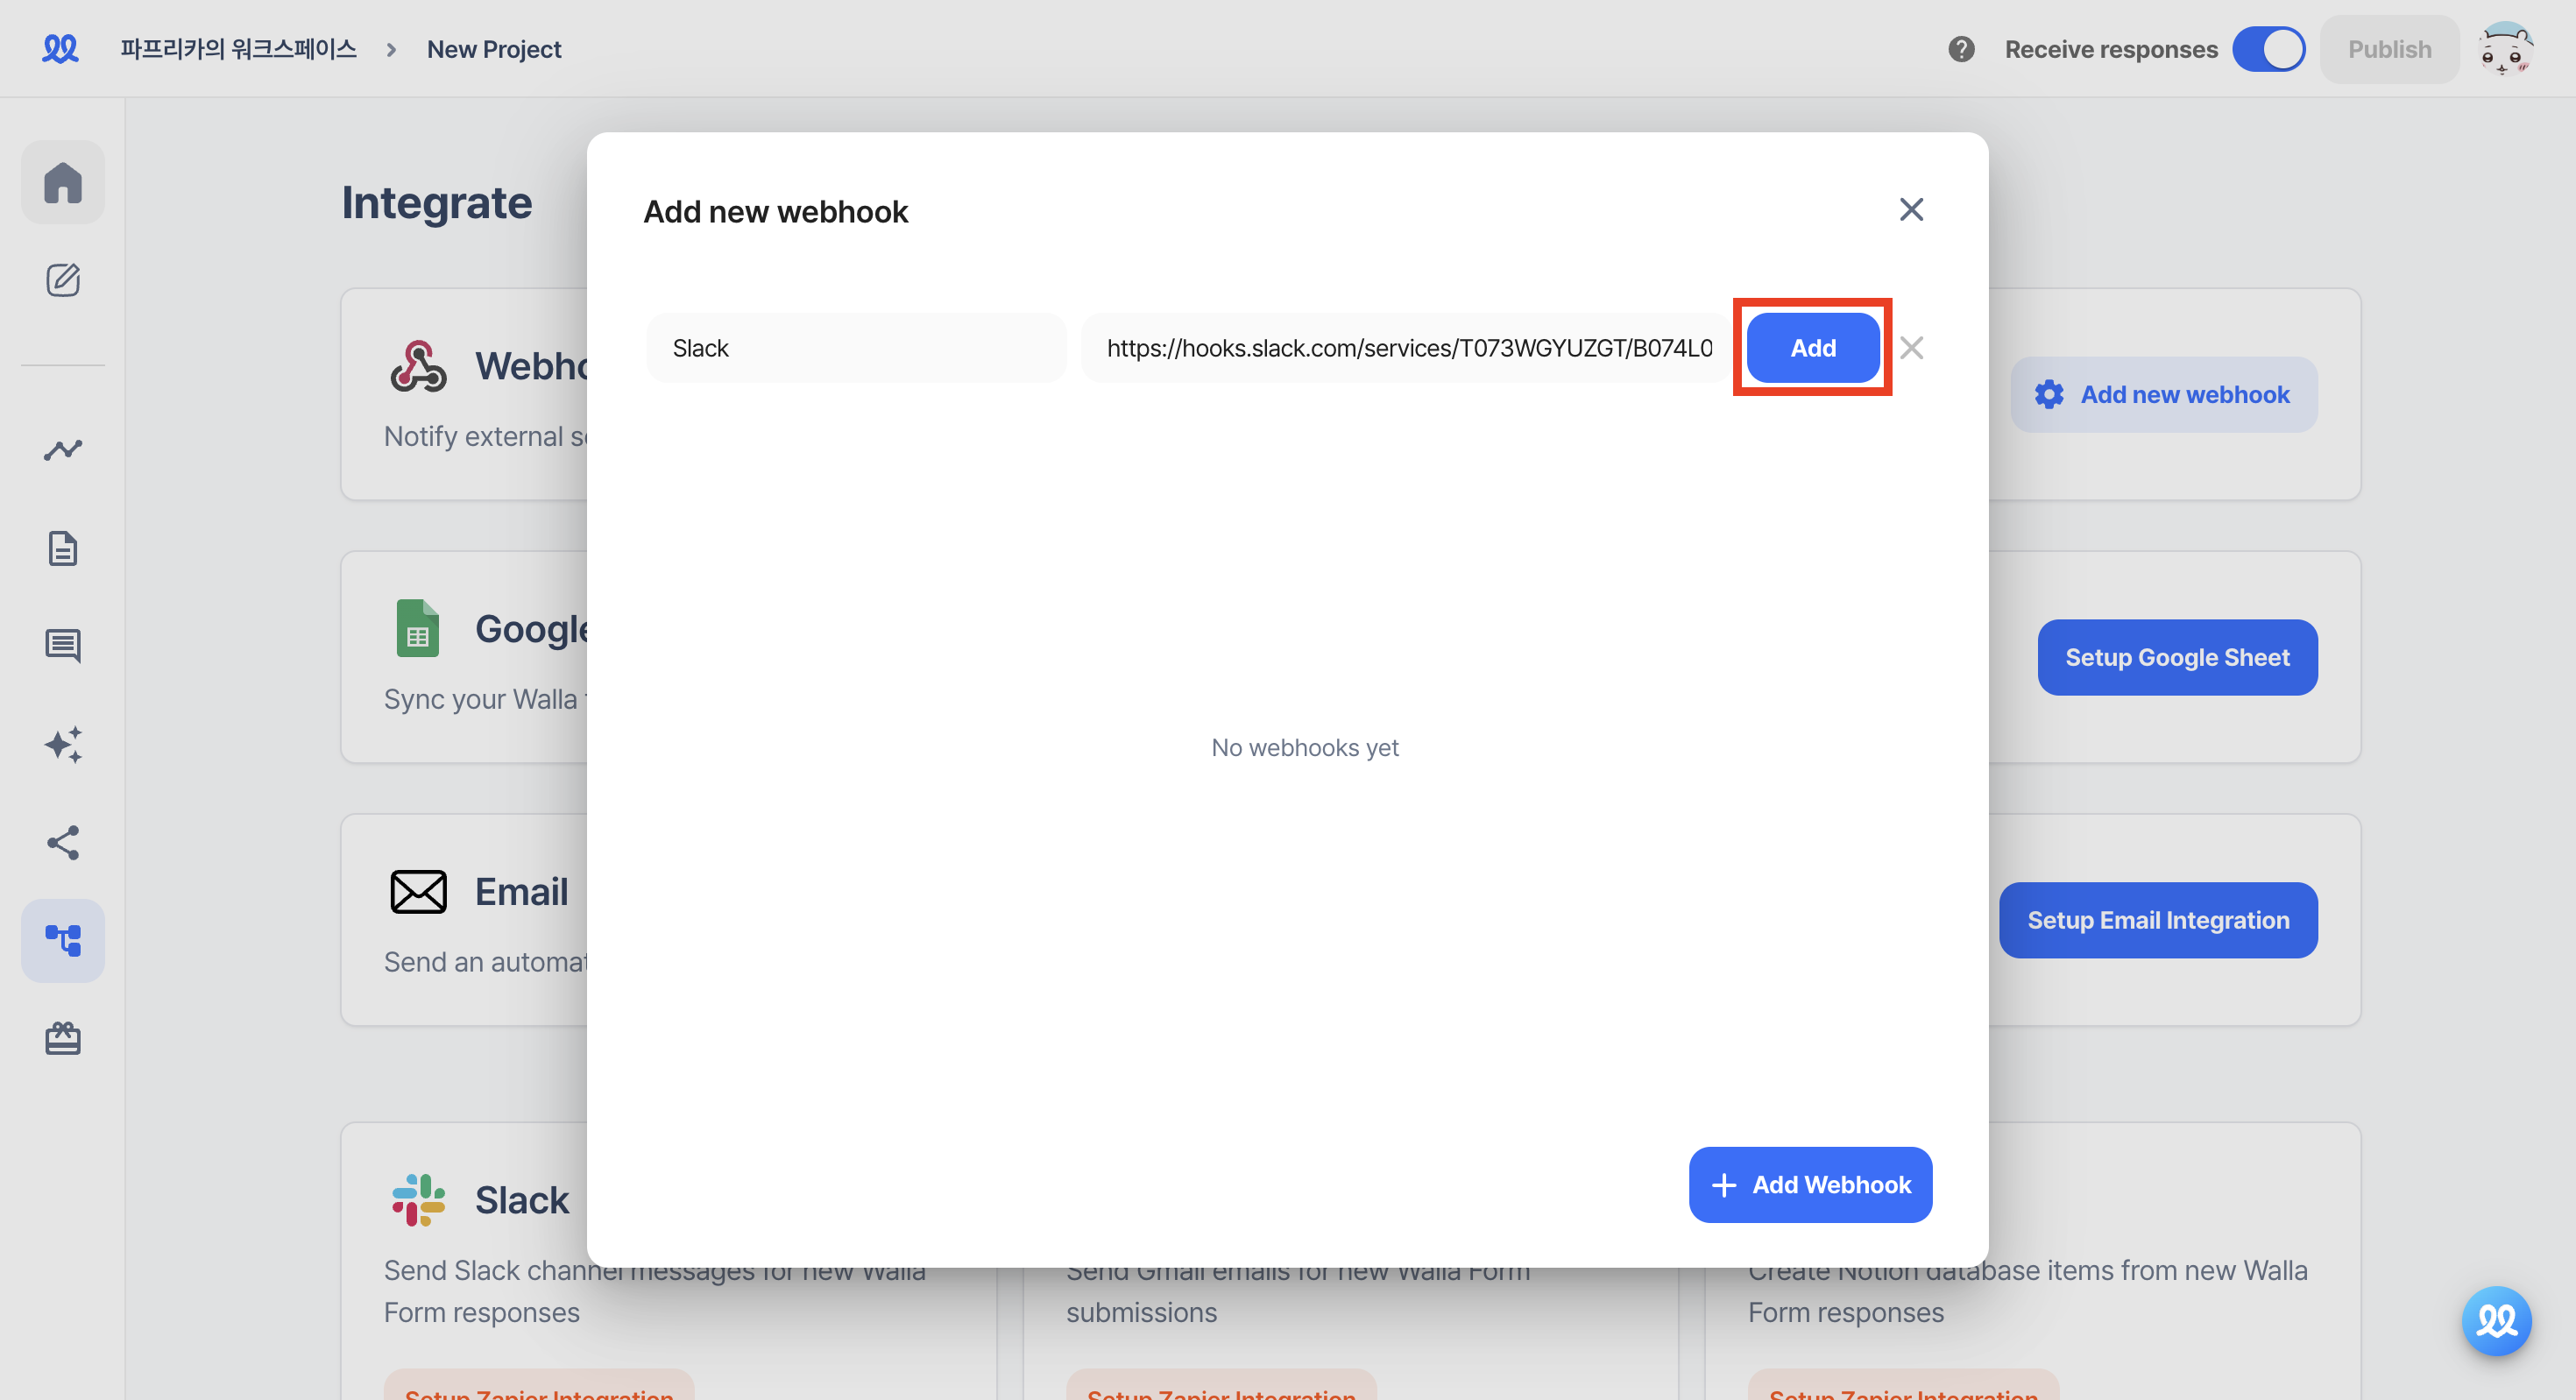
11. Paste the URL copied from Slack and click 'Add'.
12. Change the Header Name value to Content-Type and Value to application/json.
13. Activate the Body settings and refer to the preset below to freely compose the content you want to receive on Slack.
- Write the content you want between the double quotes according to the format below.
{
    "text": "Write your content here."
}-
If you want to receive response details, paste
{{res:~~}}from the preset. -
If you have set hidden fields, you can also receive the hidden field content in the notification.
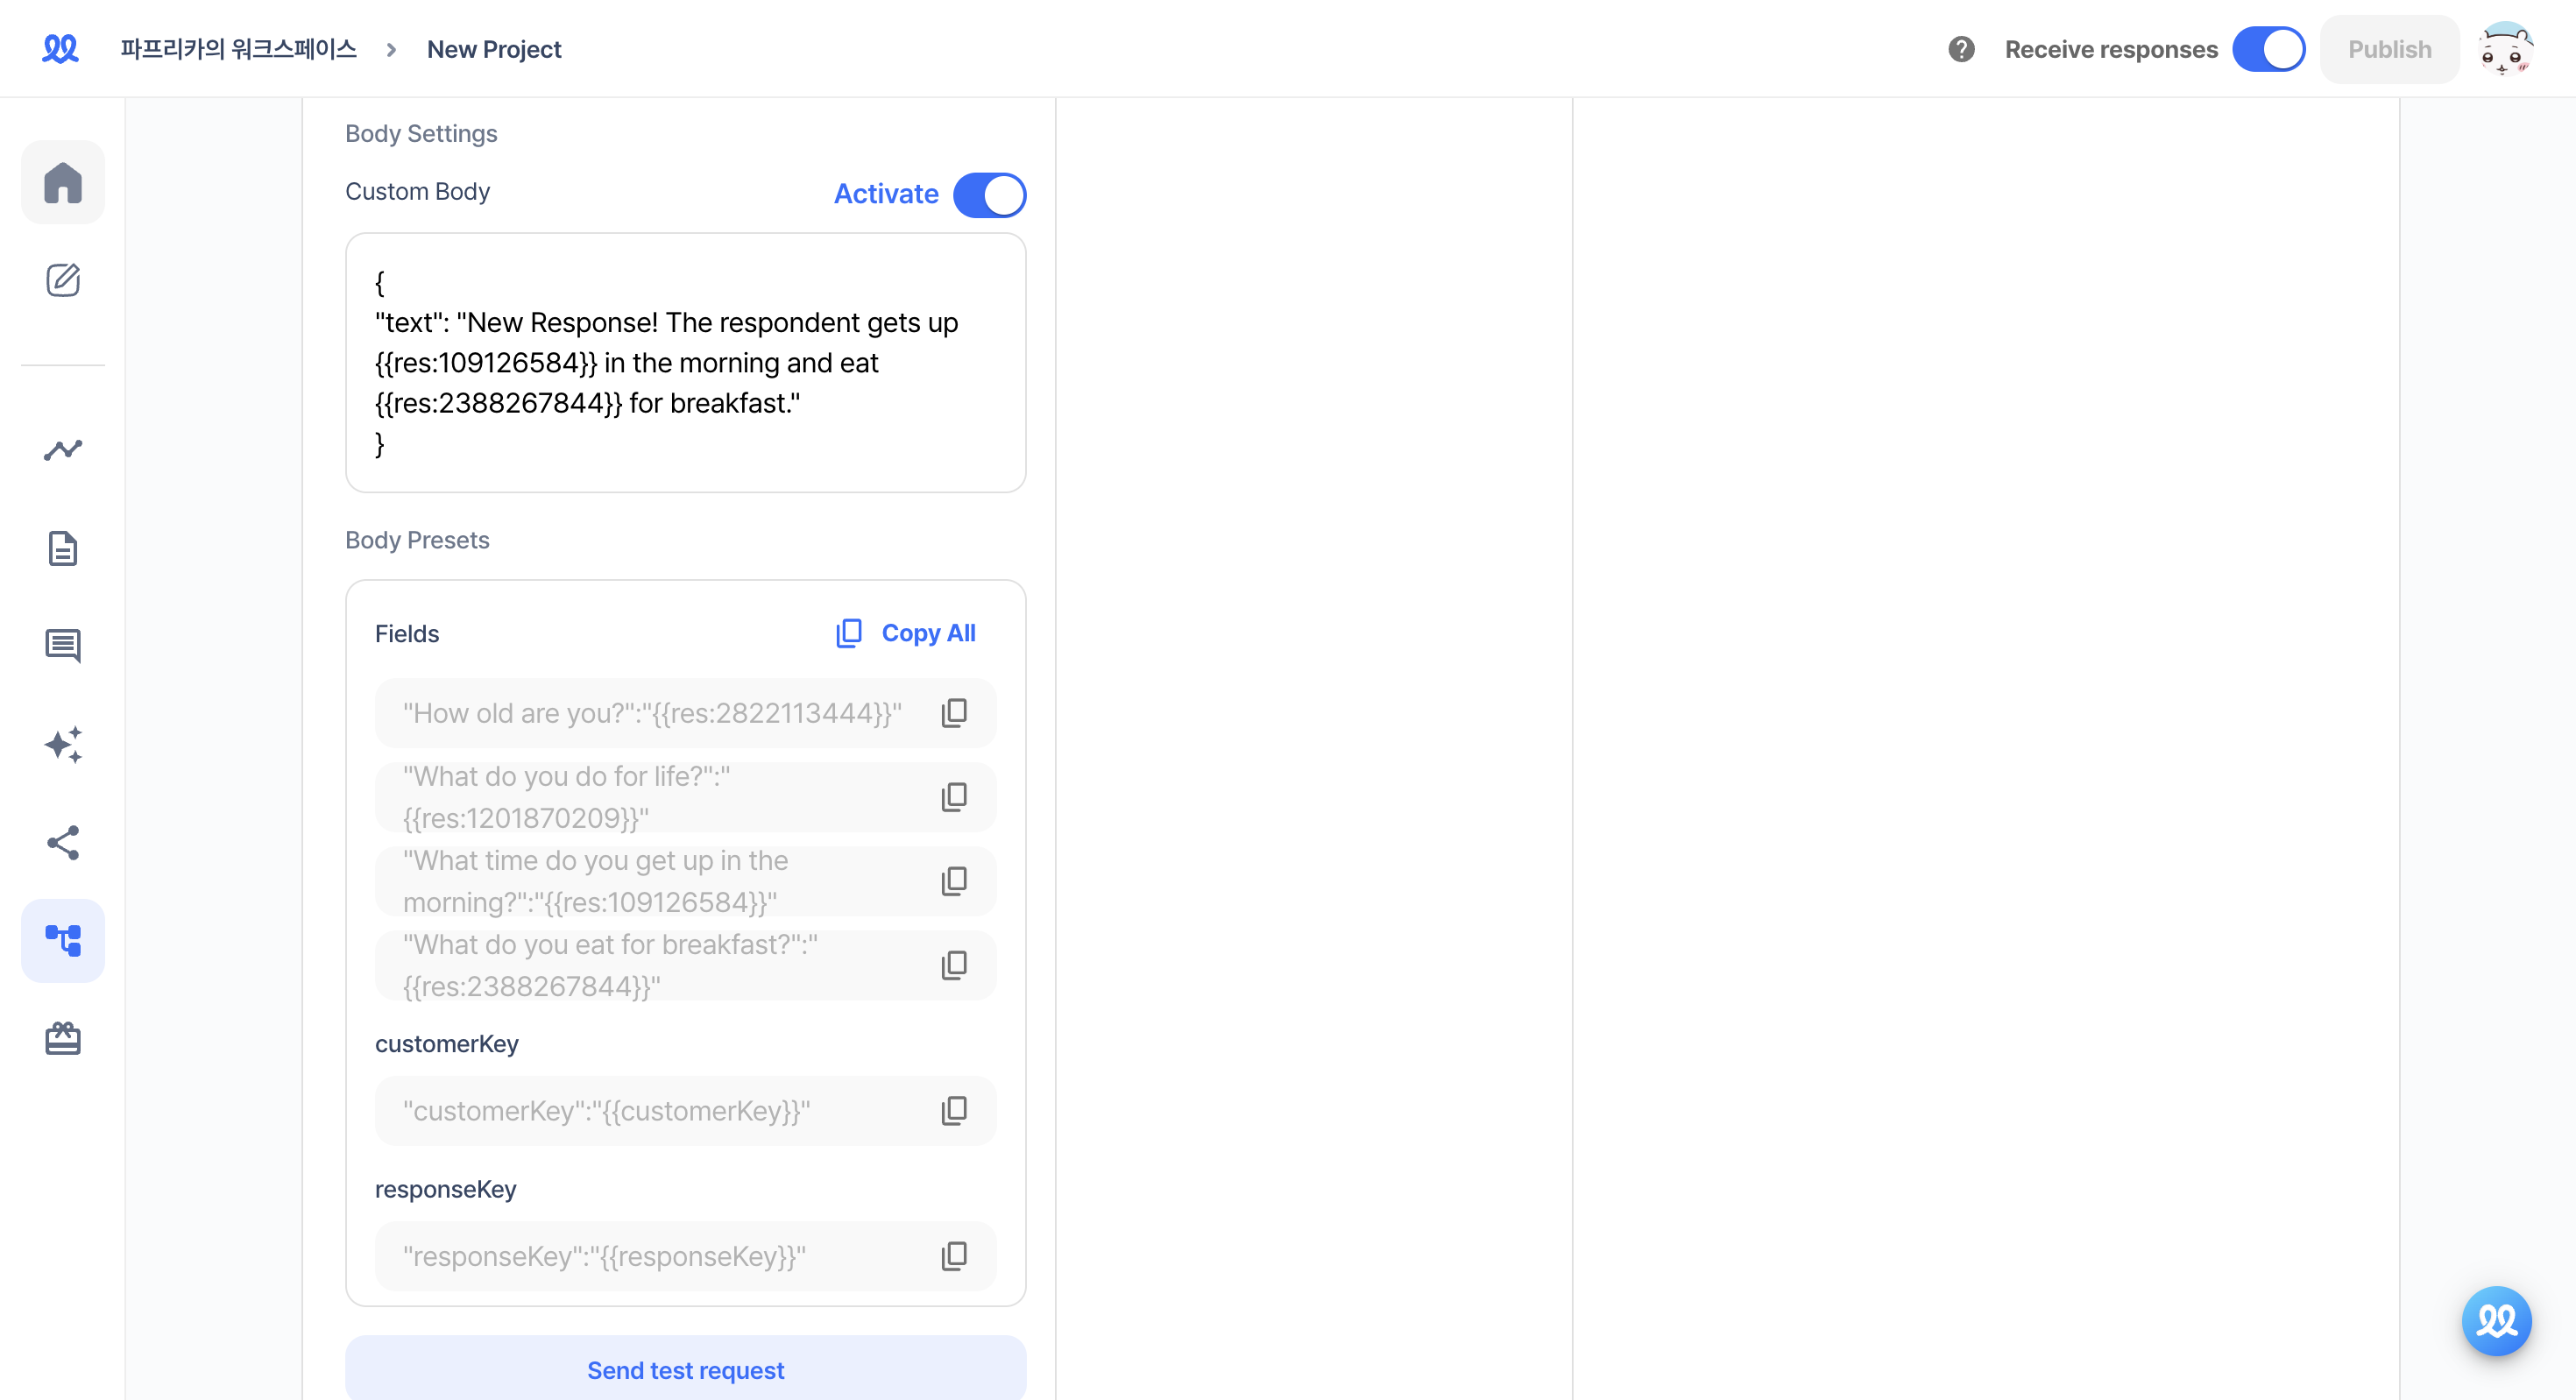
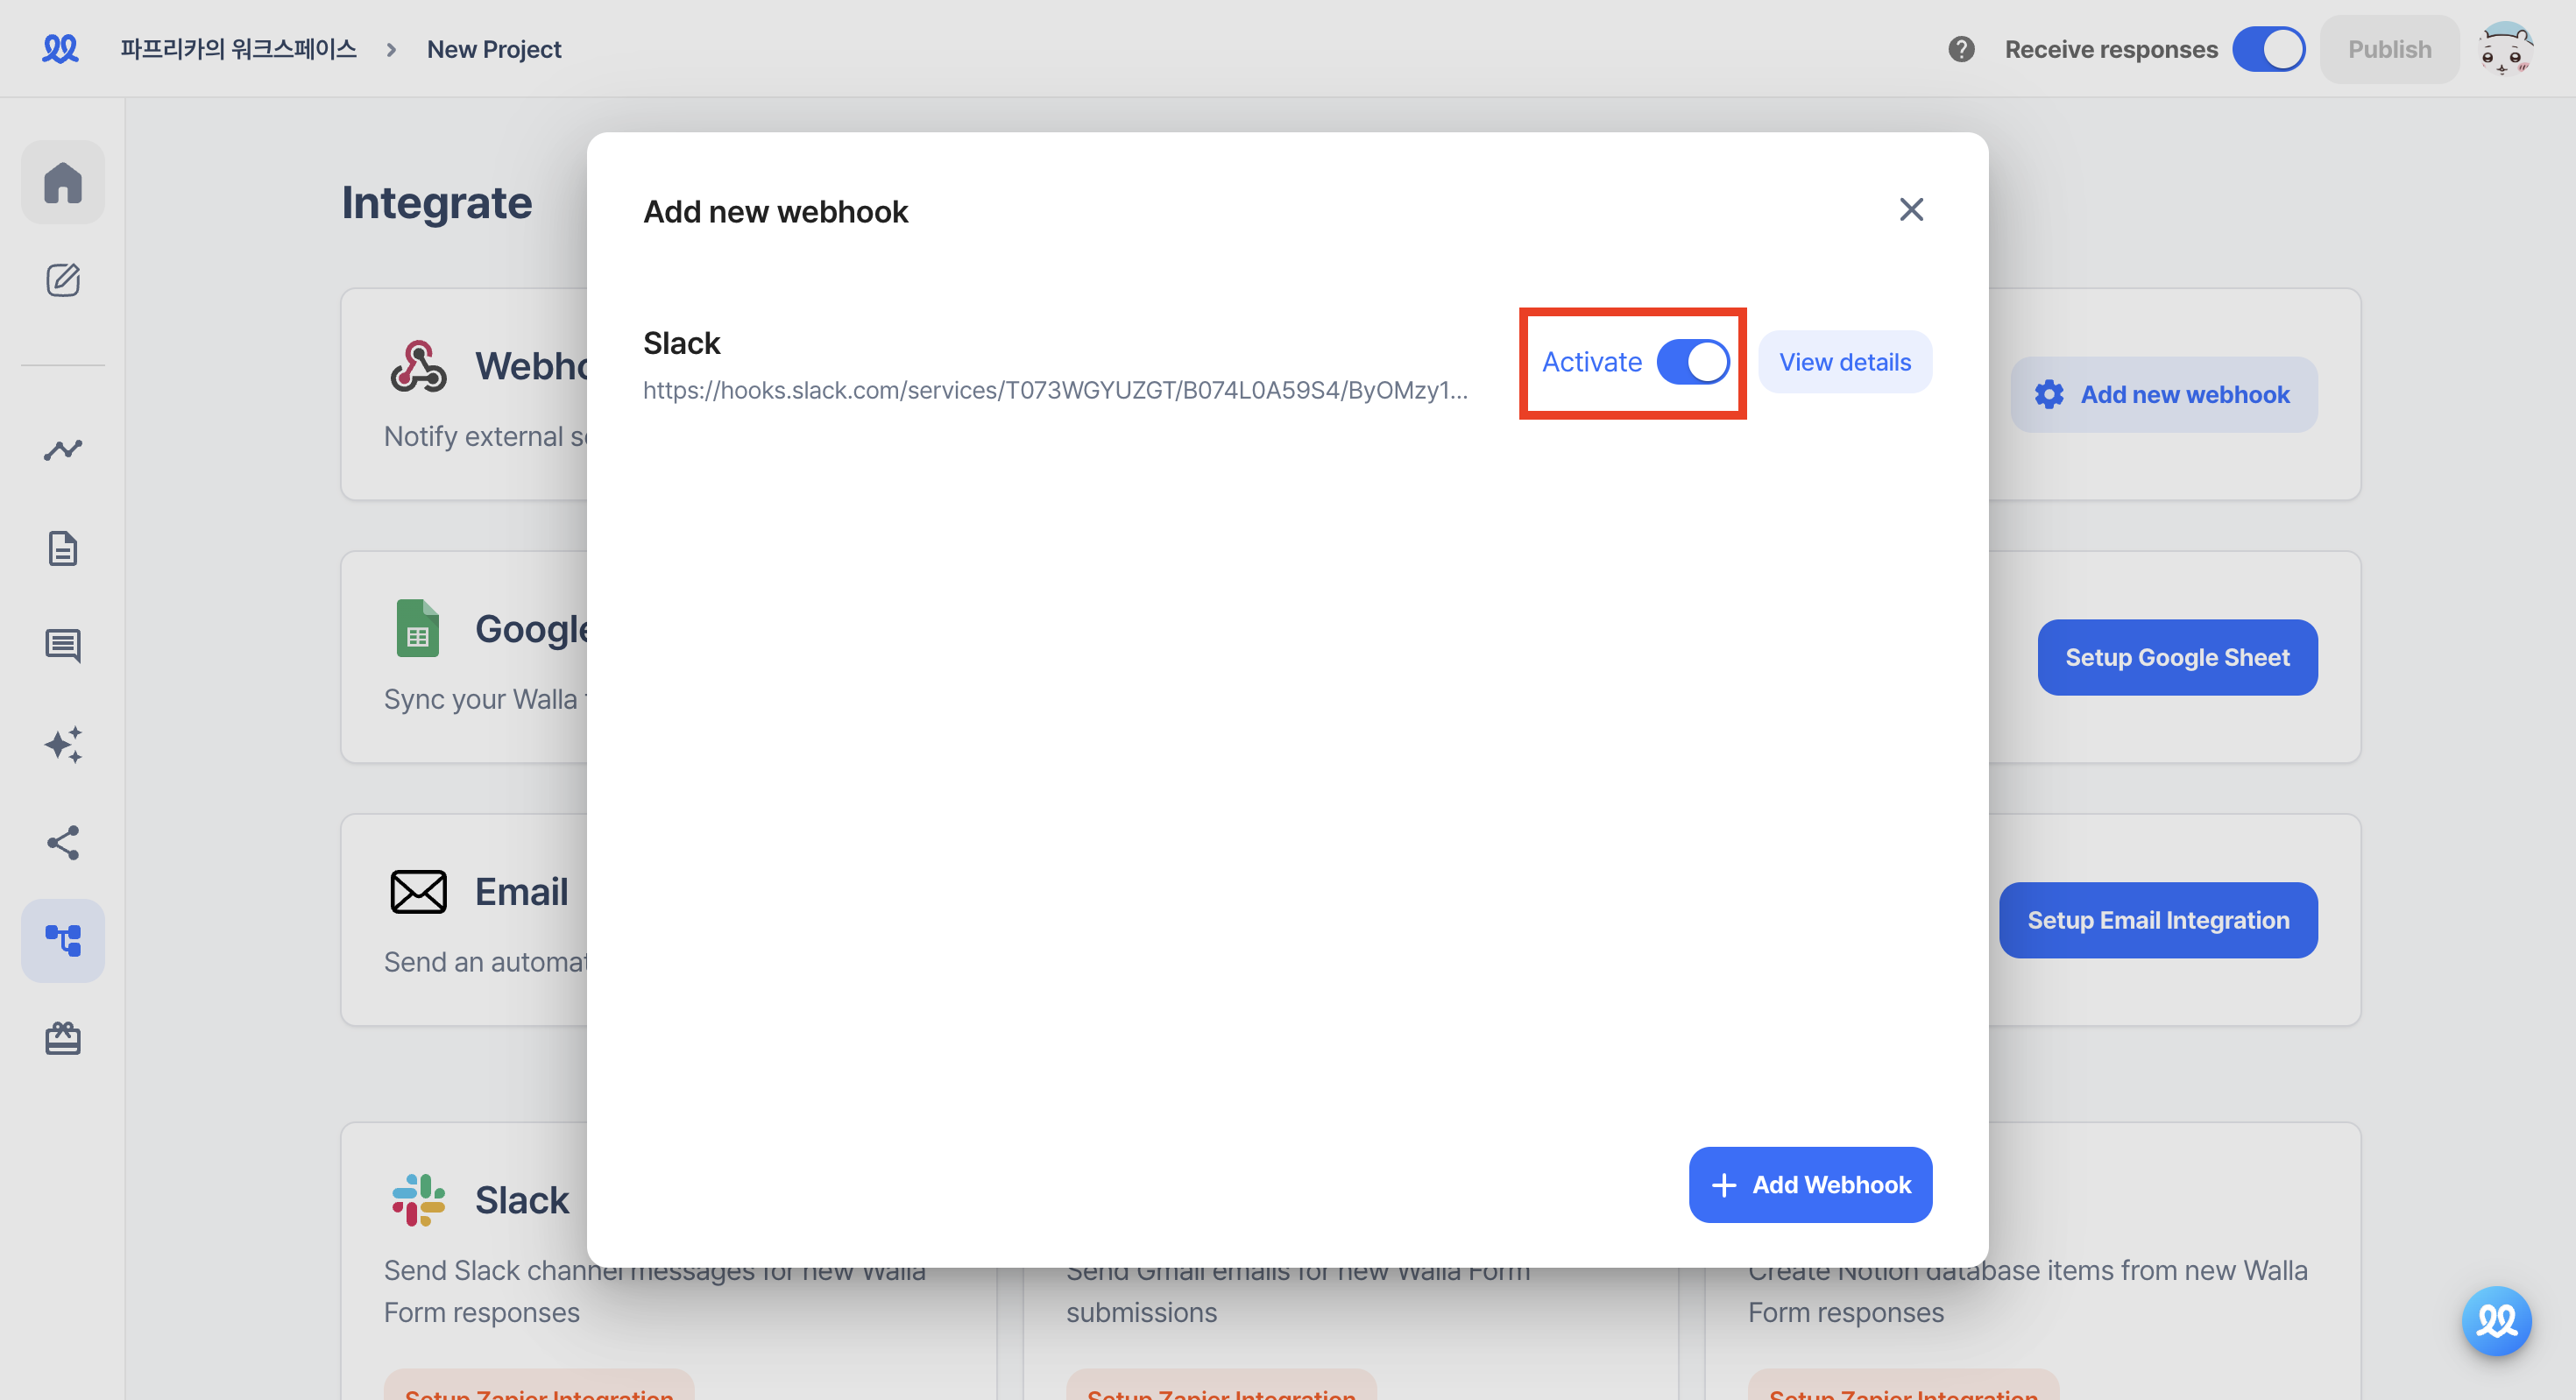
14. Save the changes and activate it in 'Add new webhook'.
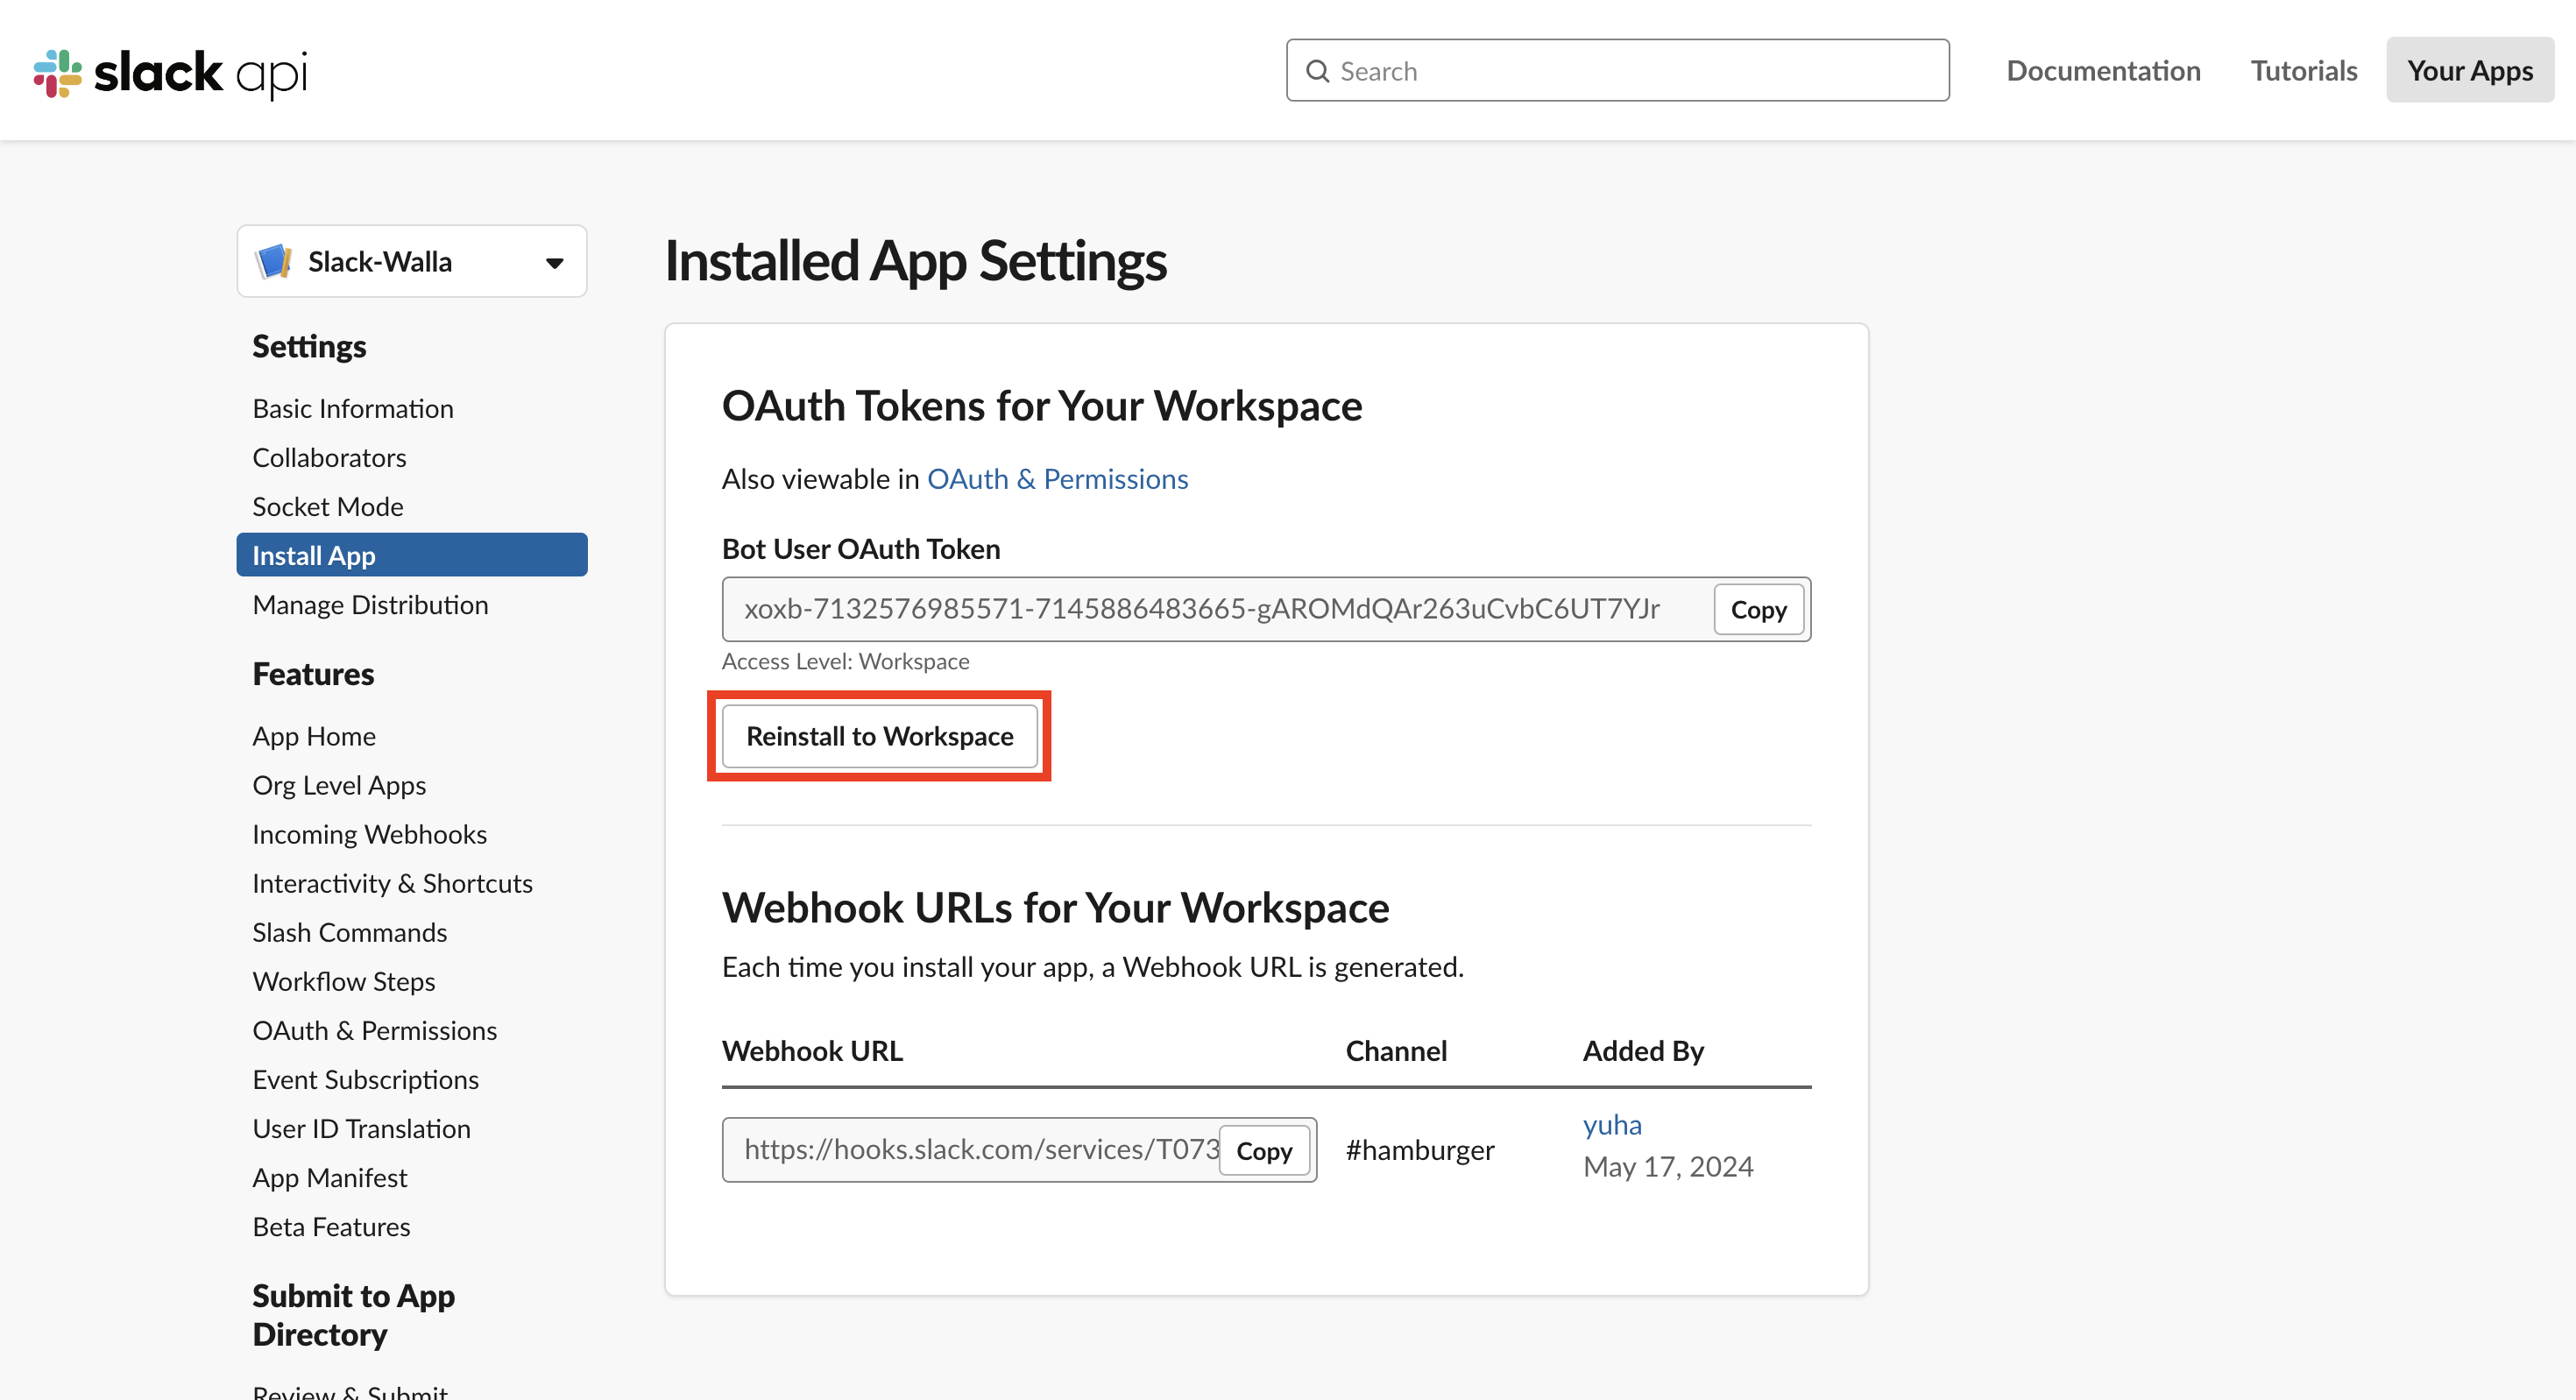
15. In the 'Install App' tab, click 'Reinstall to Workspace' to reinstall the webhook.
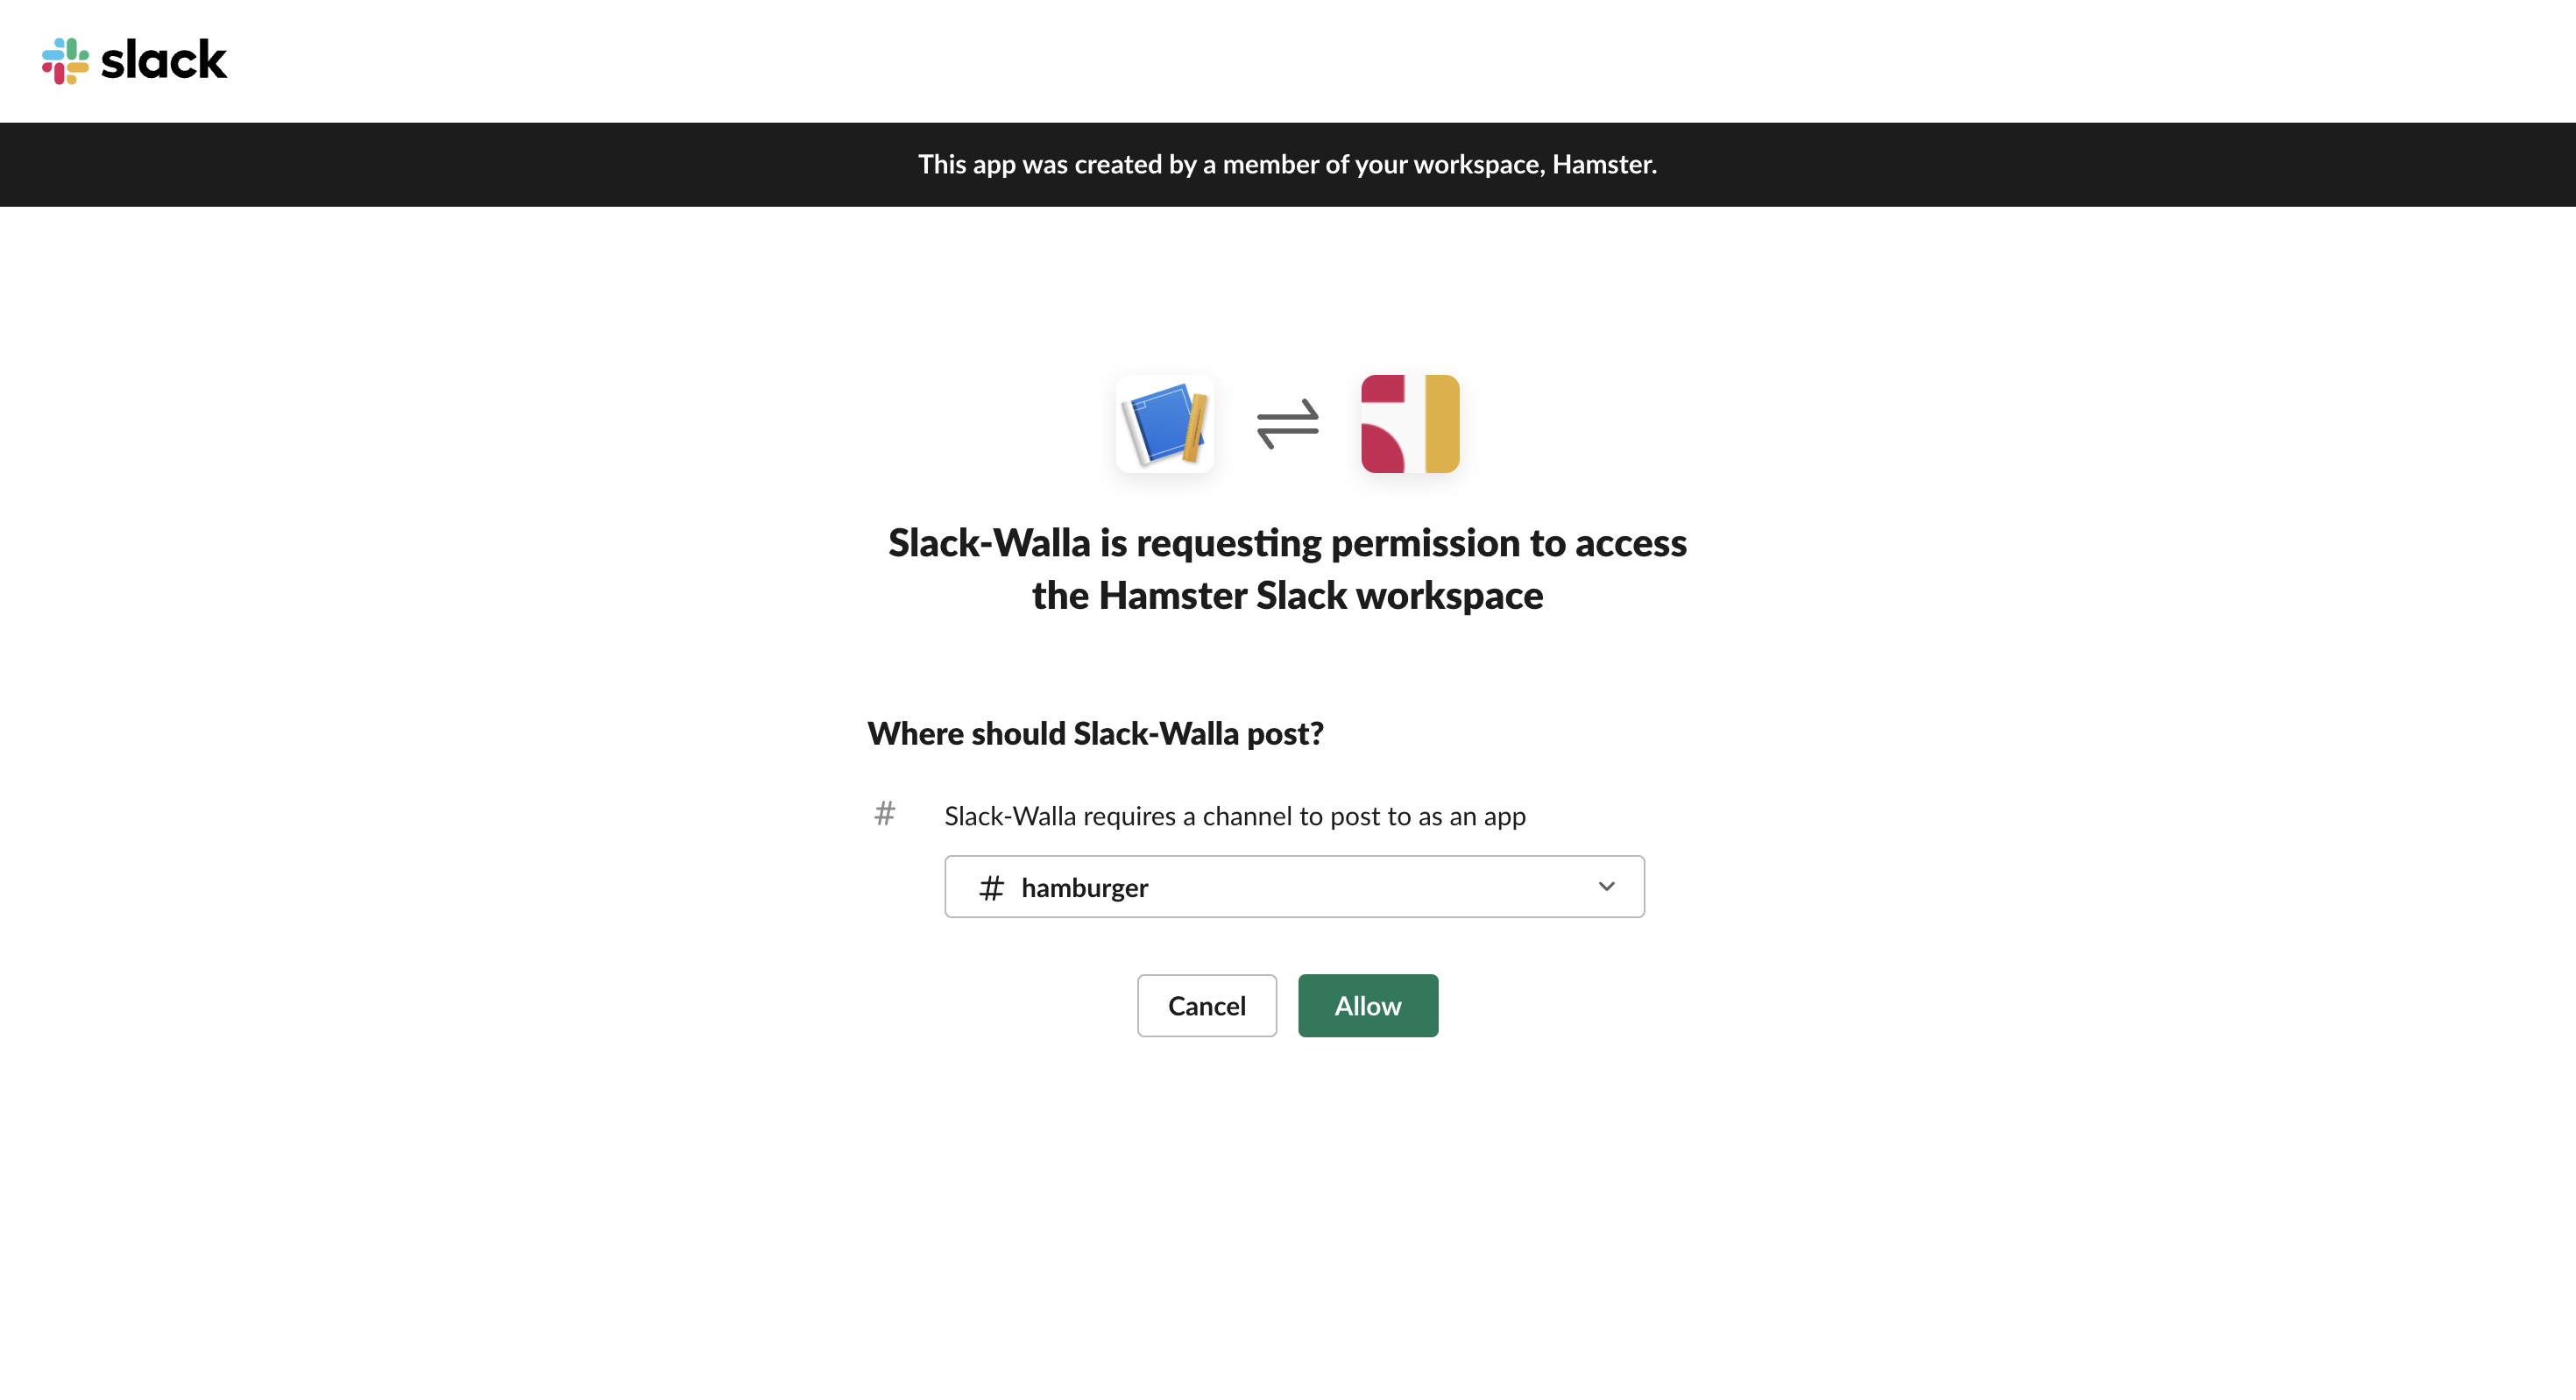
16. Select the channel to receive notifications.
17. You will receive notifications on Slack when a response arrives.

Integrating with Email
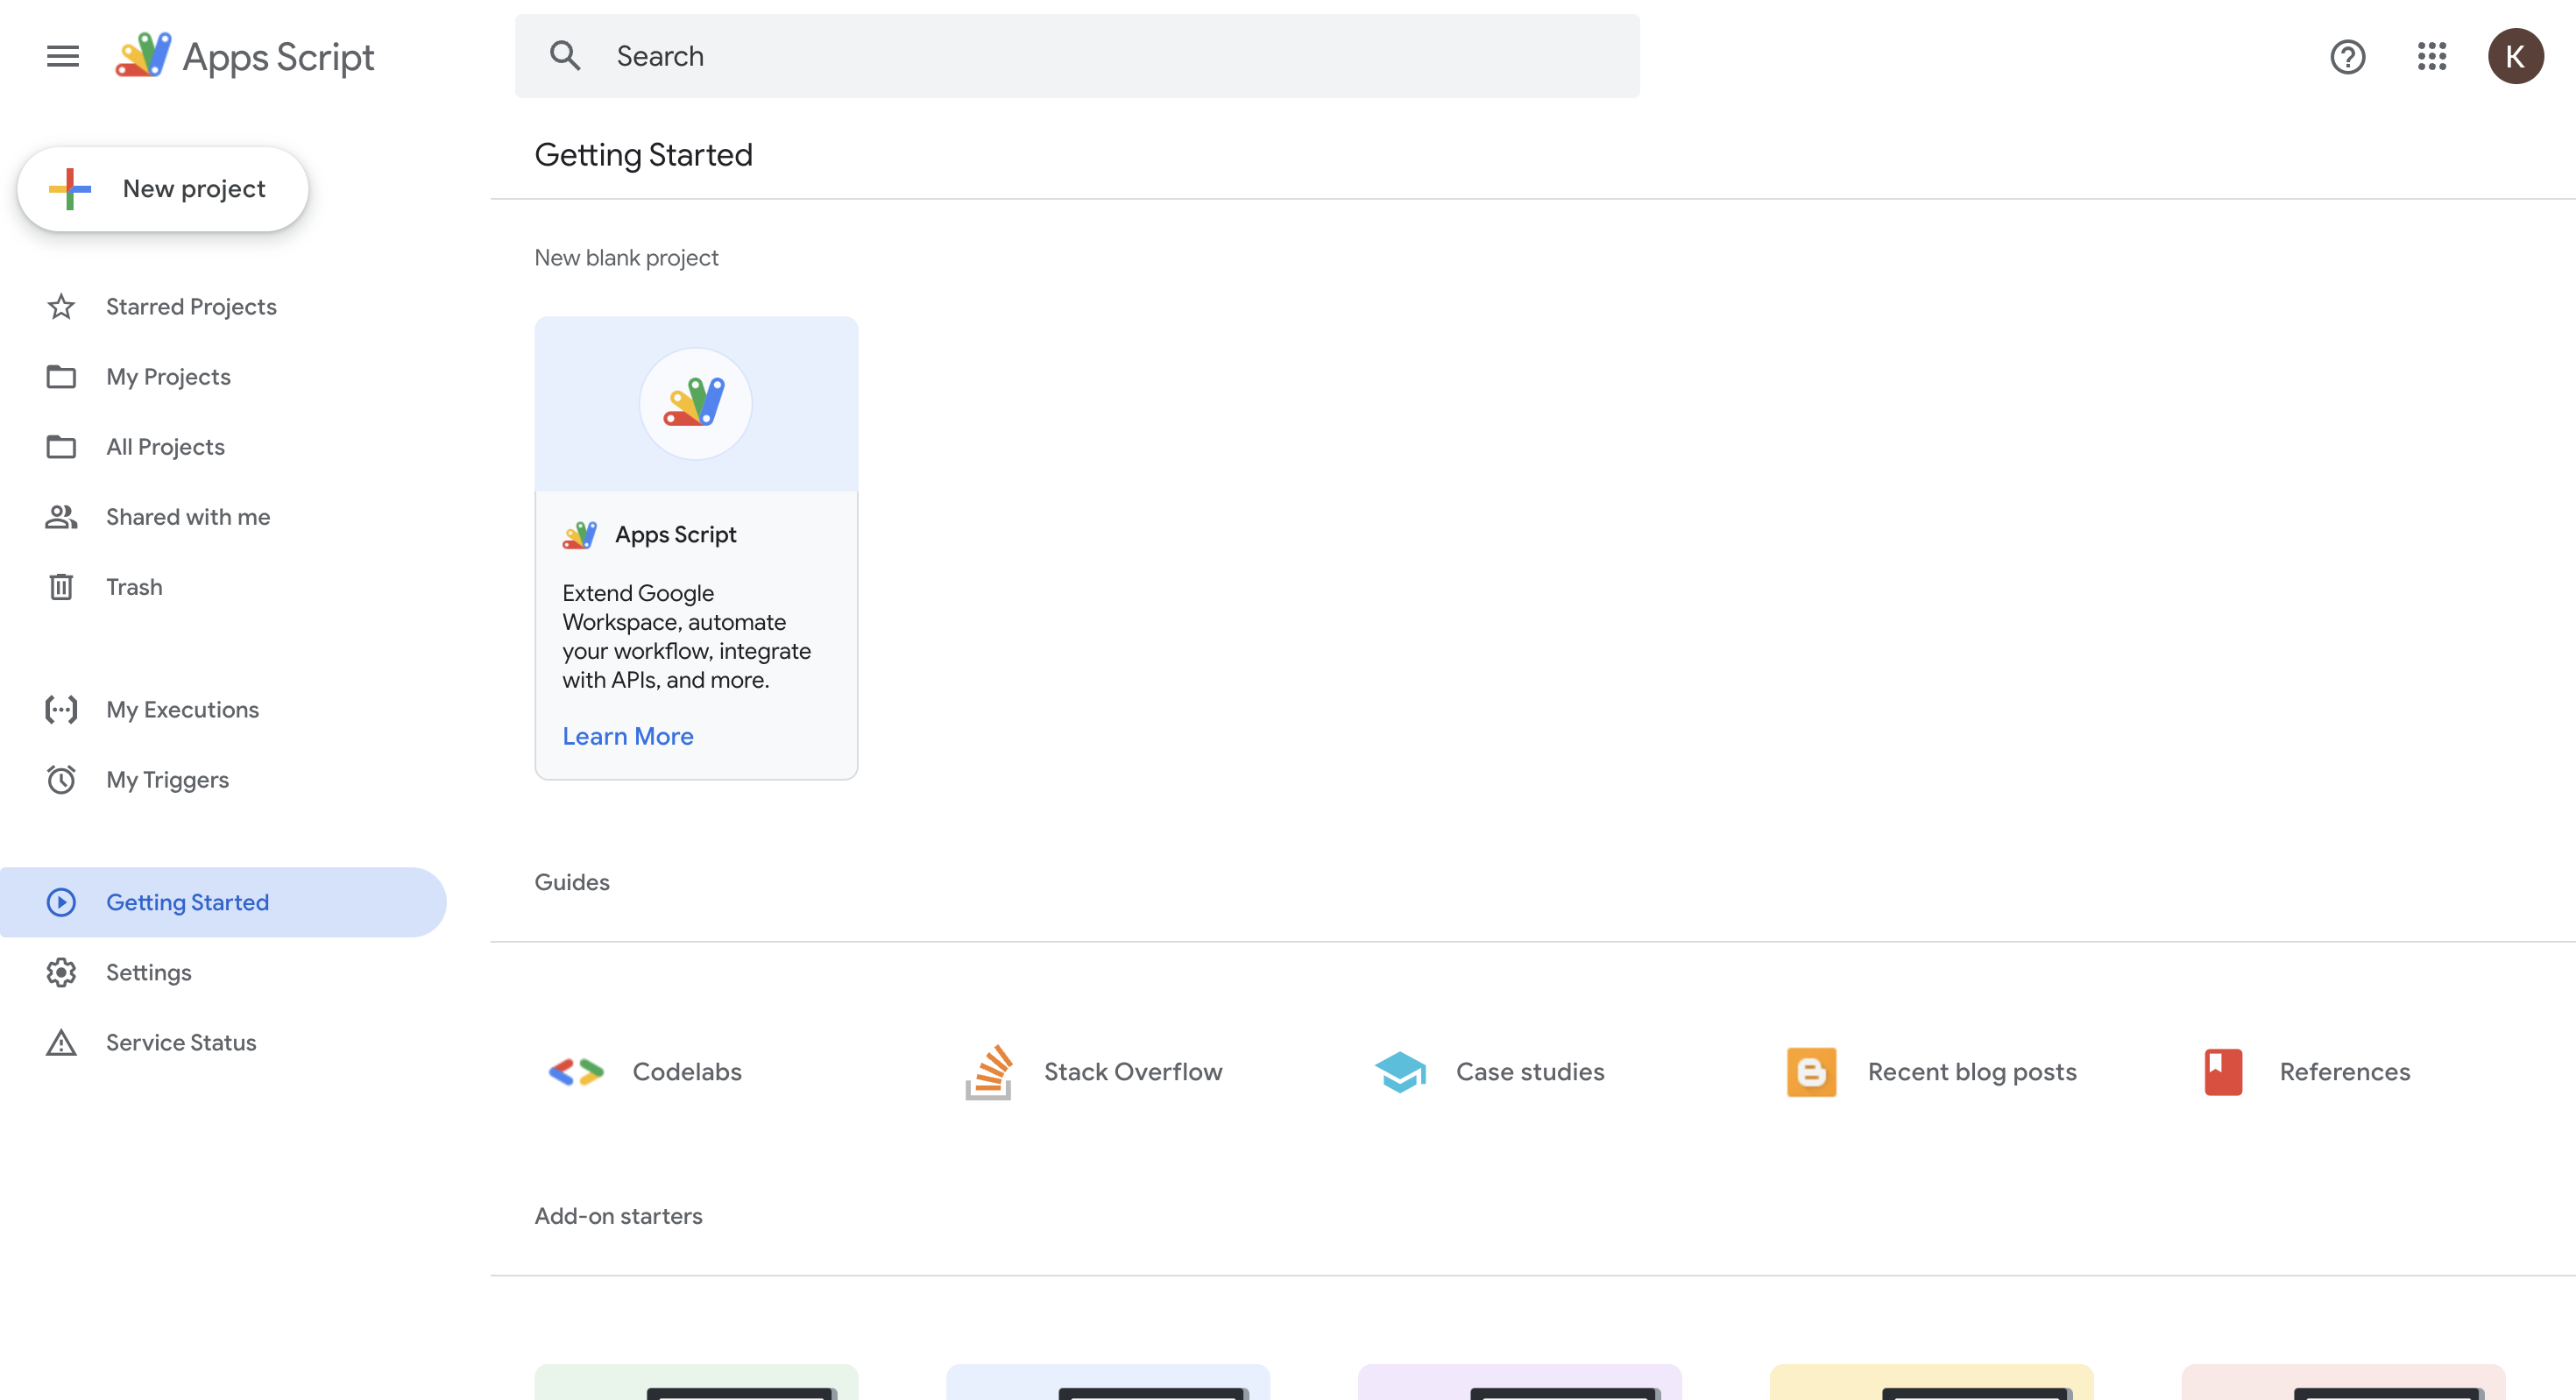
1. Go to https://script.google.com/ (opens in a new tab) and click 'New Project'.
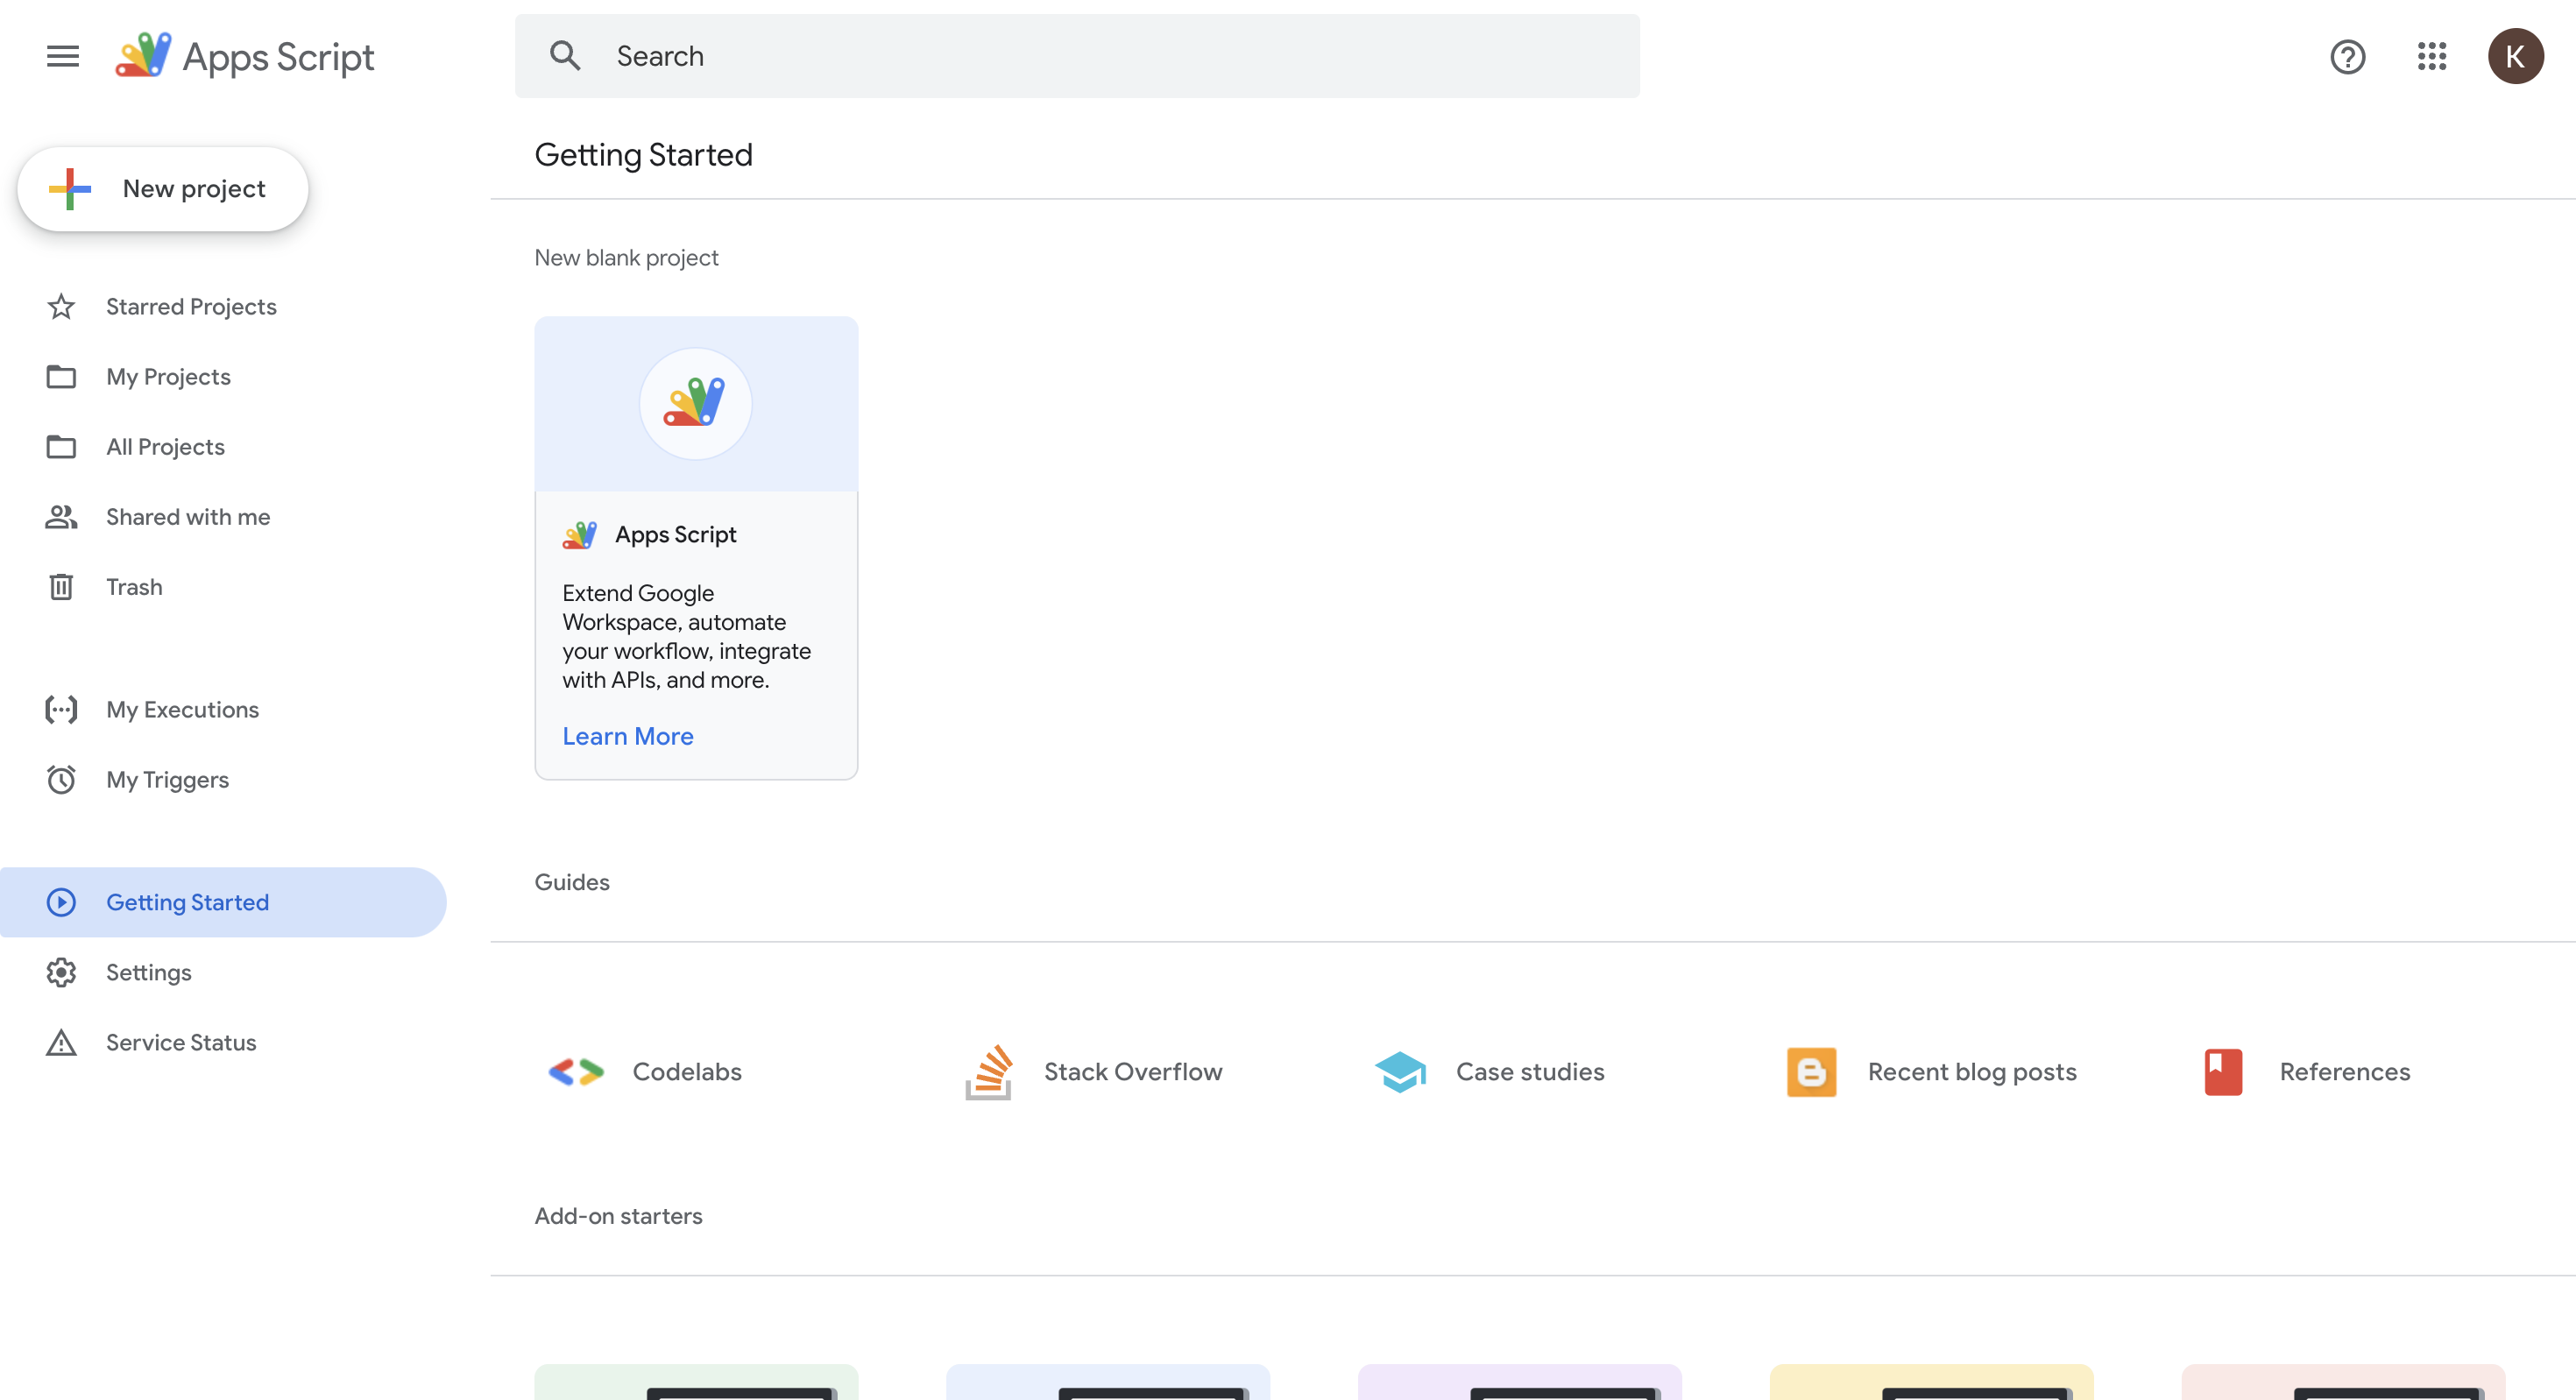
2. Delete all the default content and paste the code below.
-
For the
"------@------.---"part of the code, enter the email address to receive notifications within the quotes.- e.g.,
"minsu@walla.my, yeonghee@walla.my"
- e.g.,
-
For the
<${FORM_TITLE}> ------------part of the code, enter the subject of the email.- e.g., e.g.,
<${FORM_TITLE}> New response submitted
- e.g., e.g.,
function doPost(e) {
  var data = JSON.parse(e.postData.contents);
  var formAnswers = data.form_answers;
  var submittedAt = new Date(data.form_response.submitted_at);

  var formattedDate = Utilities.formatDate(submittedAt, "Asia/Seoul", "yyyy-MM-dd HH:mm:ss");
  var FORM_TITLE= data.form_definition.title;
  var PROJECT_KEY= data.form_definition.id;
  var emailBody = `<html>
  <body>
    <h3>New response is submitted.</h3>
    <p>A new response was submitted to your project "${FORM_TITLE}".</p>
    <p>Response ID: ${data.form_response.response_id}</p>
    <p>Submitted at: ${formattedDate}</p>`;

  formAnswers.forEach(function(field) {
    var question = field.label;
    var answer = getAnswerString(field);
    emailBody += `<h4>${question}</h4><p>${answer}</p>`;
  });

  emailBody += `</body></html>`;

  var recipientEmail = "------@------.---";
  var subject = `<${FORM_TITLE}> ------------`;
  var advancedOptions = {
    htmlBody: emailBody,
    charset: "UTF-8"
  };
  GmailApp.sendEmail(recipientEmail, subject, "", advancedOptions);

  return ContentService.createTextOutput(JSON.stringify({result: "success"})).setMimeType(ContentService.MimeType.JSON);
}

function getAnswerString(field) {
  switch (field.type) {
    case 'CHECKBOX':
    case 'RADIO':
      return Array.isArray(field.response) ? field.response.join(', ') : field.response;
    case 'CHECKBOX_GRID':
    case 'RADIO_GRID':
      return field.response.map(el => el.lineResponse.join(', ')).join('; ');
    case 'GEOLOCATION':
      return Object.entries(field.response || {}).map(([key, value]) => `${key}: ${value}`).join(', ');
    case 'HIDDEN':
      return field.response || '';
    default:
      return Array.isArray(field.response) ? field.response.join(', ') : field.response;
  }
}
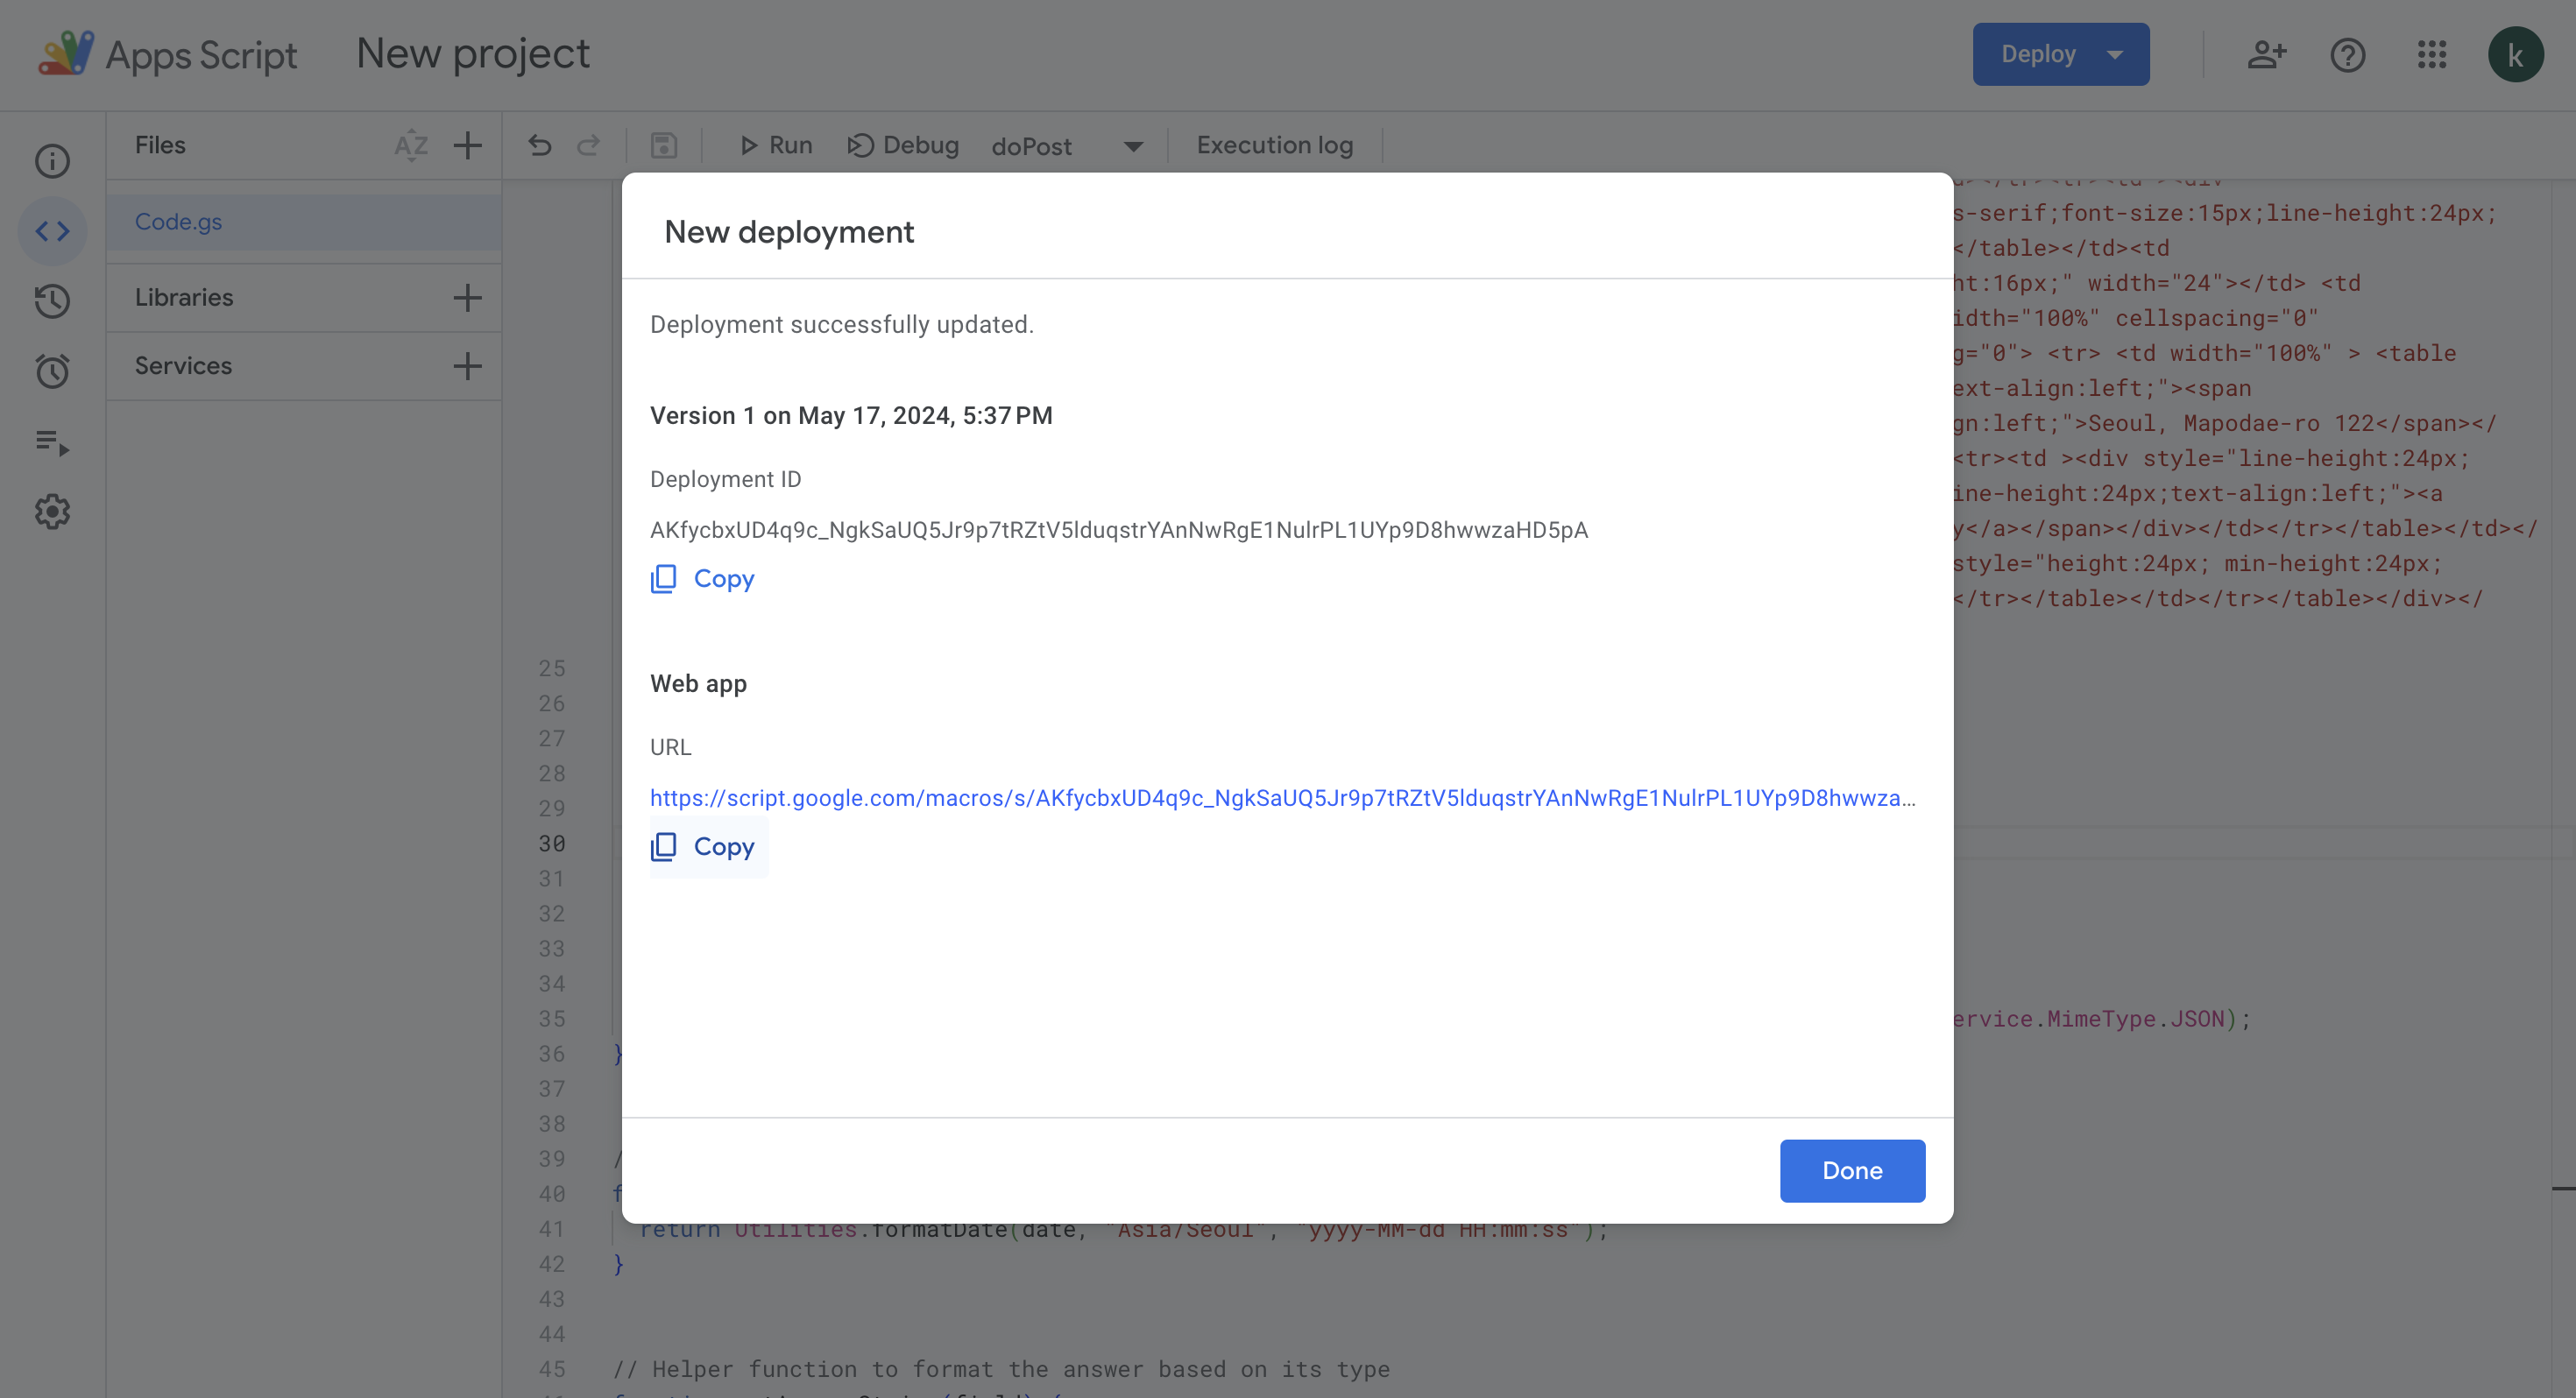
3. Click 'New Deployment'.
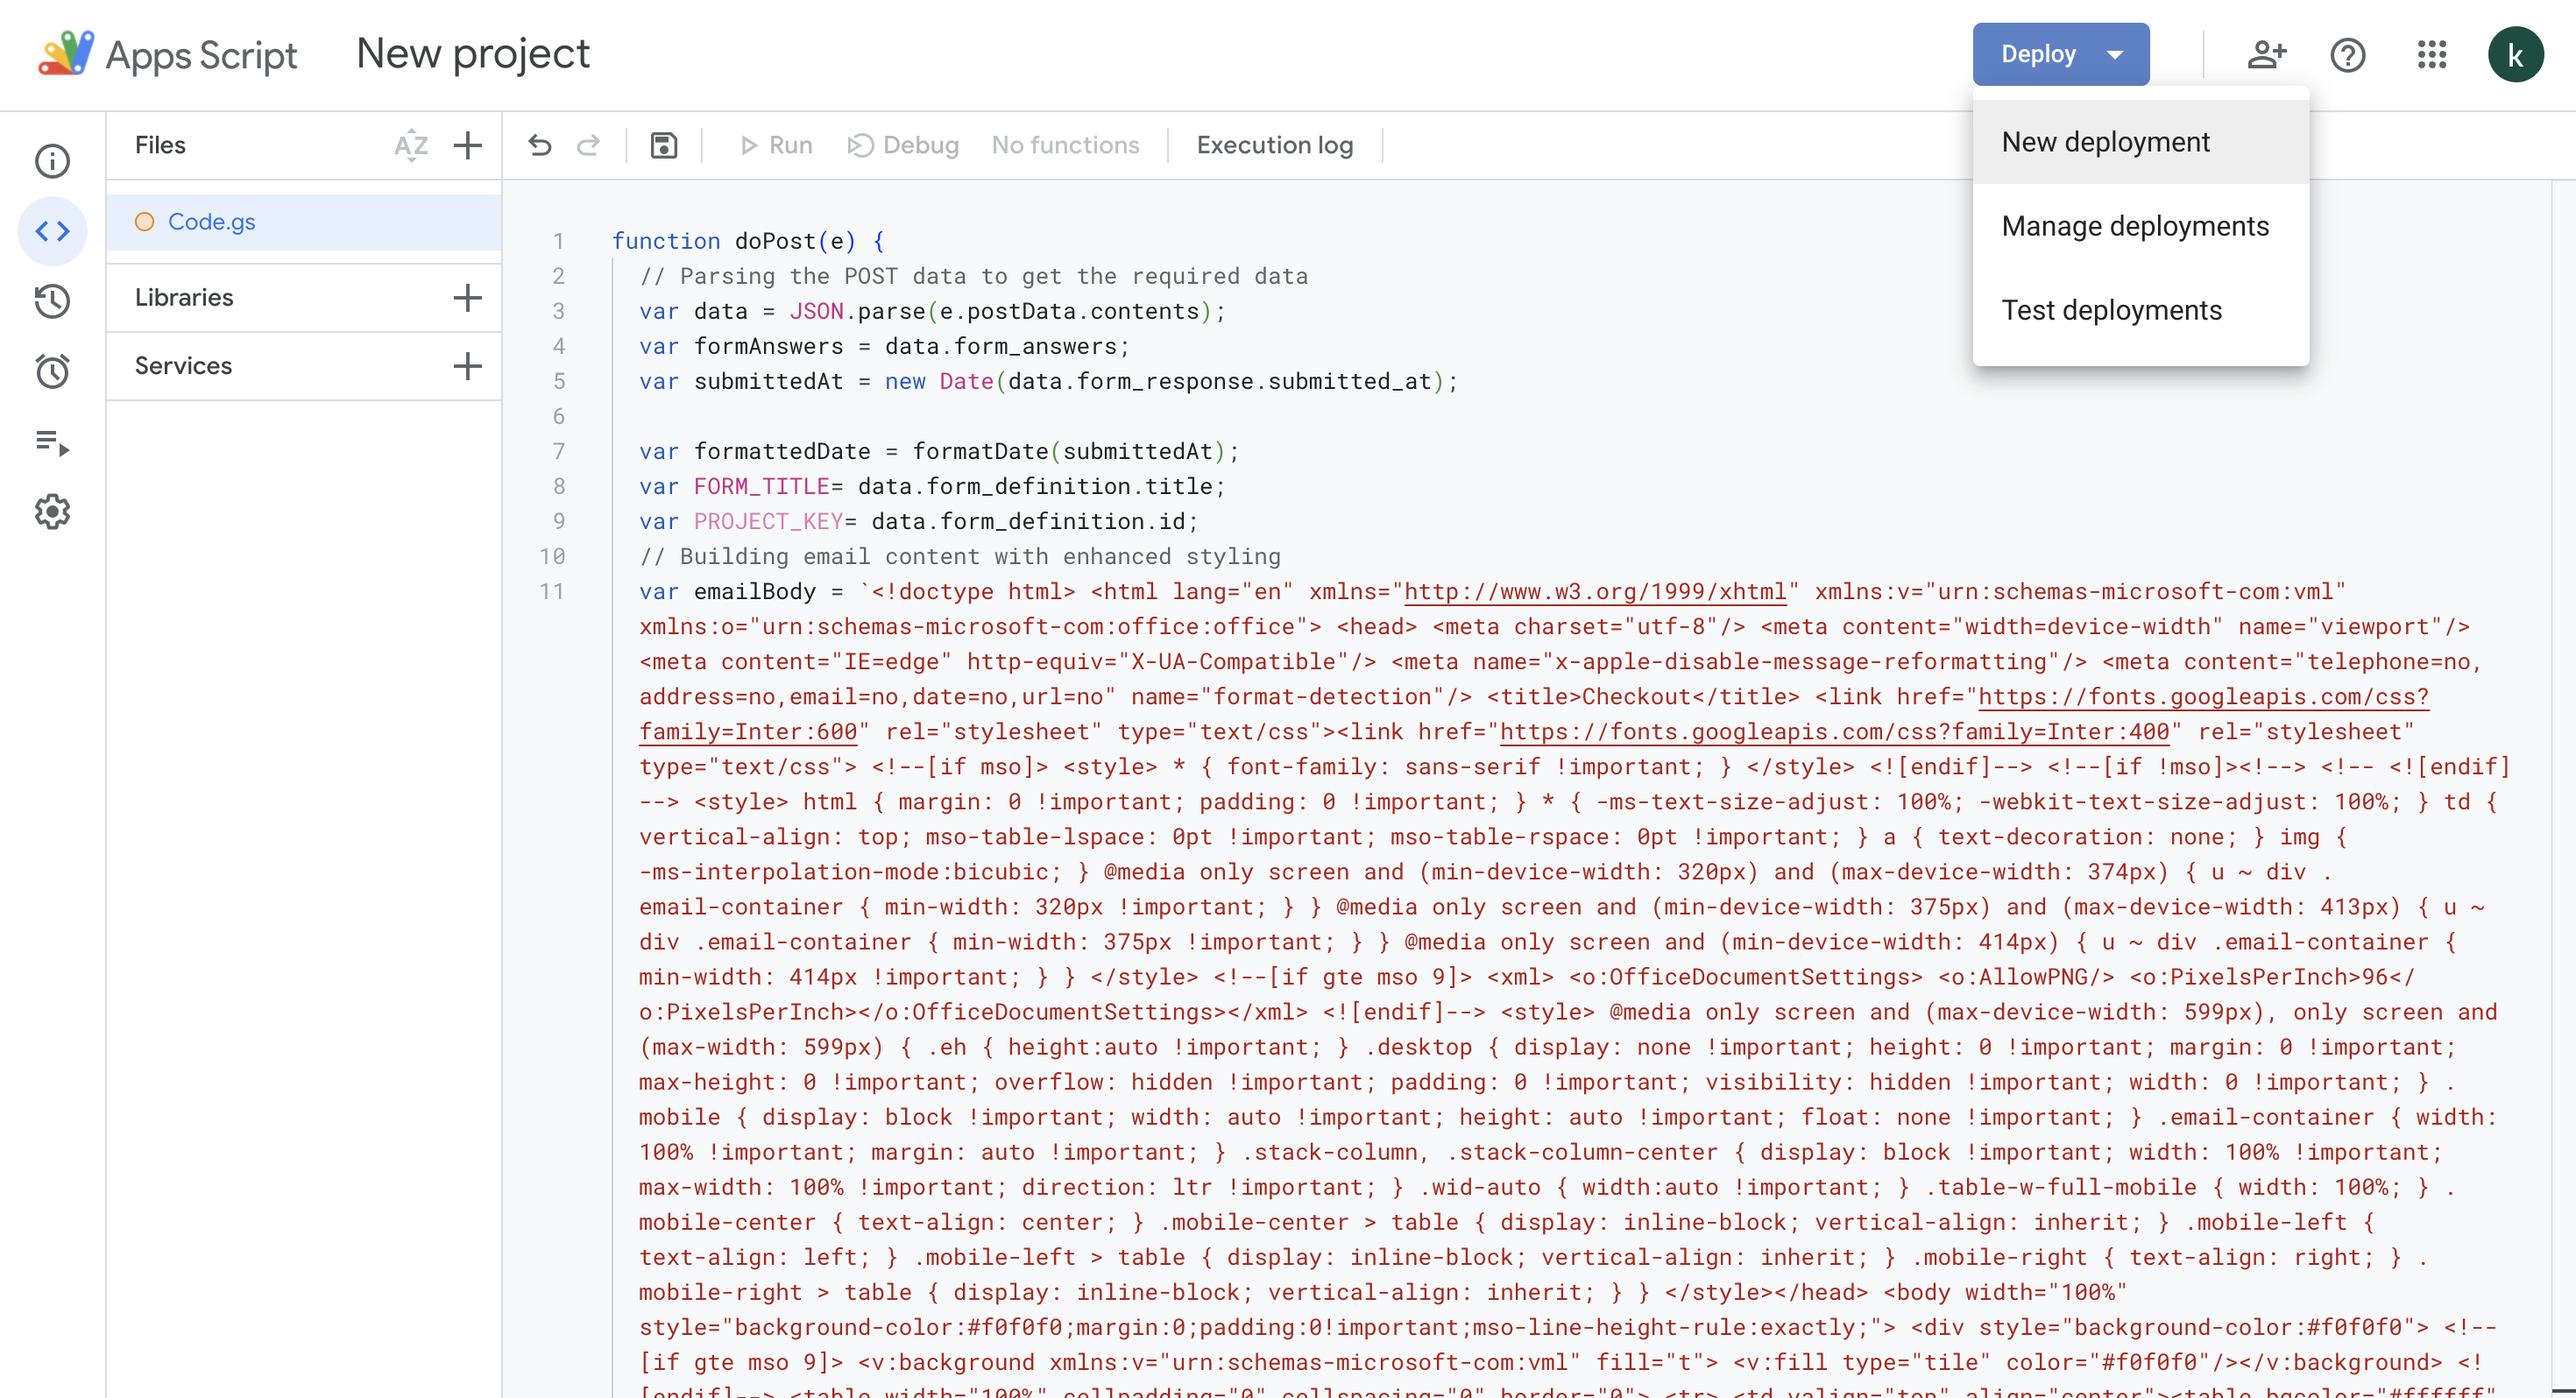
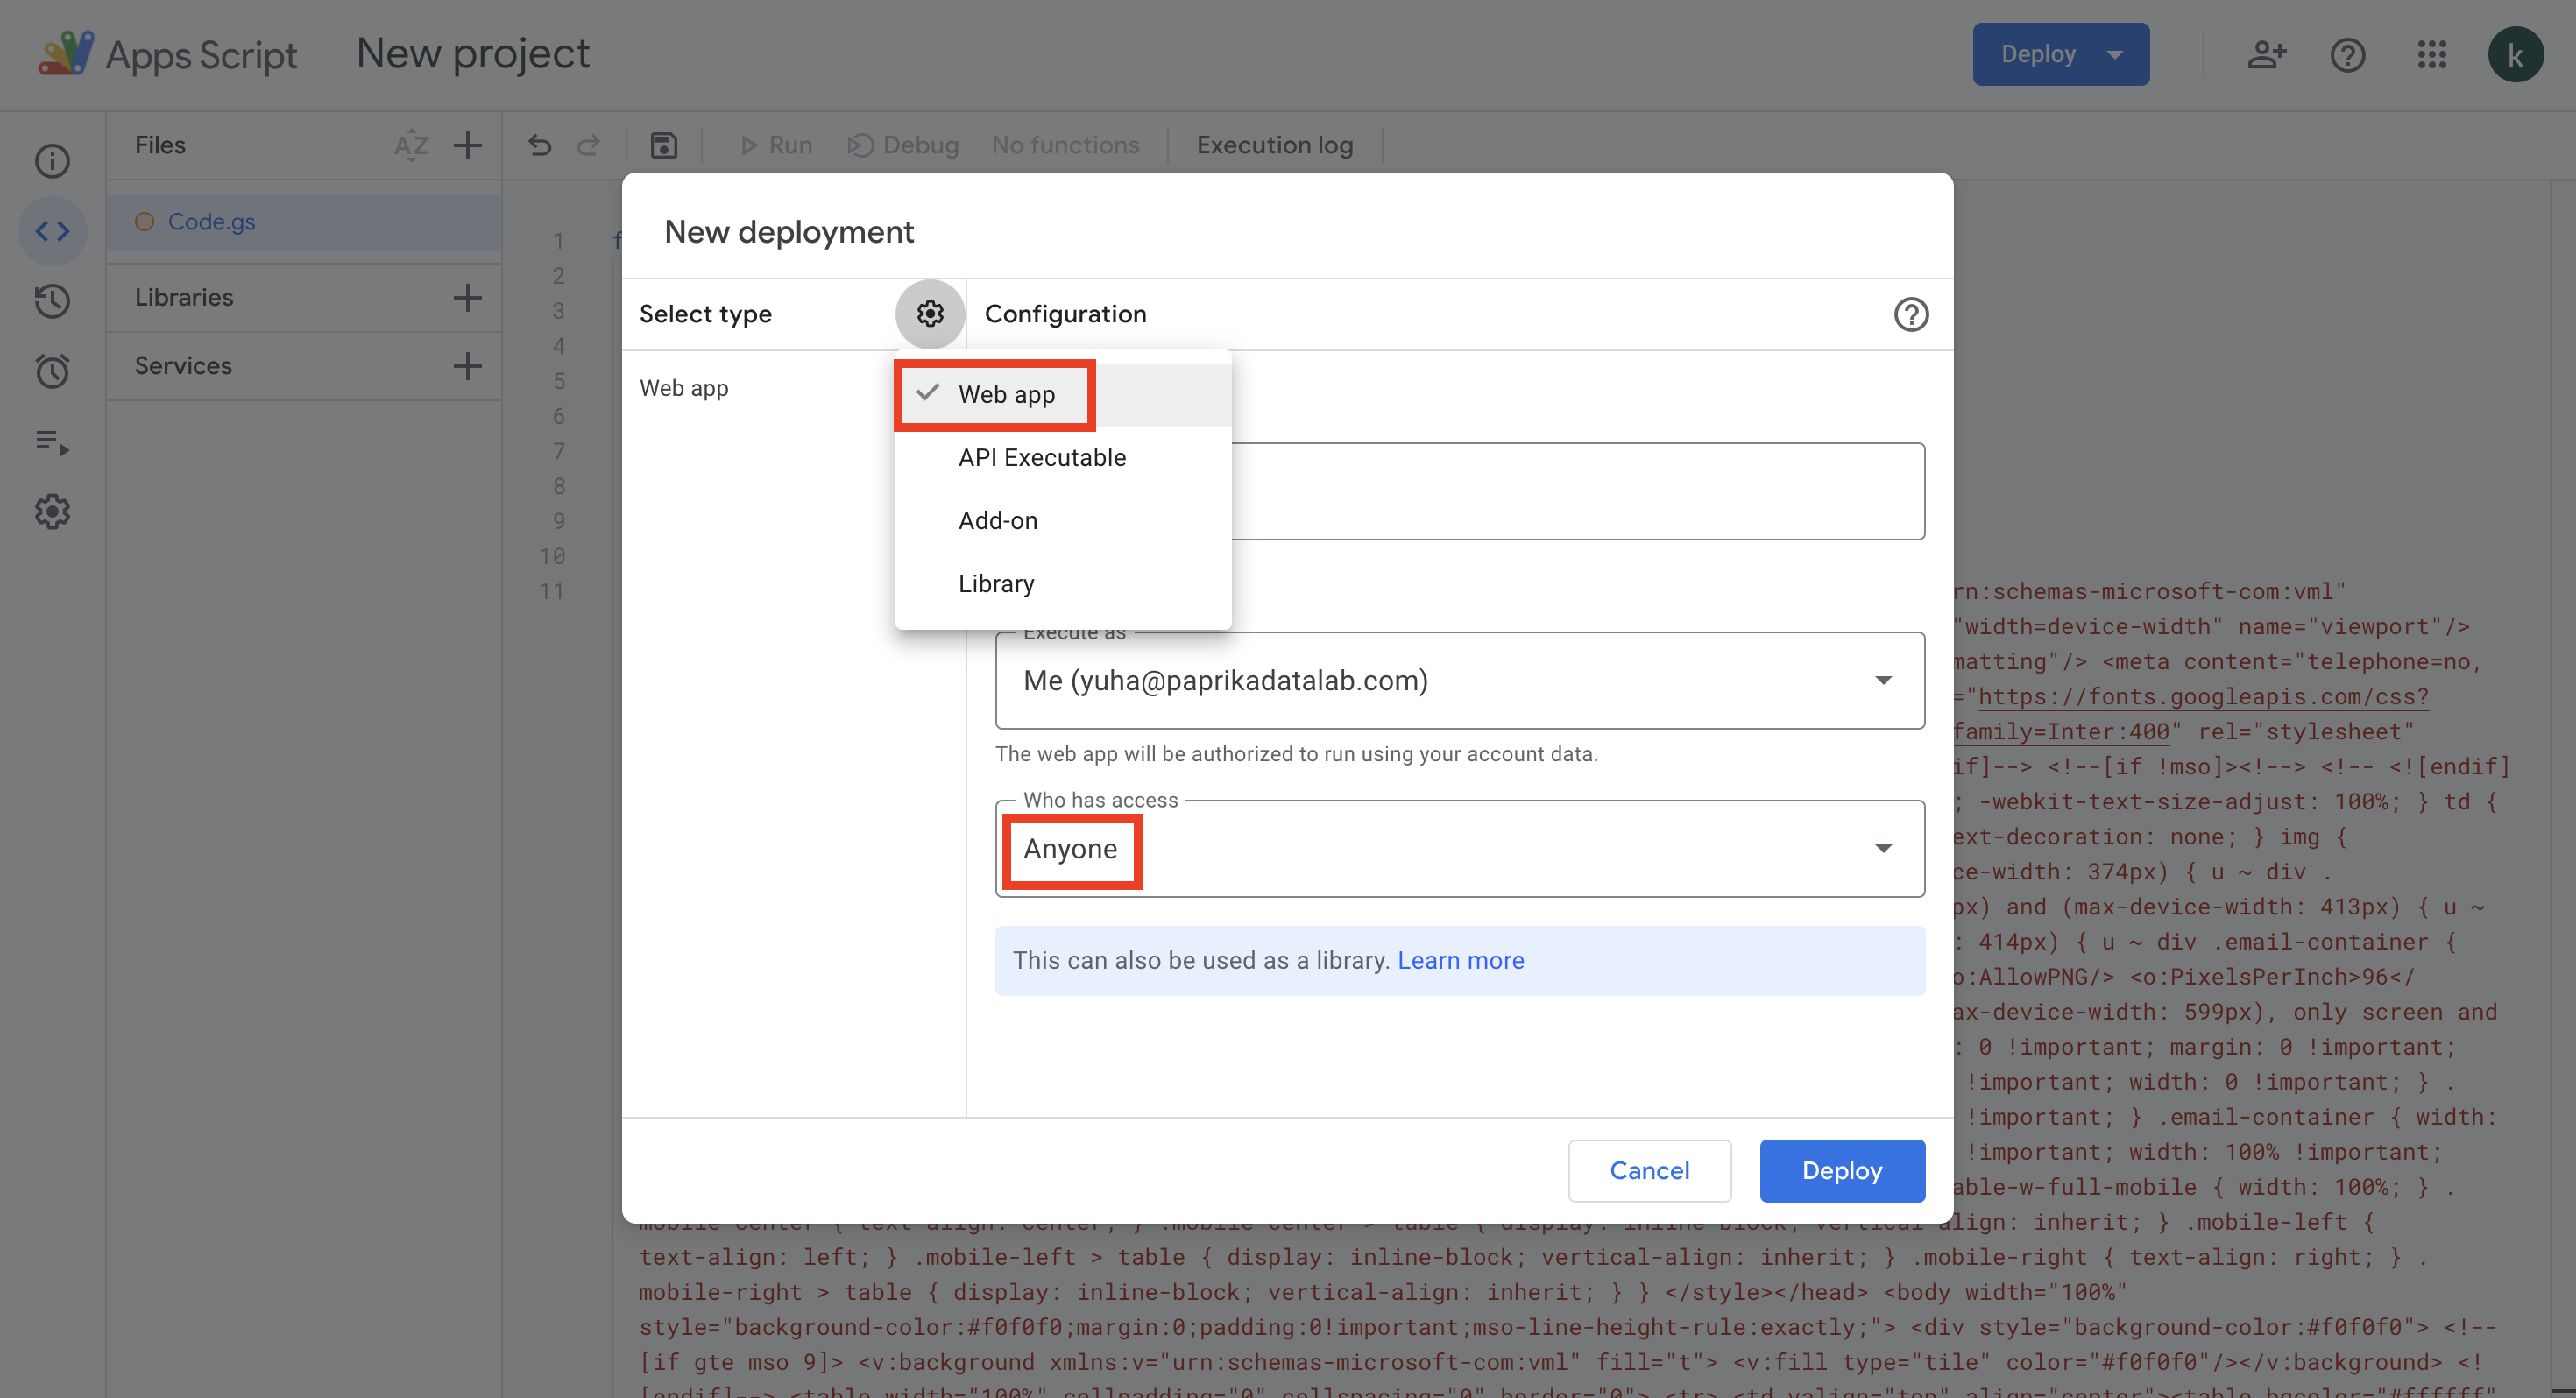
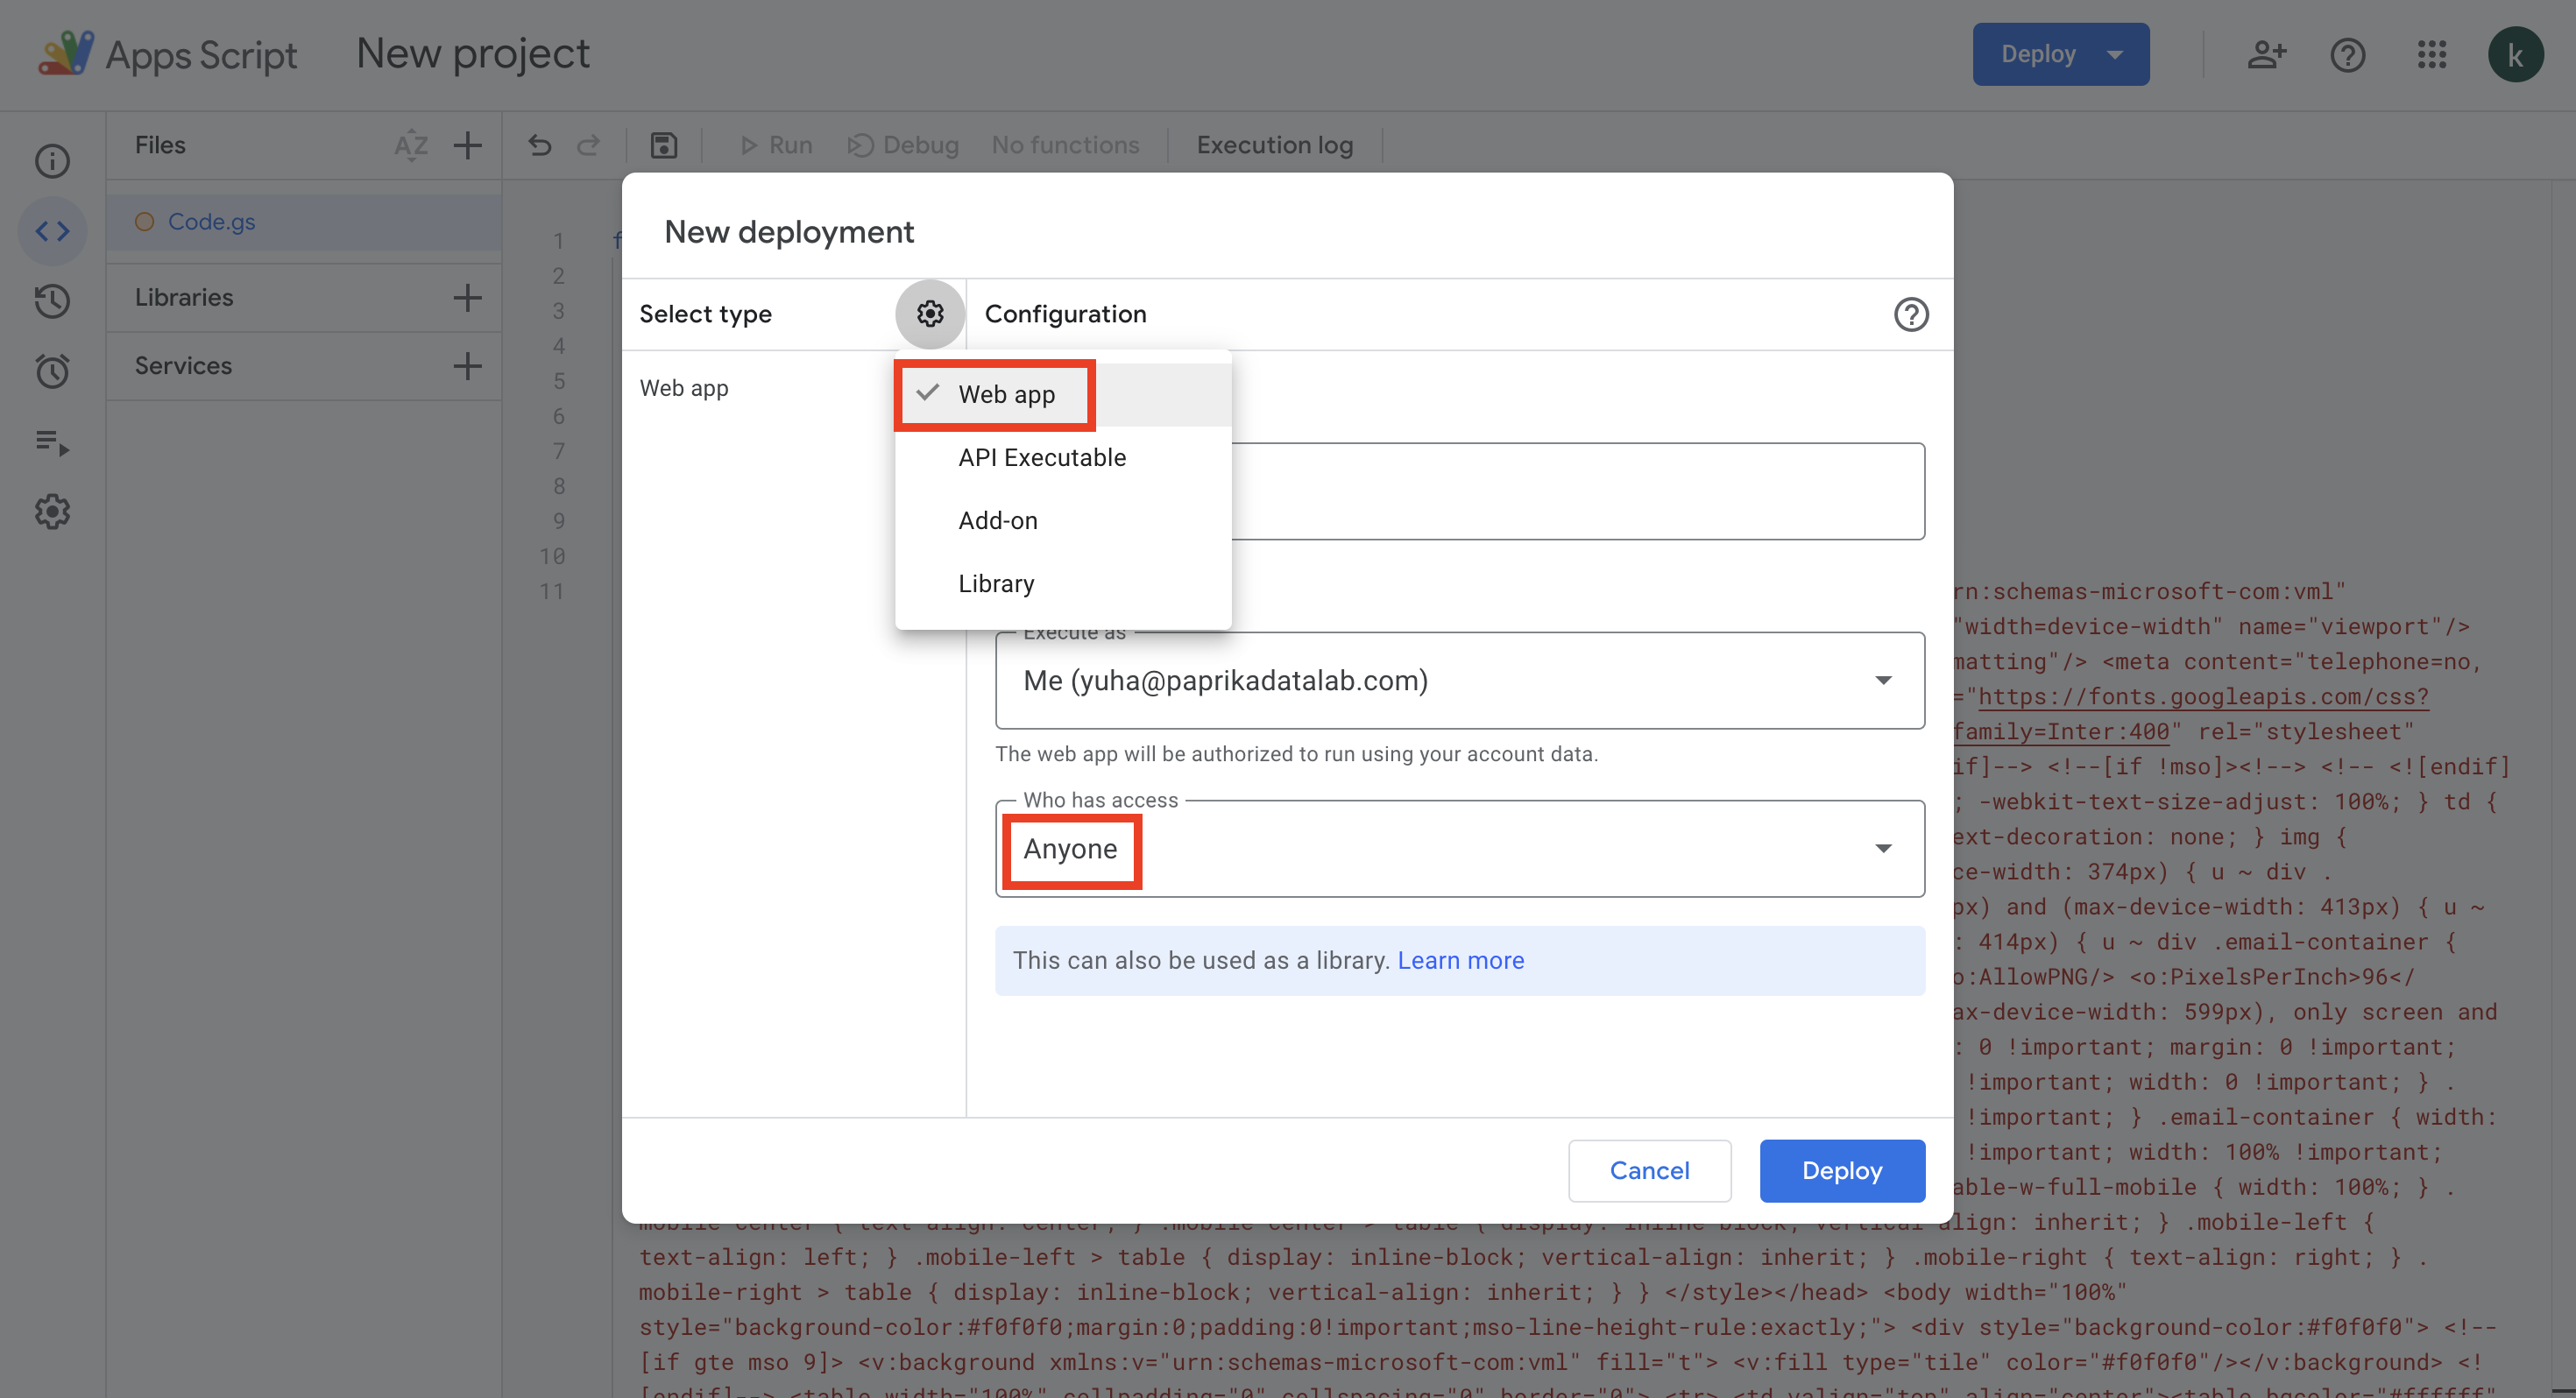
4. Set the type to 'Web App' and the user access to 'Anyone'.
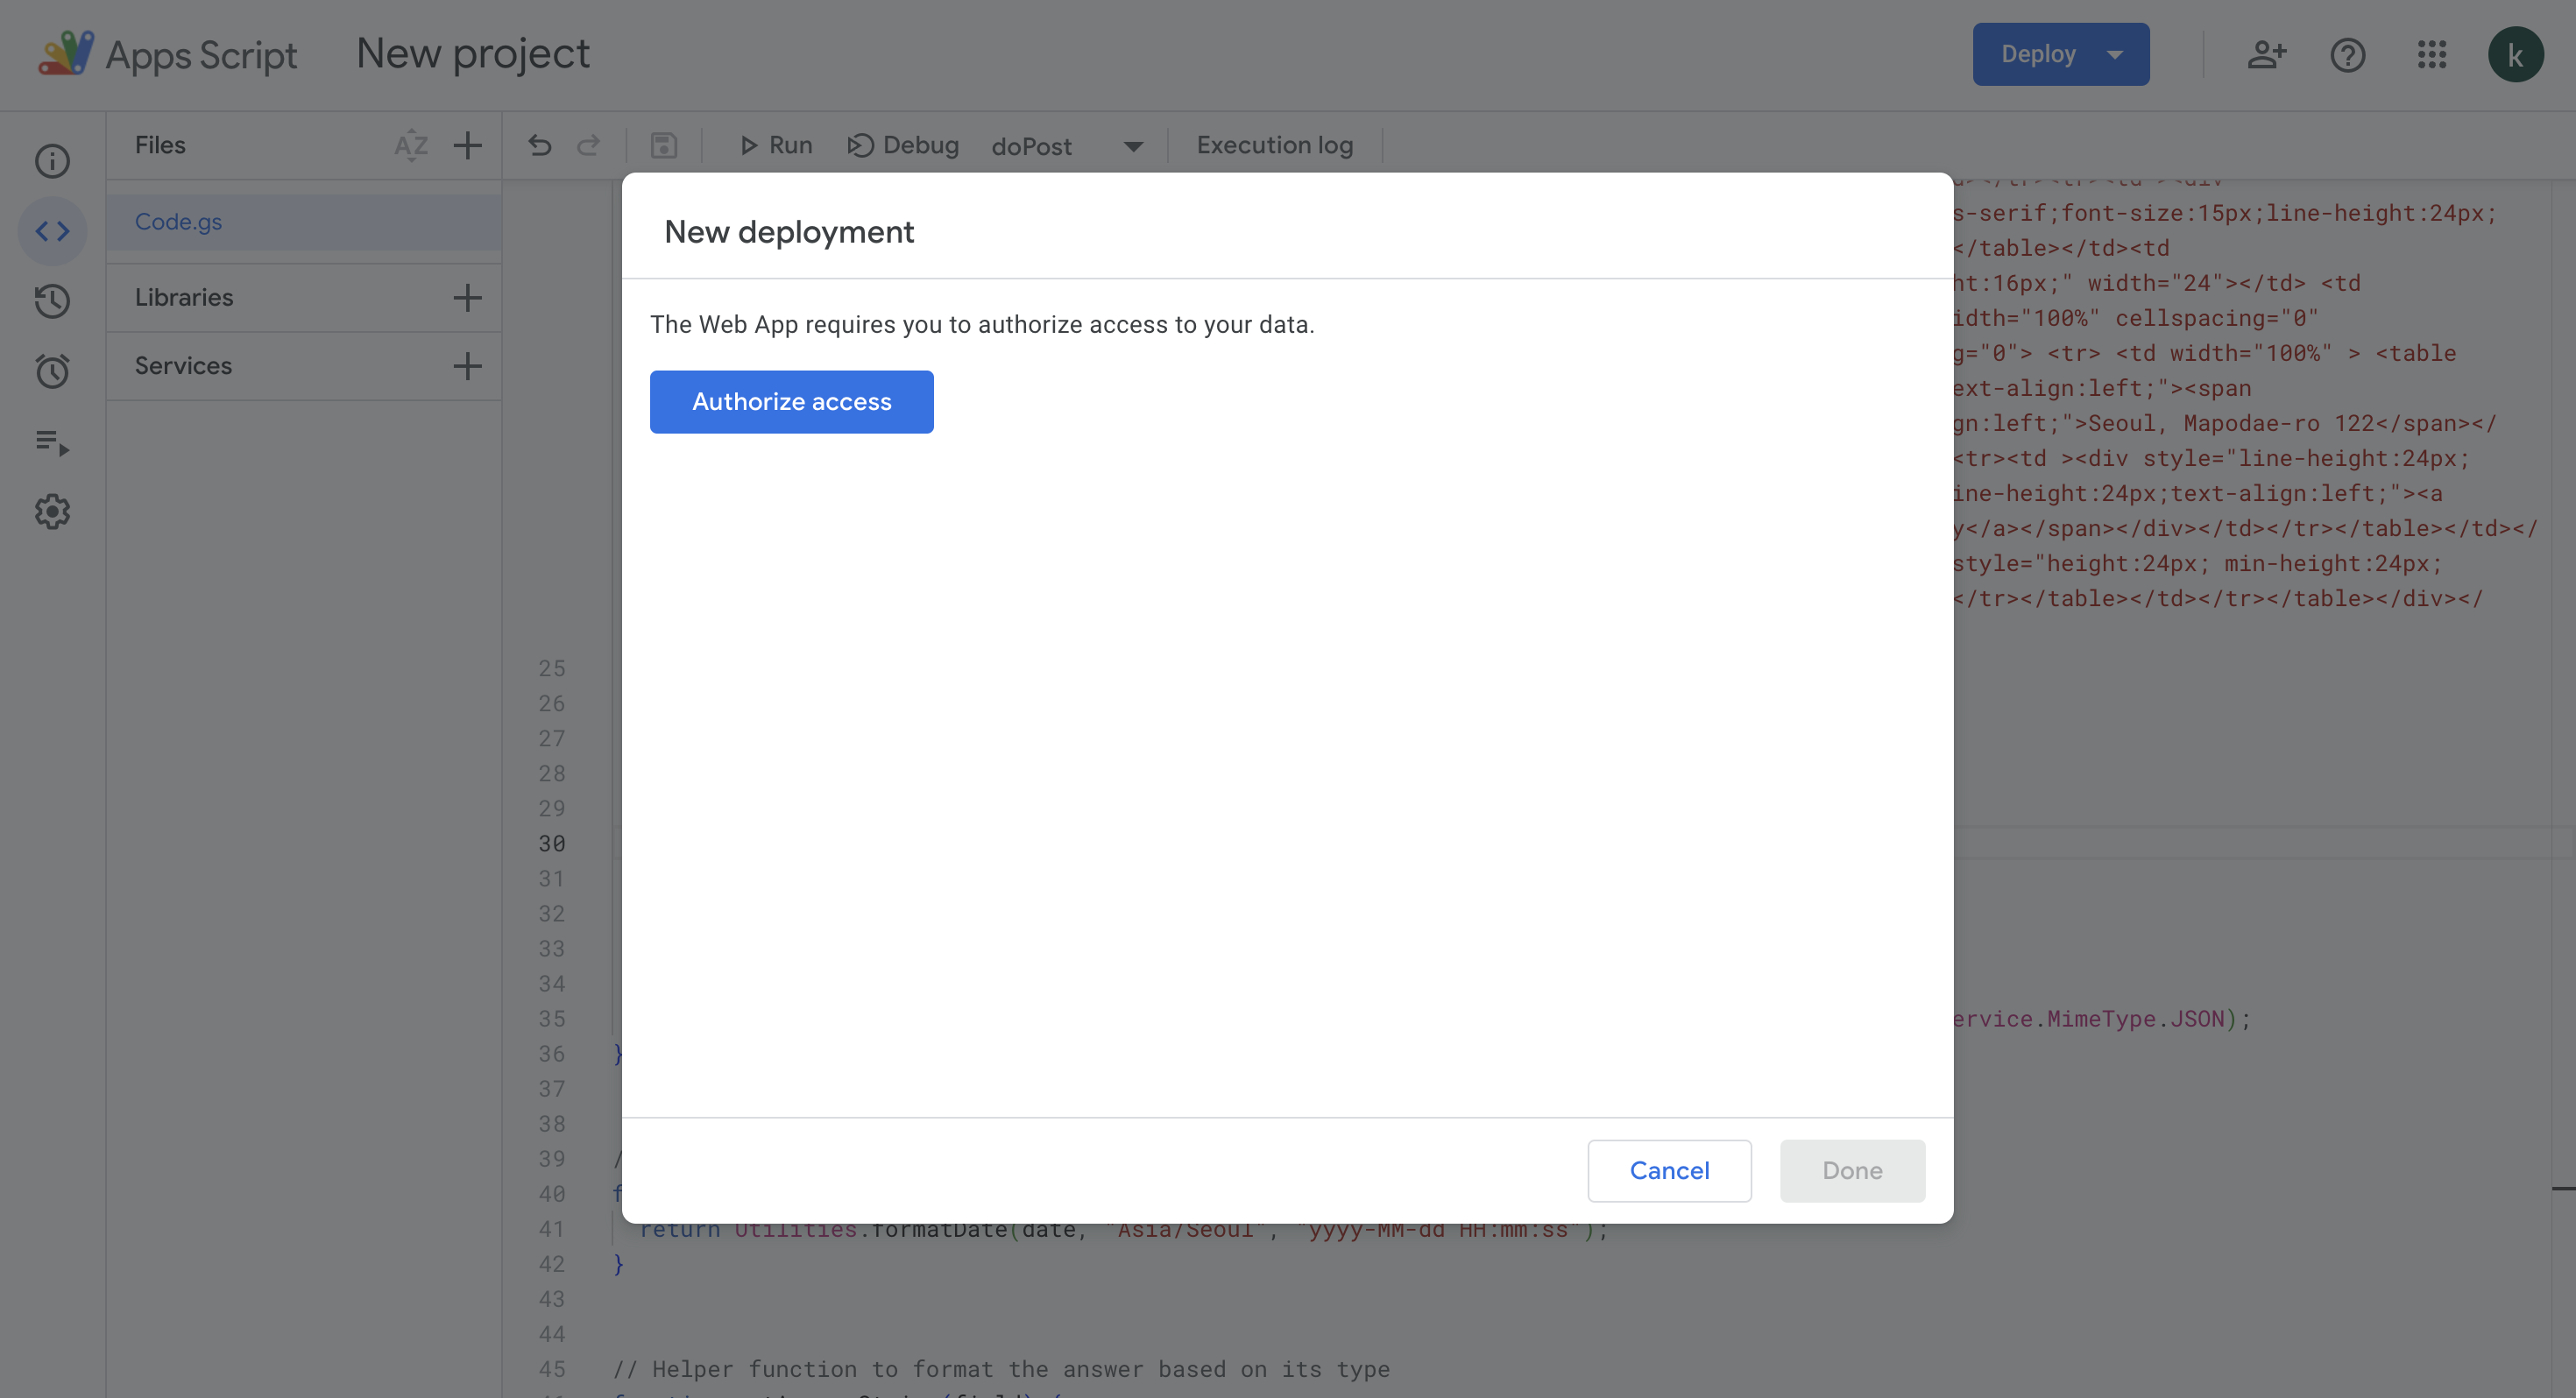
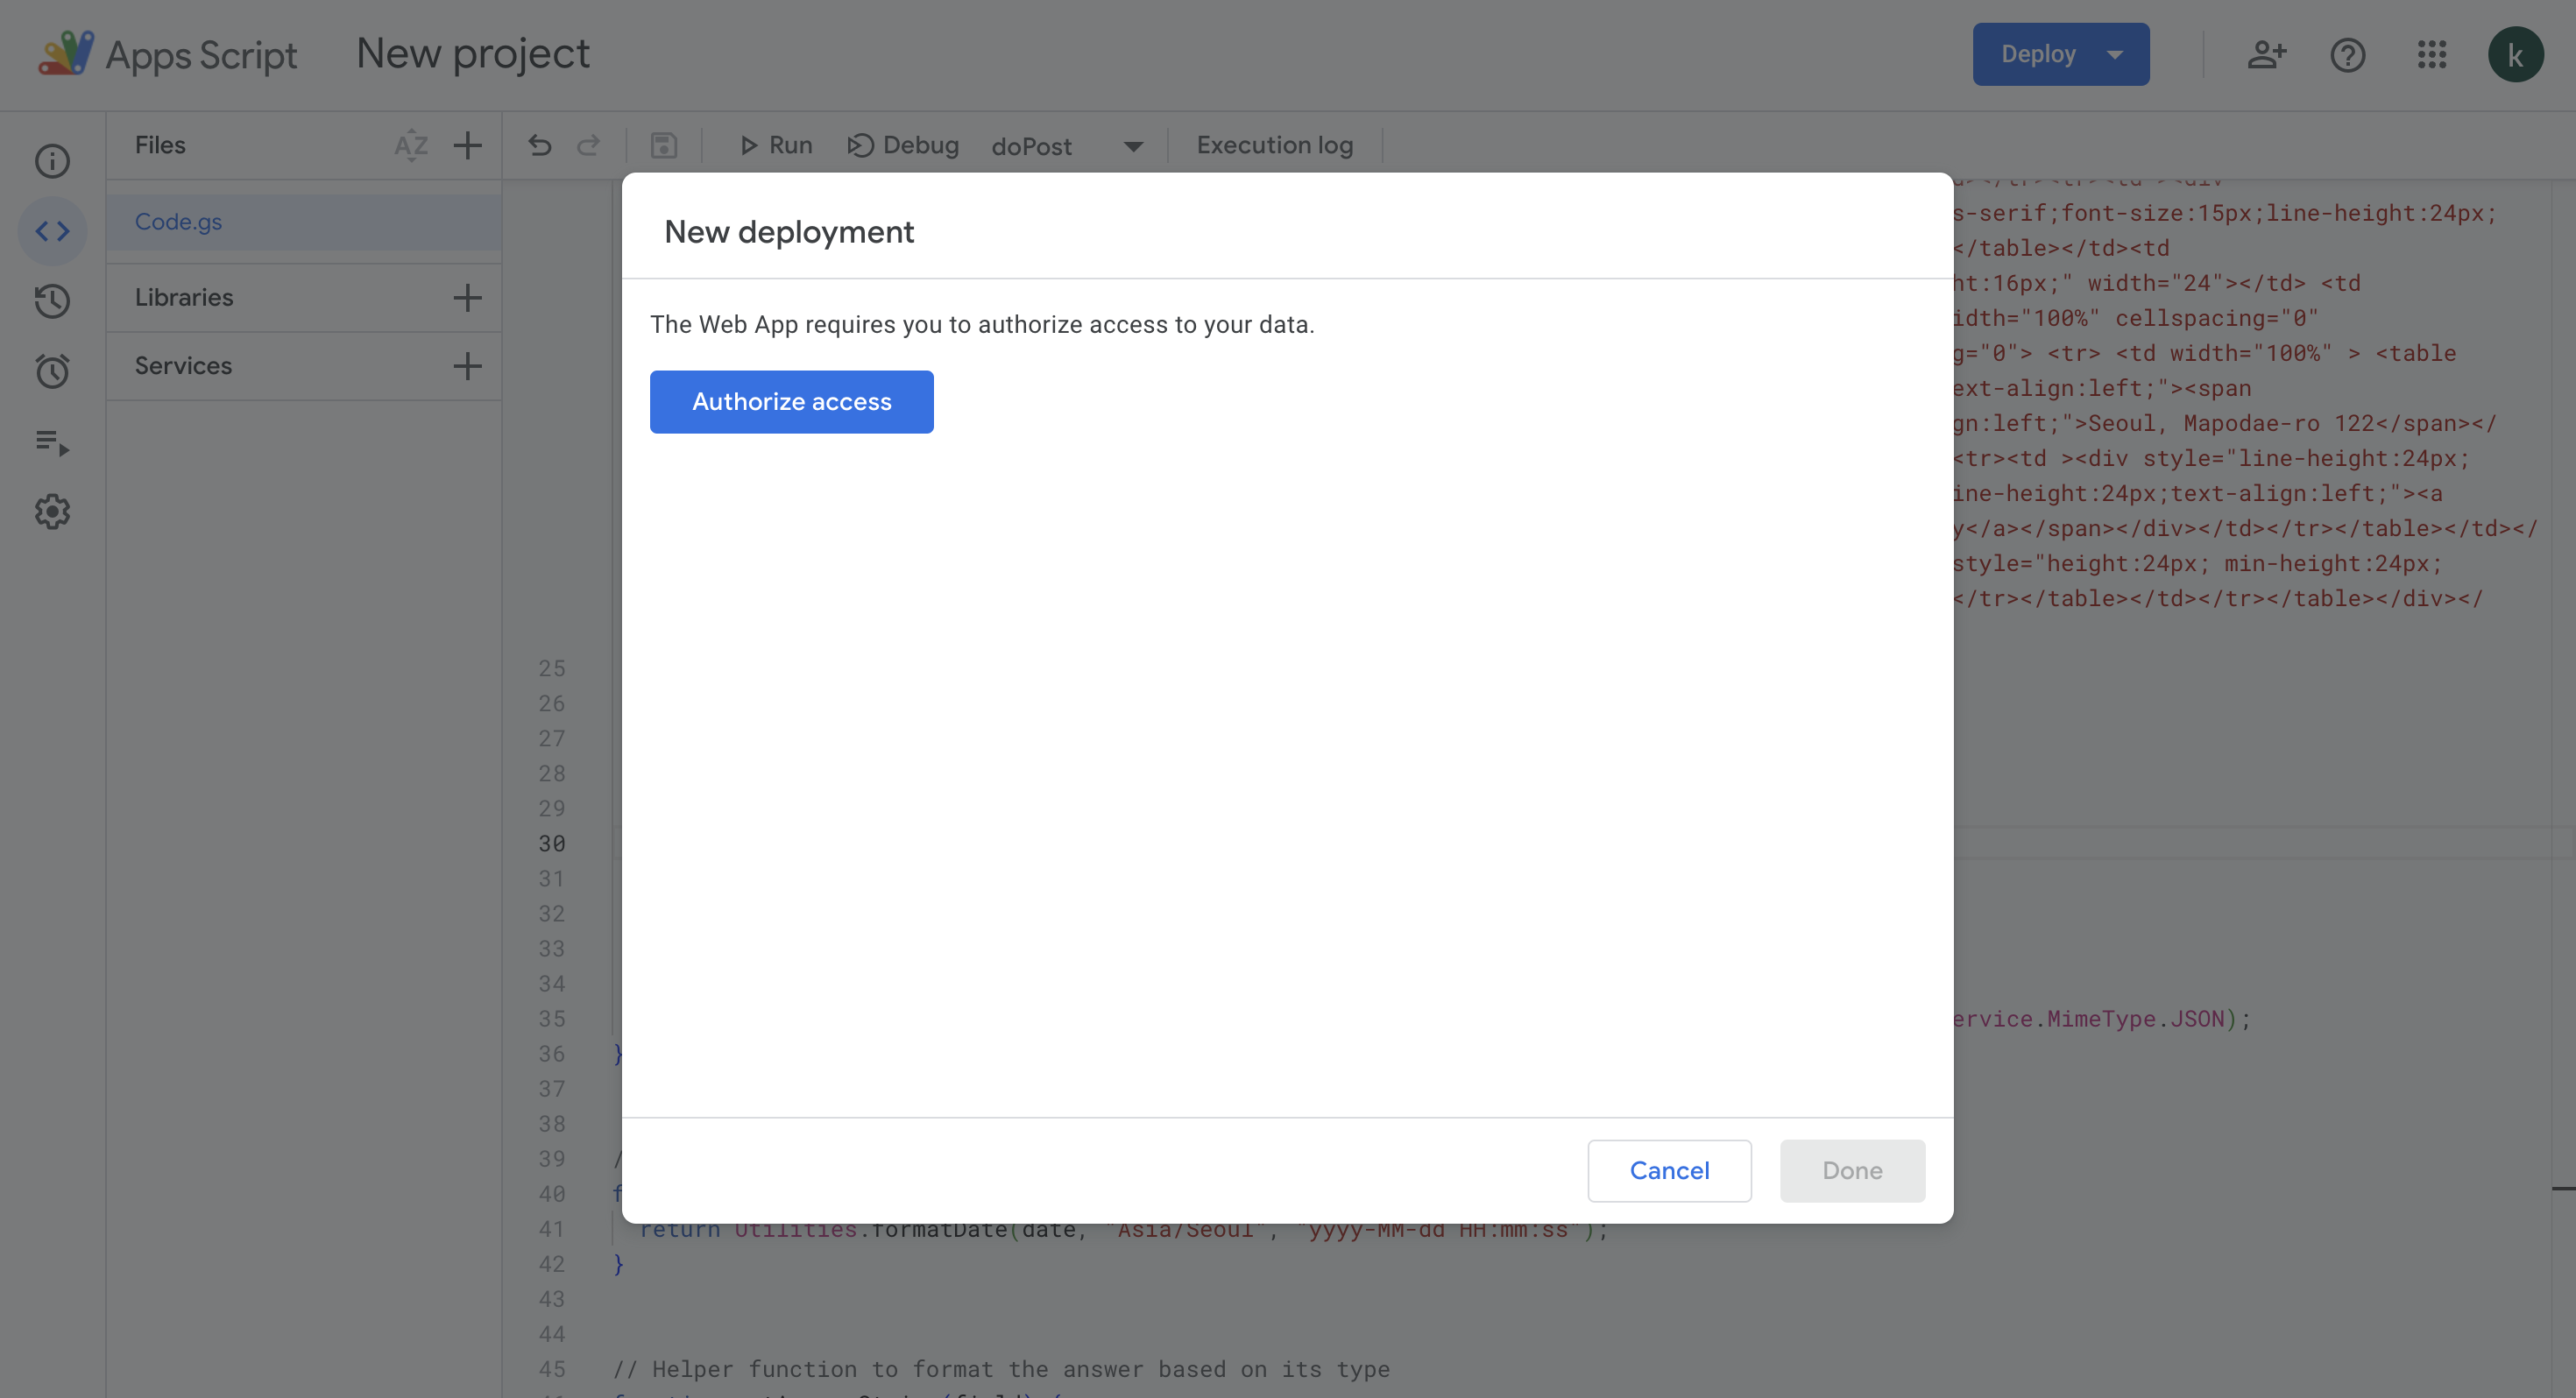
5. Authorize access.
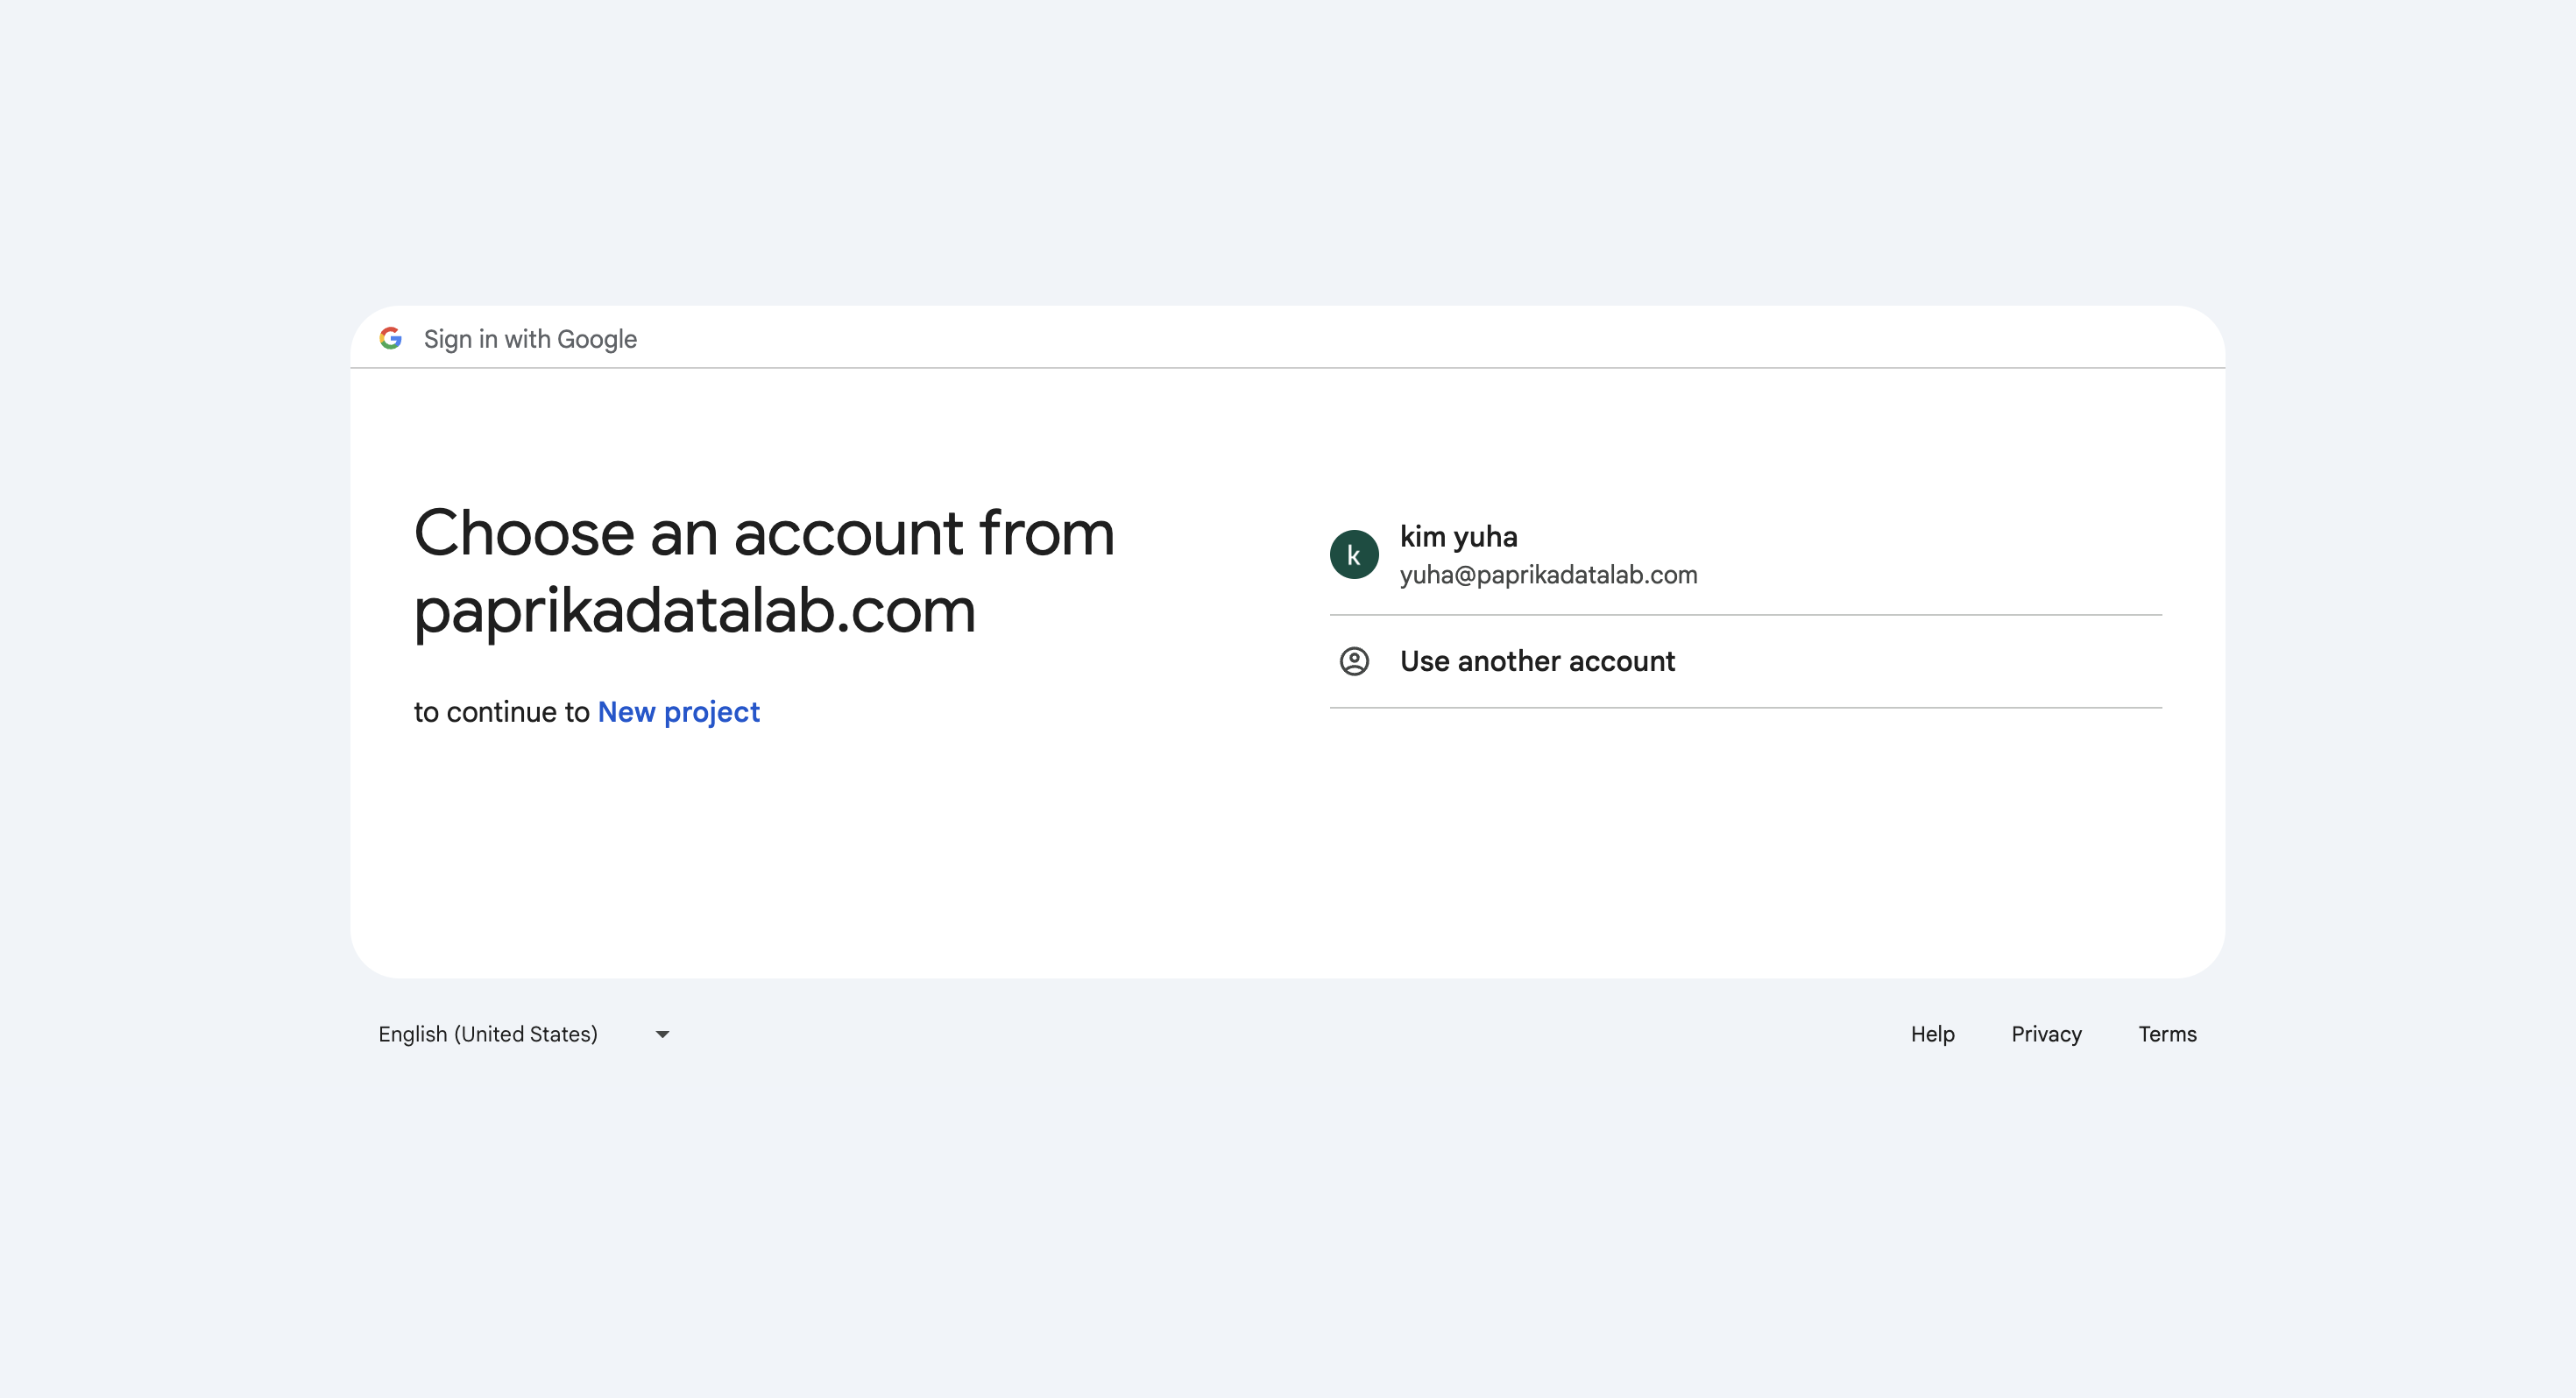
6. Select the email address to be the sender.
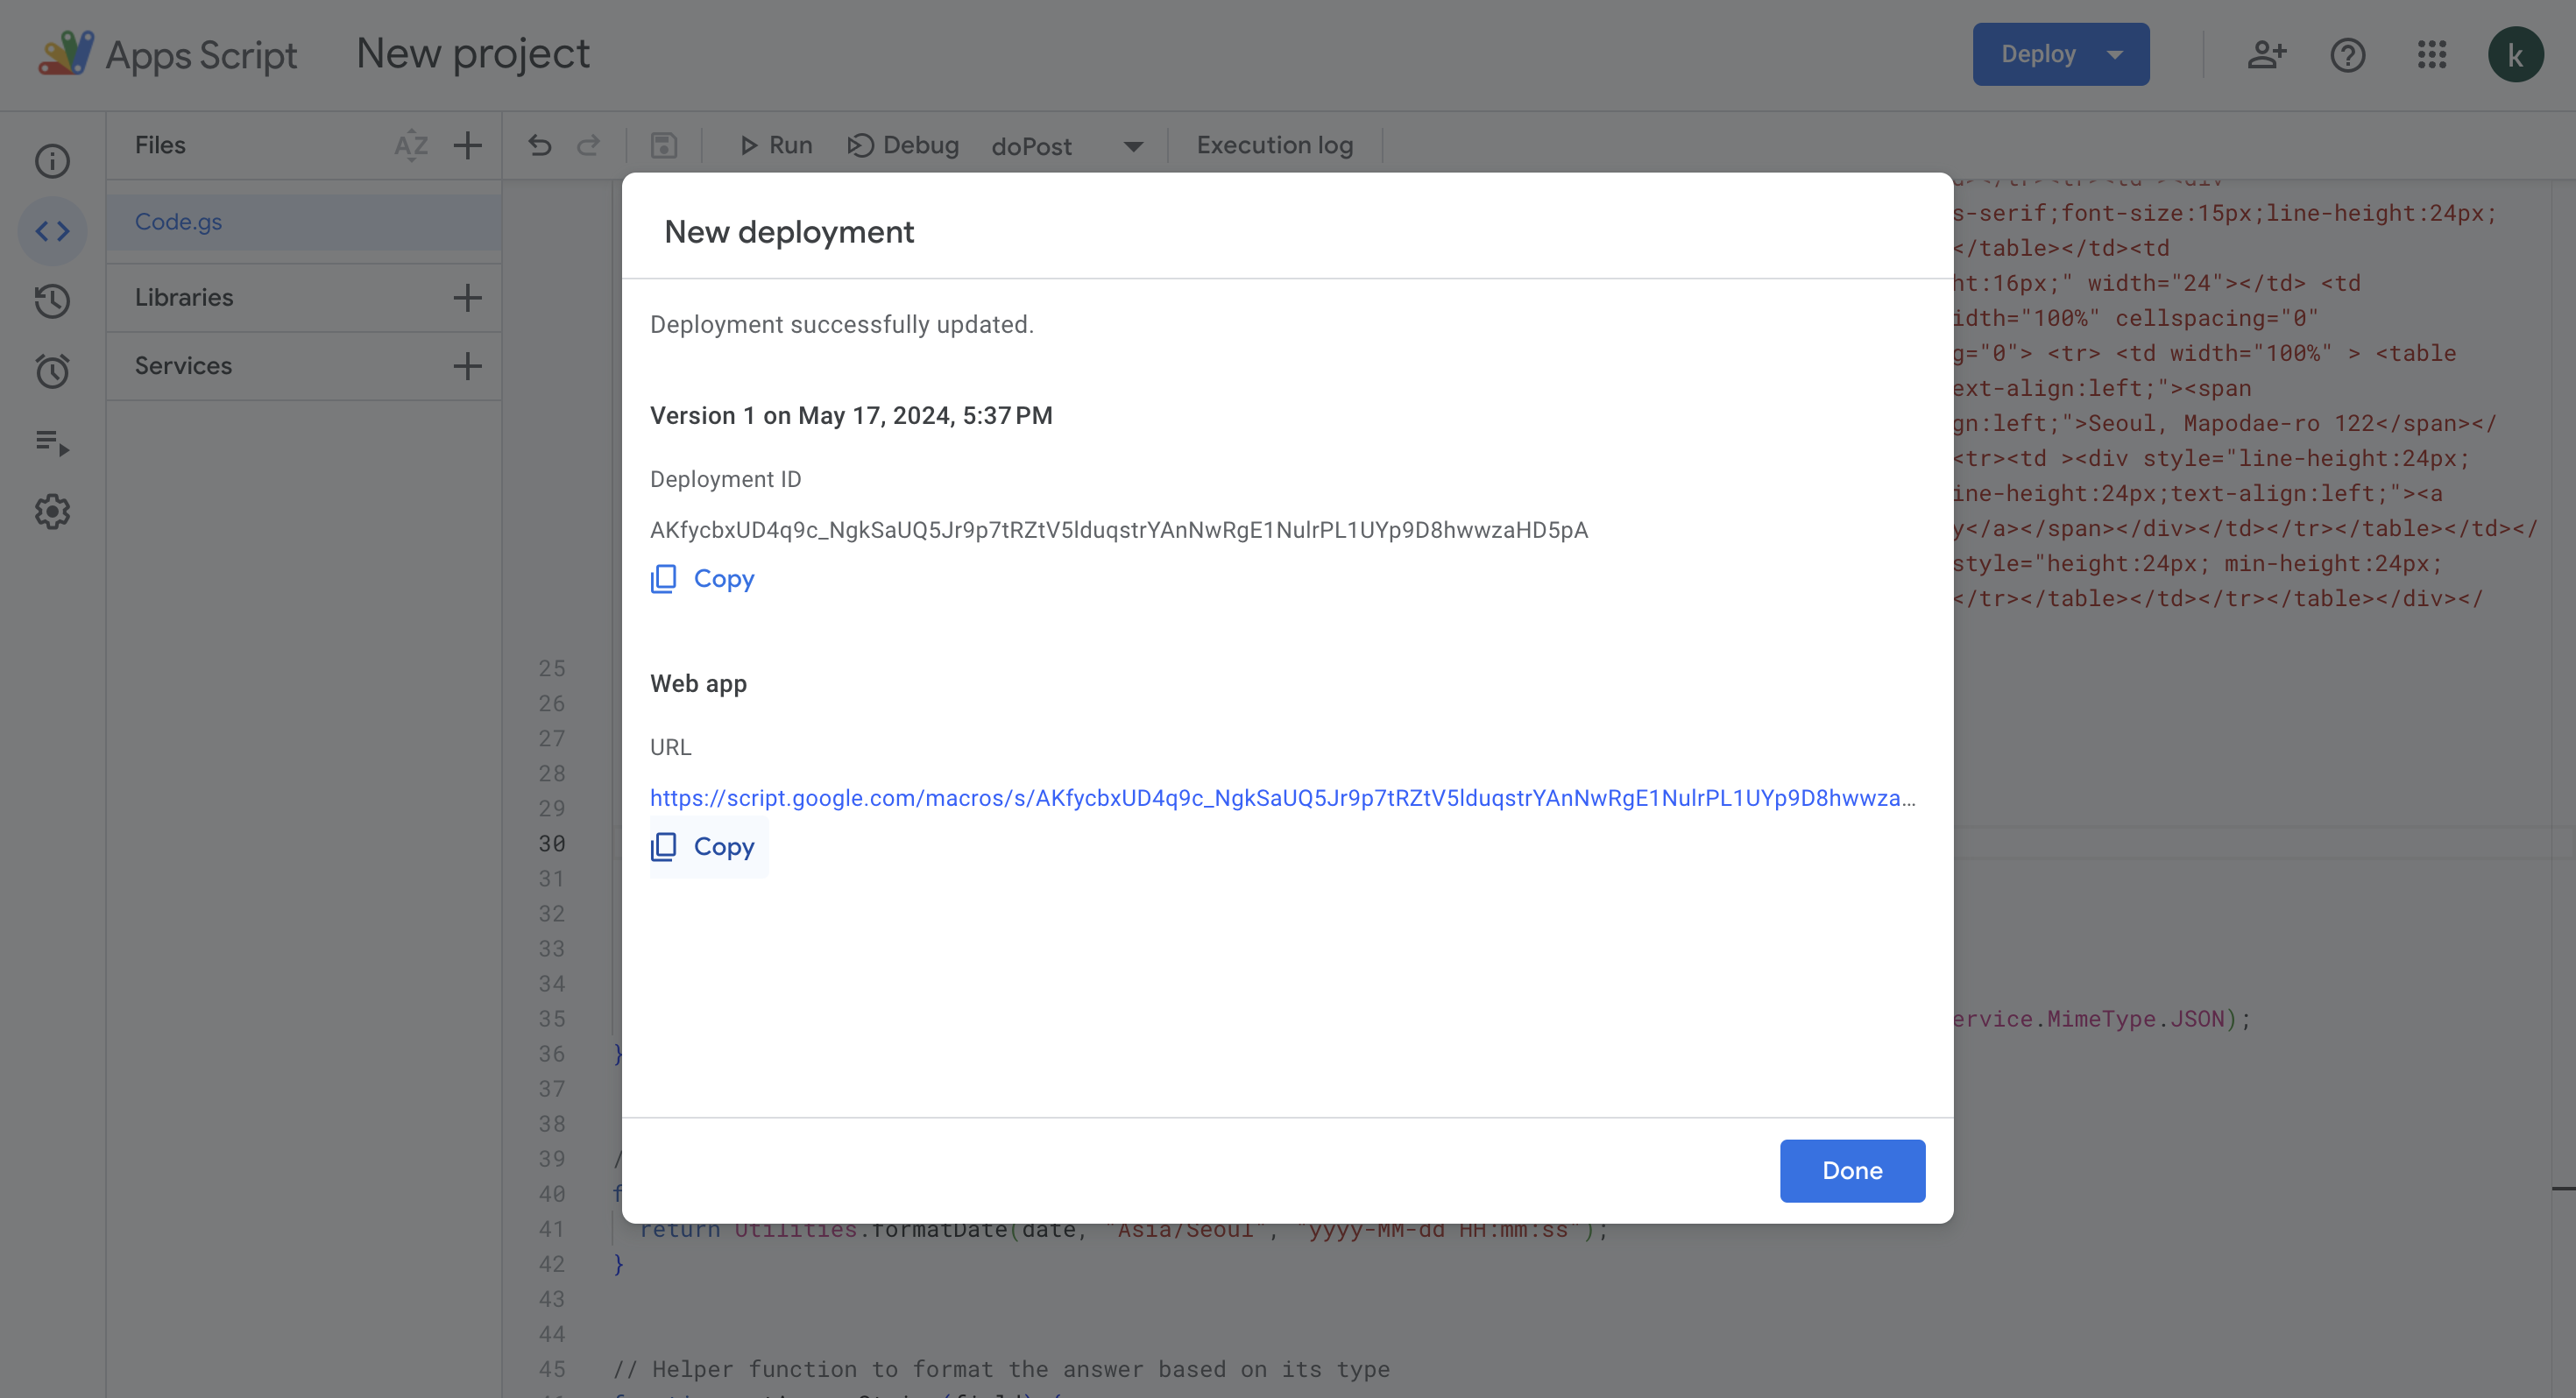
7. Copy the 'URL'.
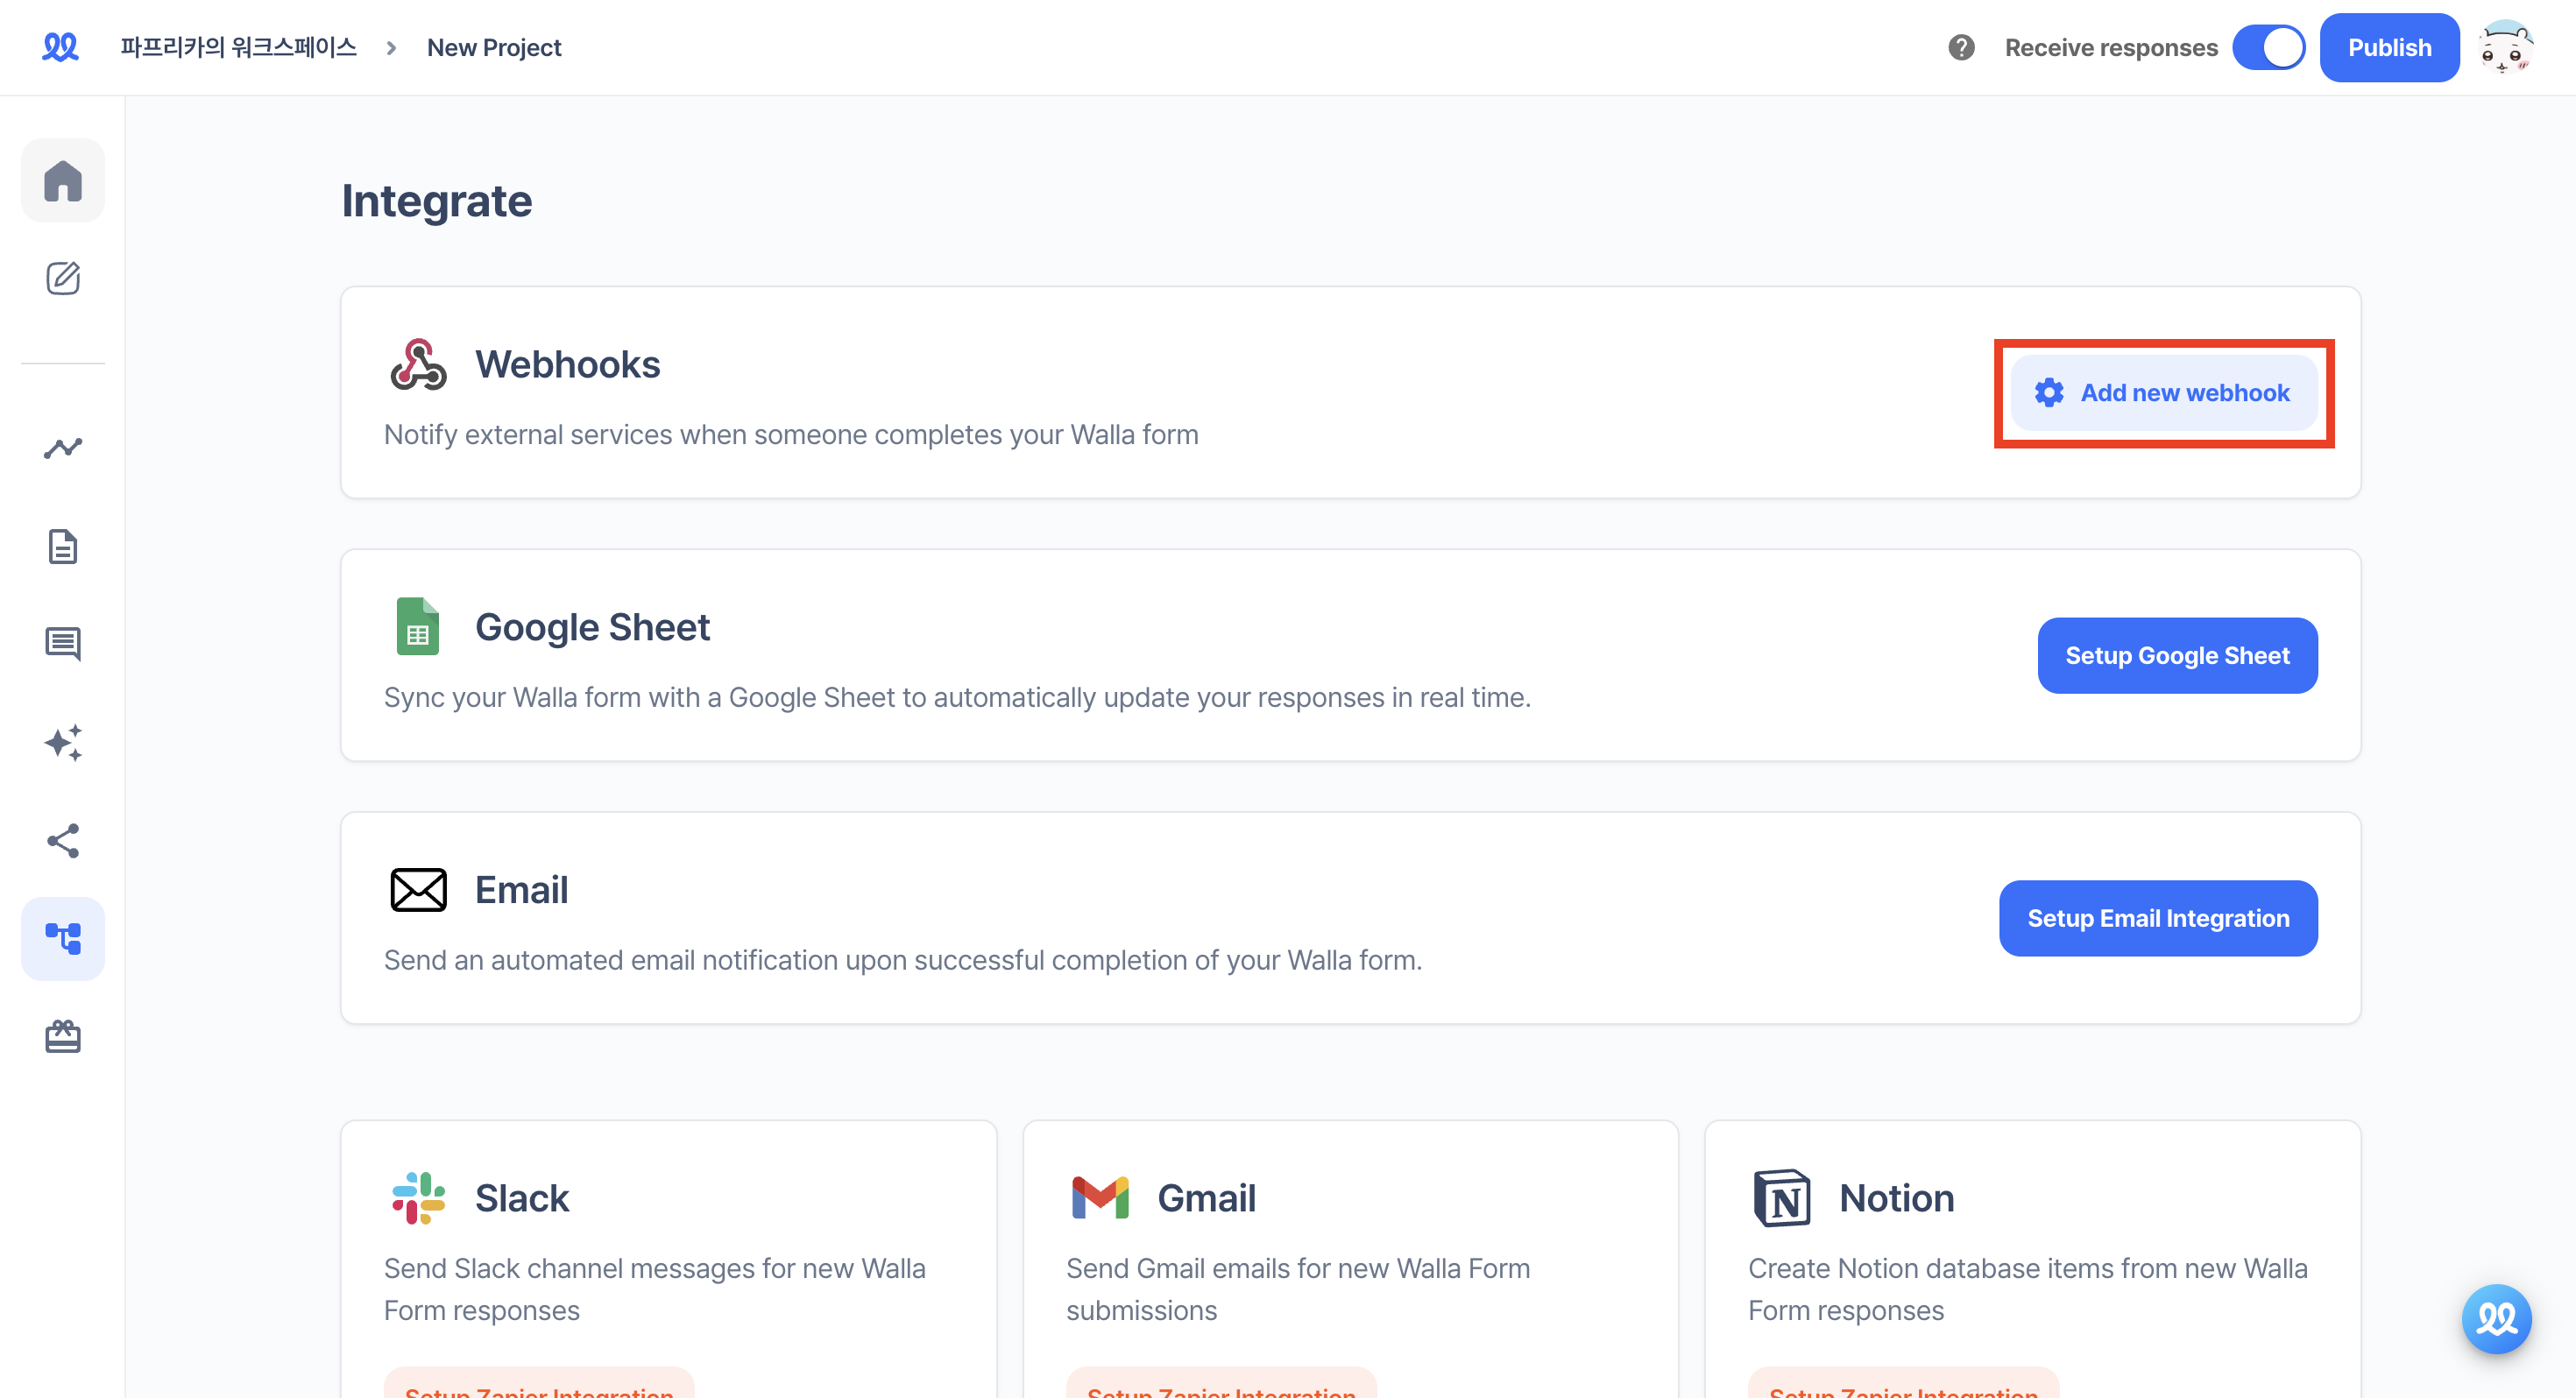
8. Go to the 'Integrate' tab in Walla and click 'Add new webhook'.
9. Paste the URL and add the webhook.
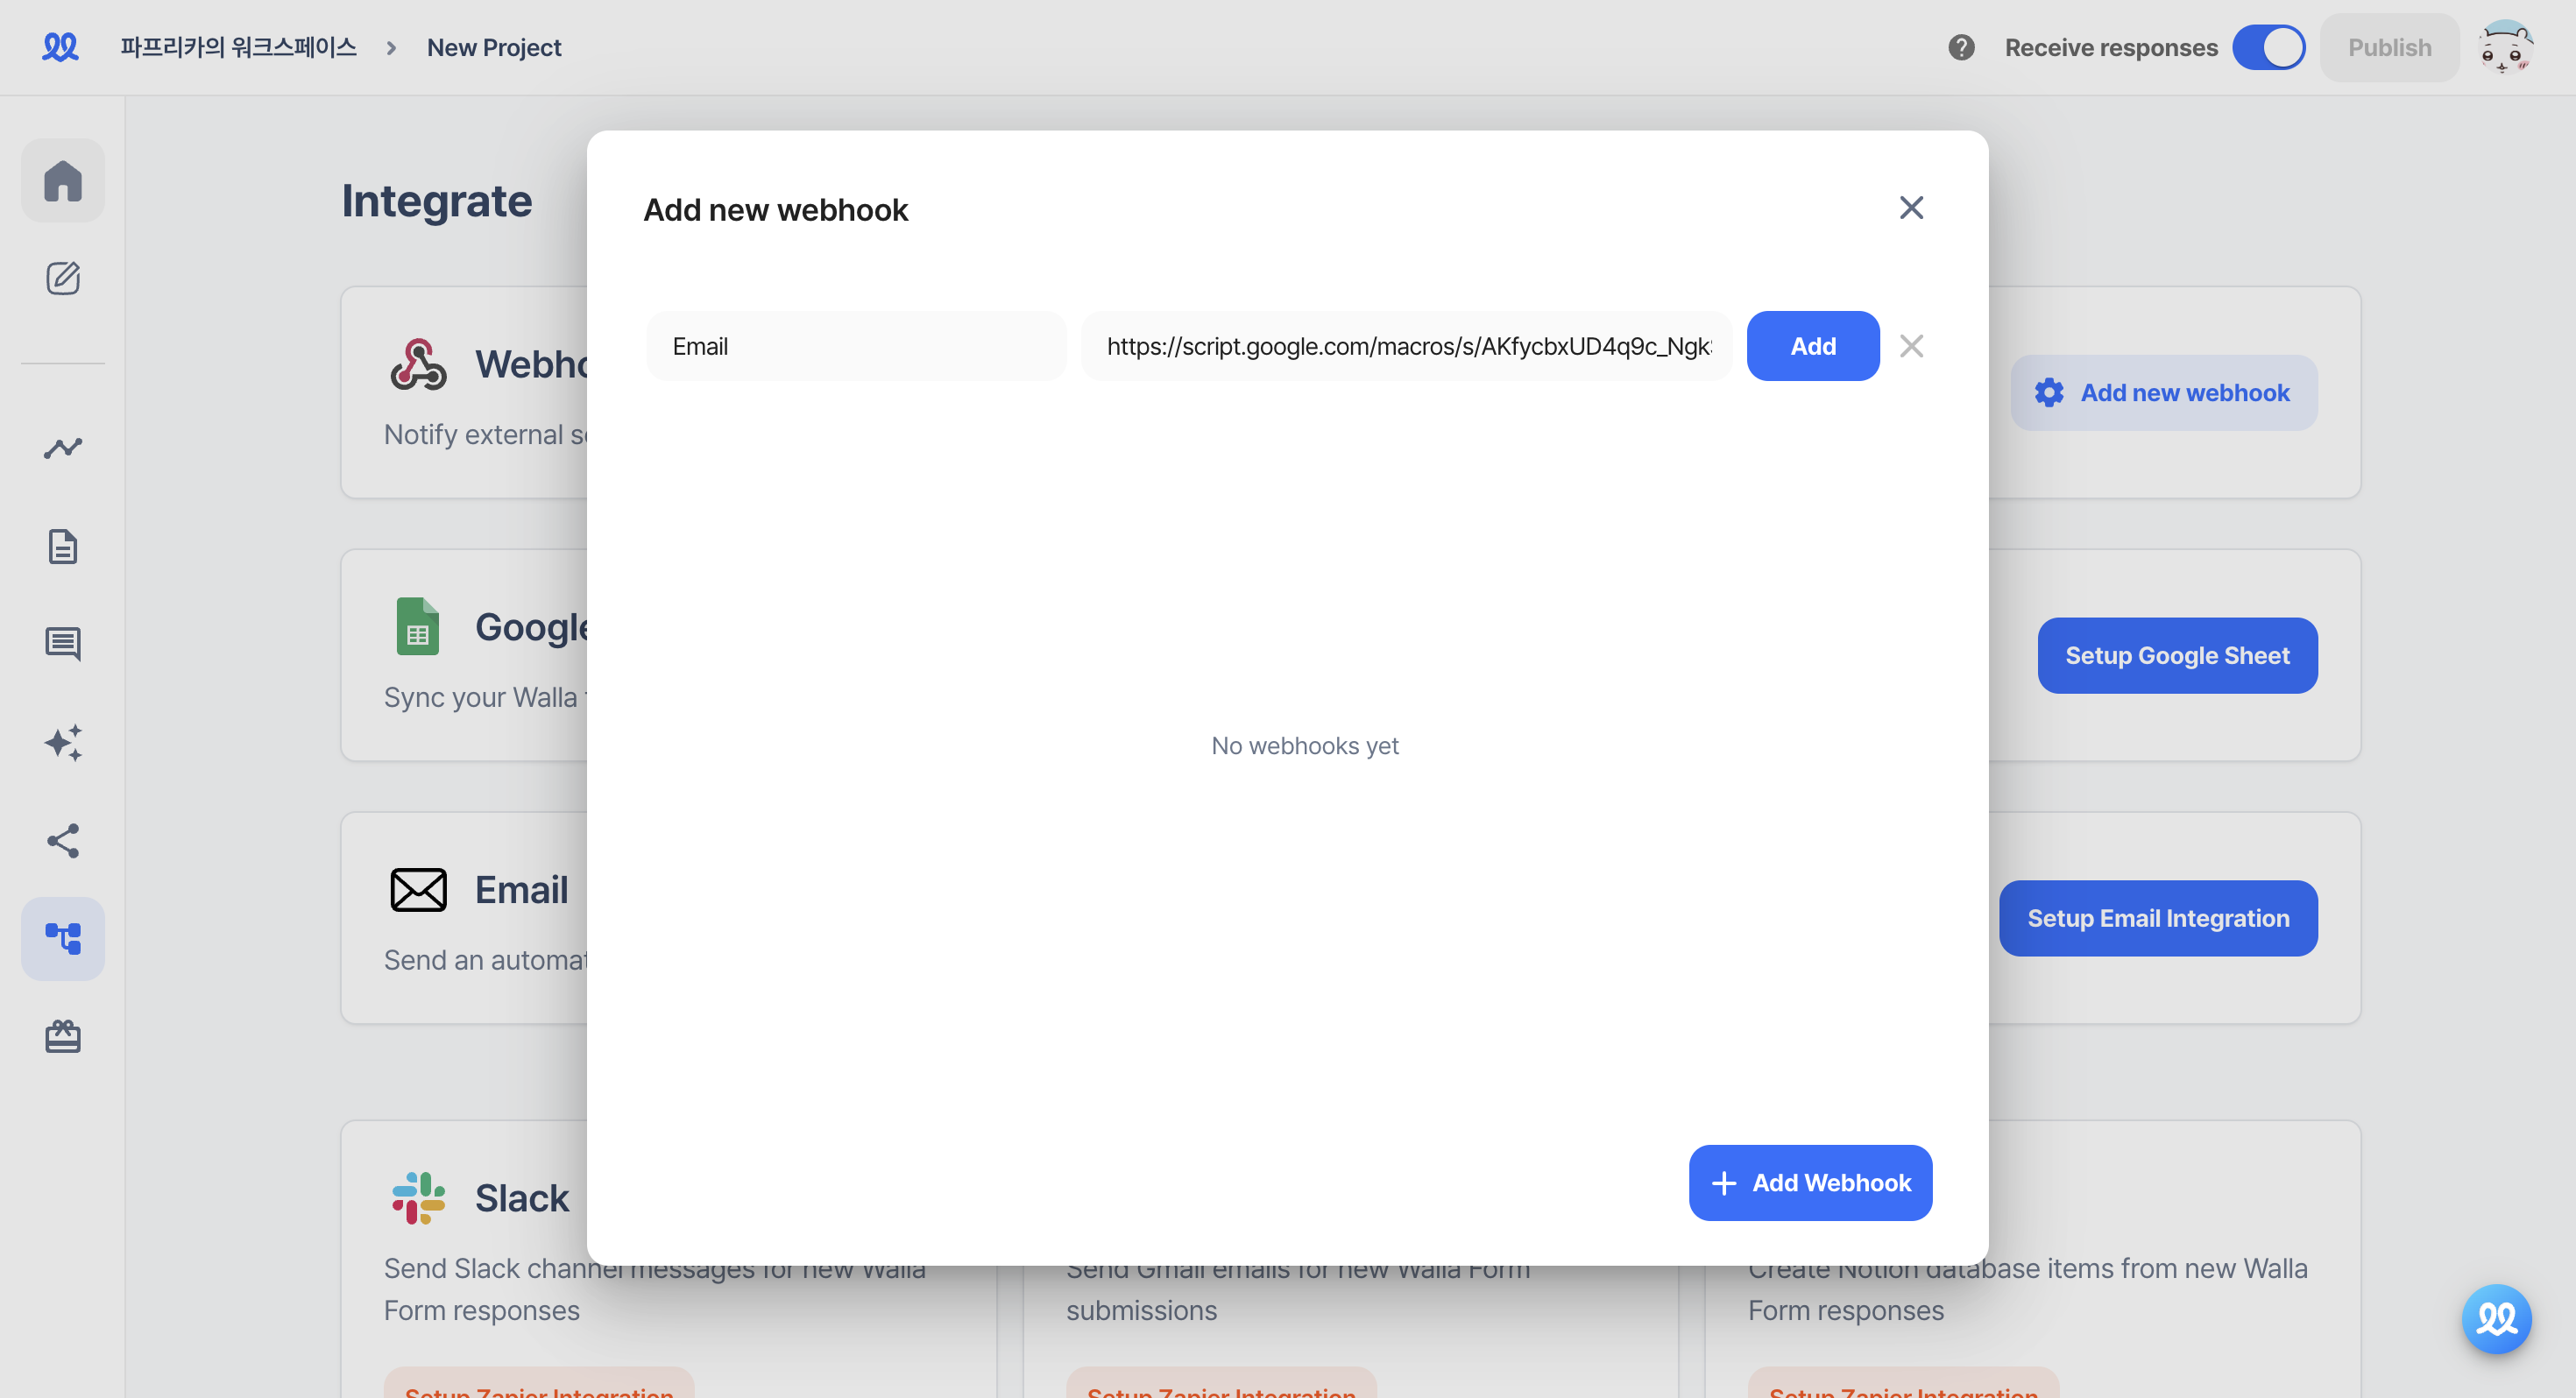
10. Save the changes and activate it in 'Add new webhook'.
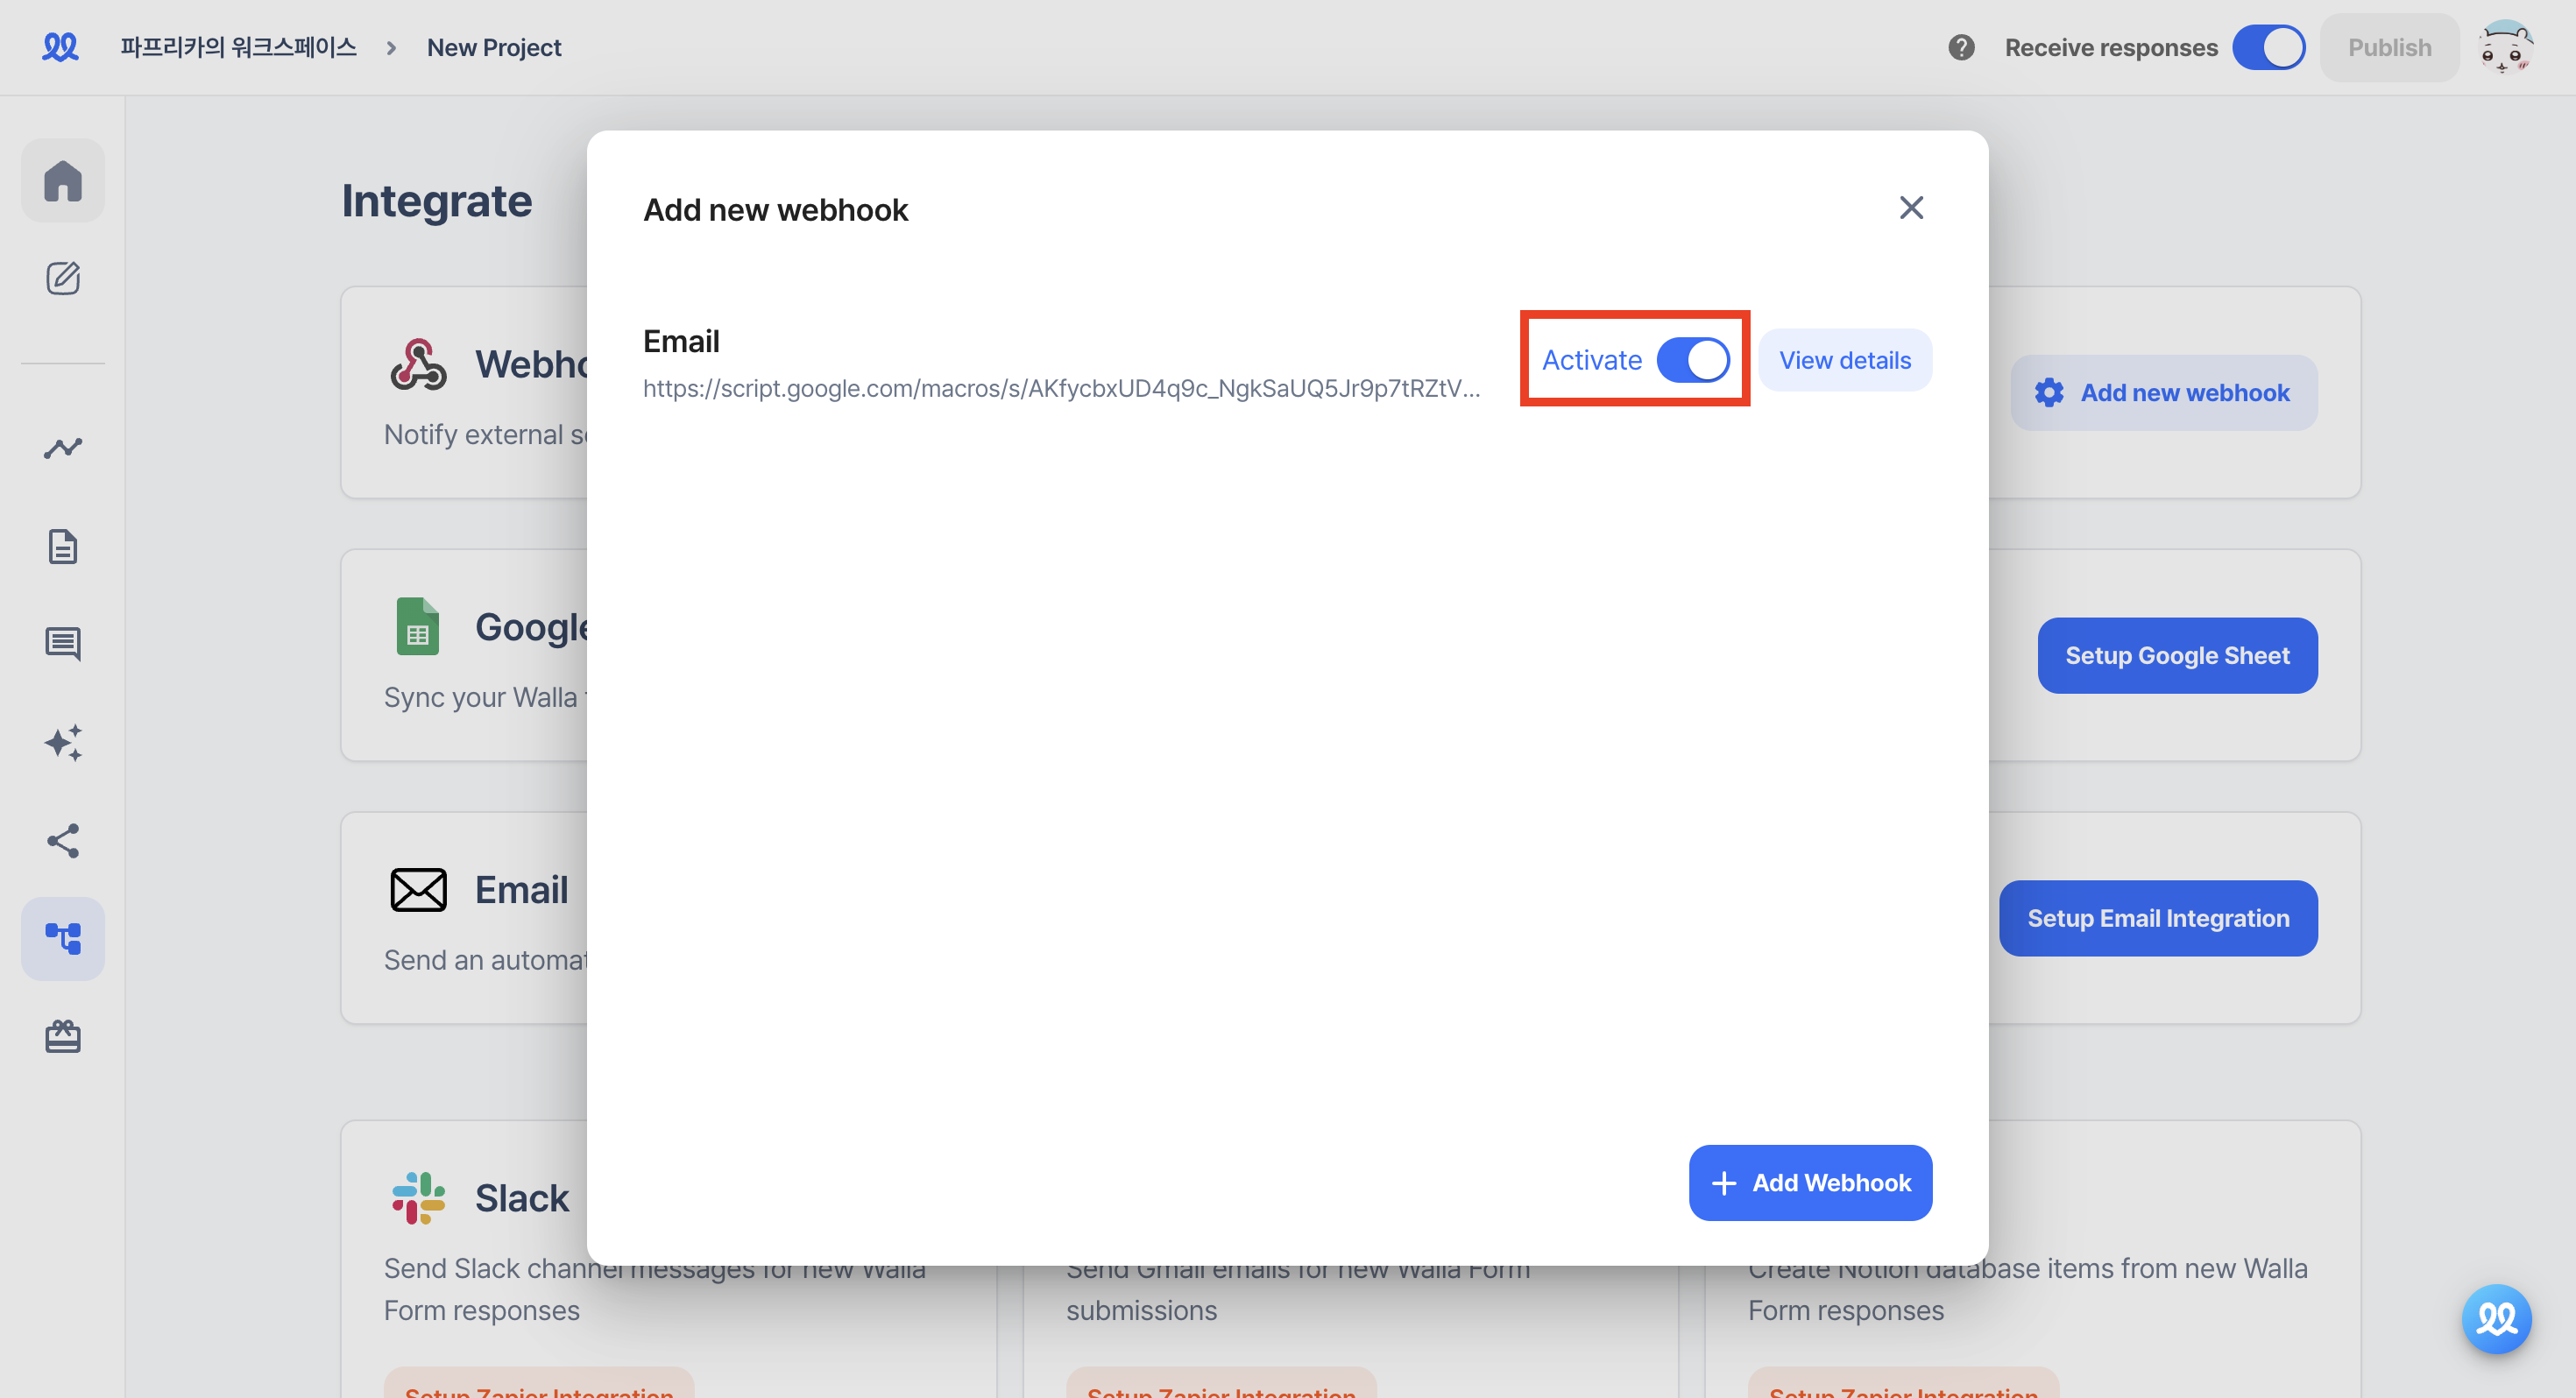
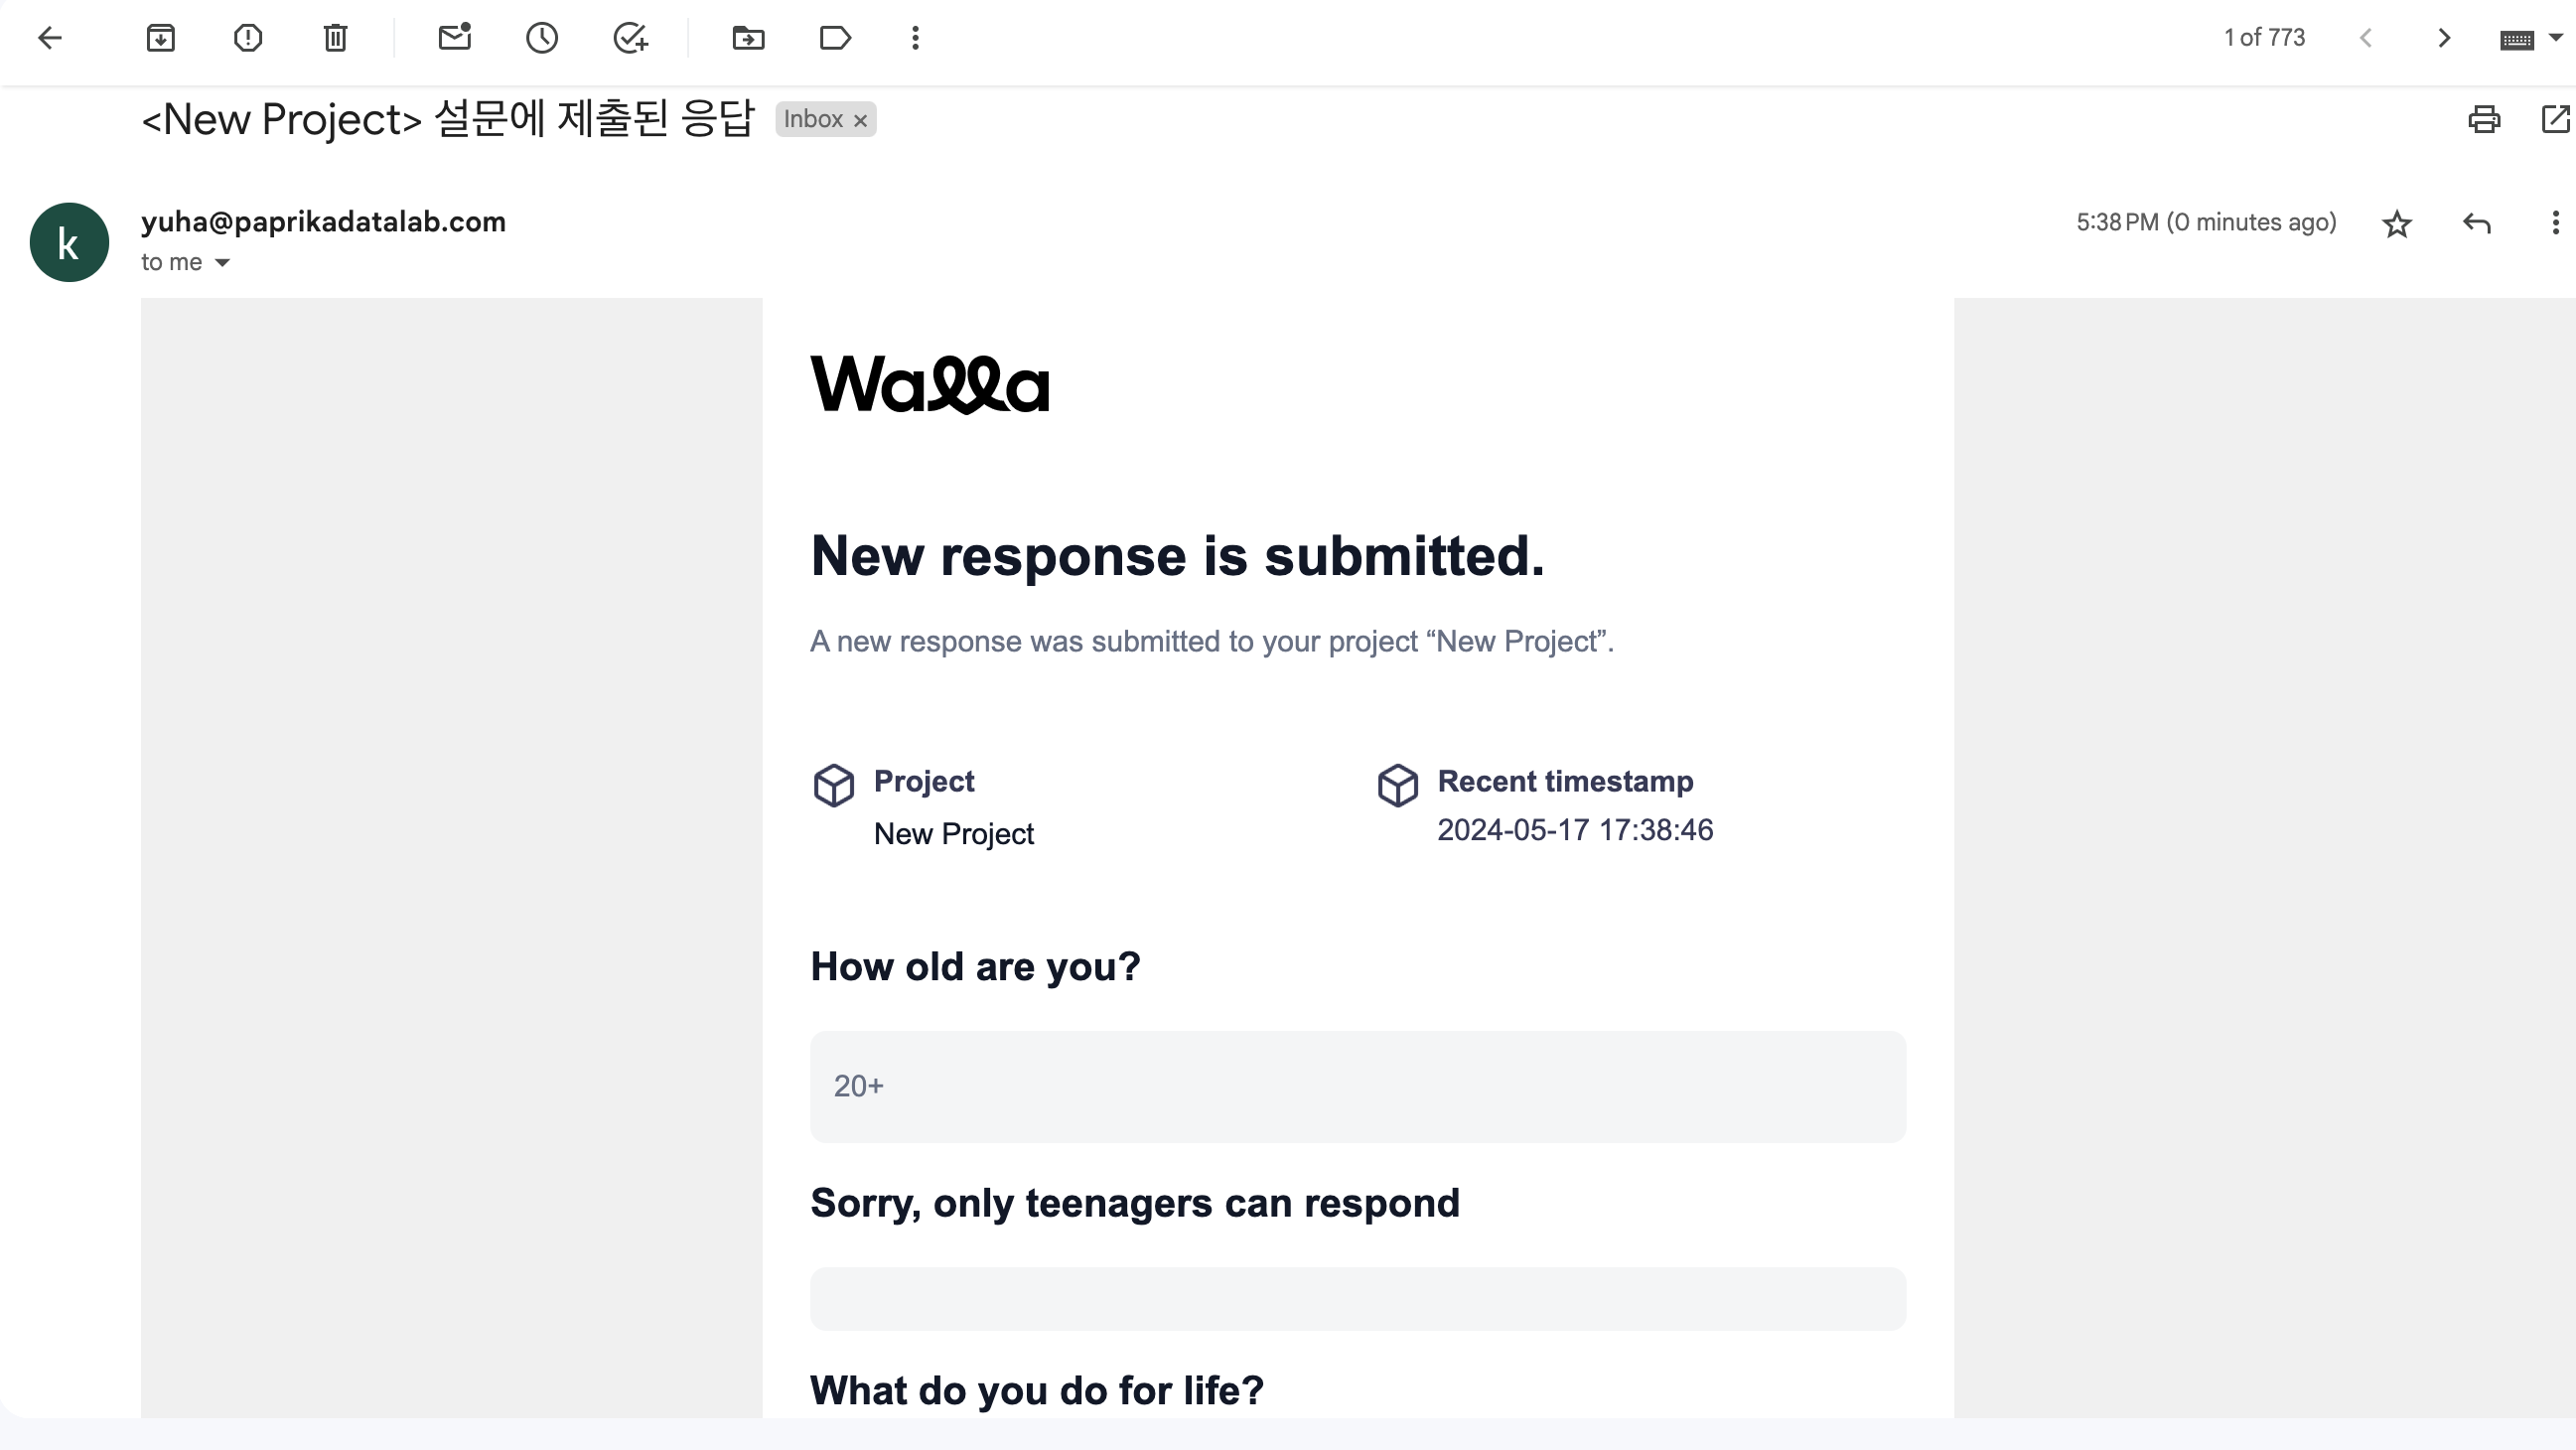
11. You will receive notifications by email when a response arrives.
Integrating with Google Sheets
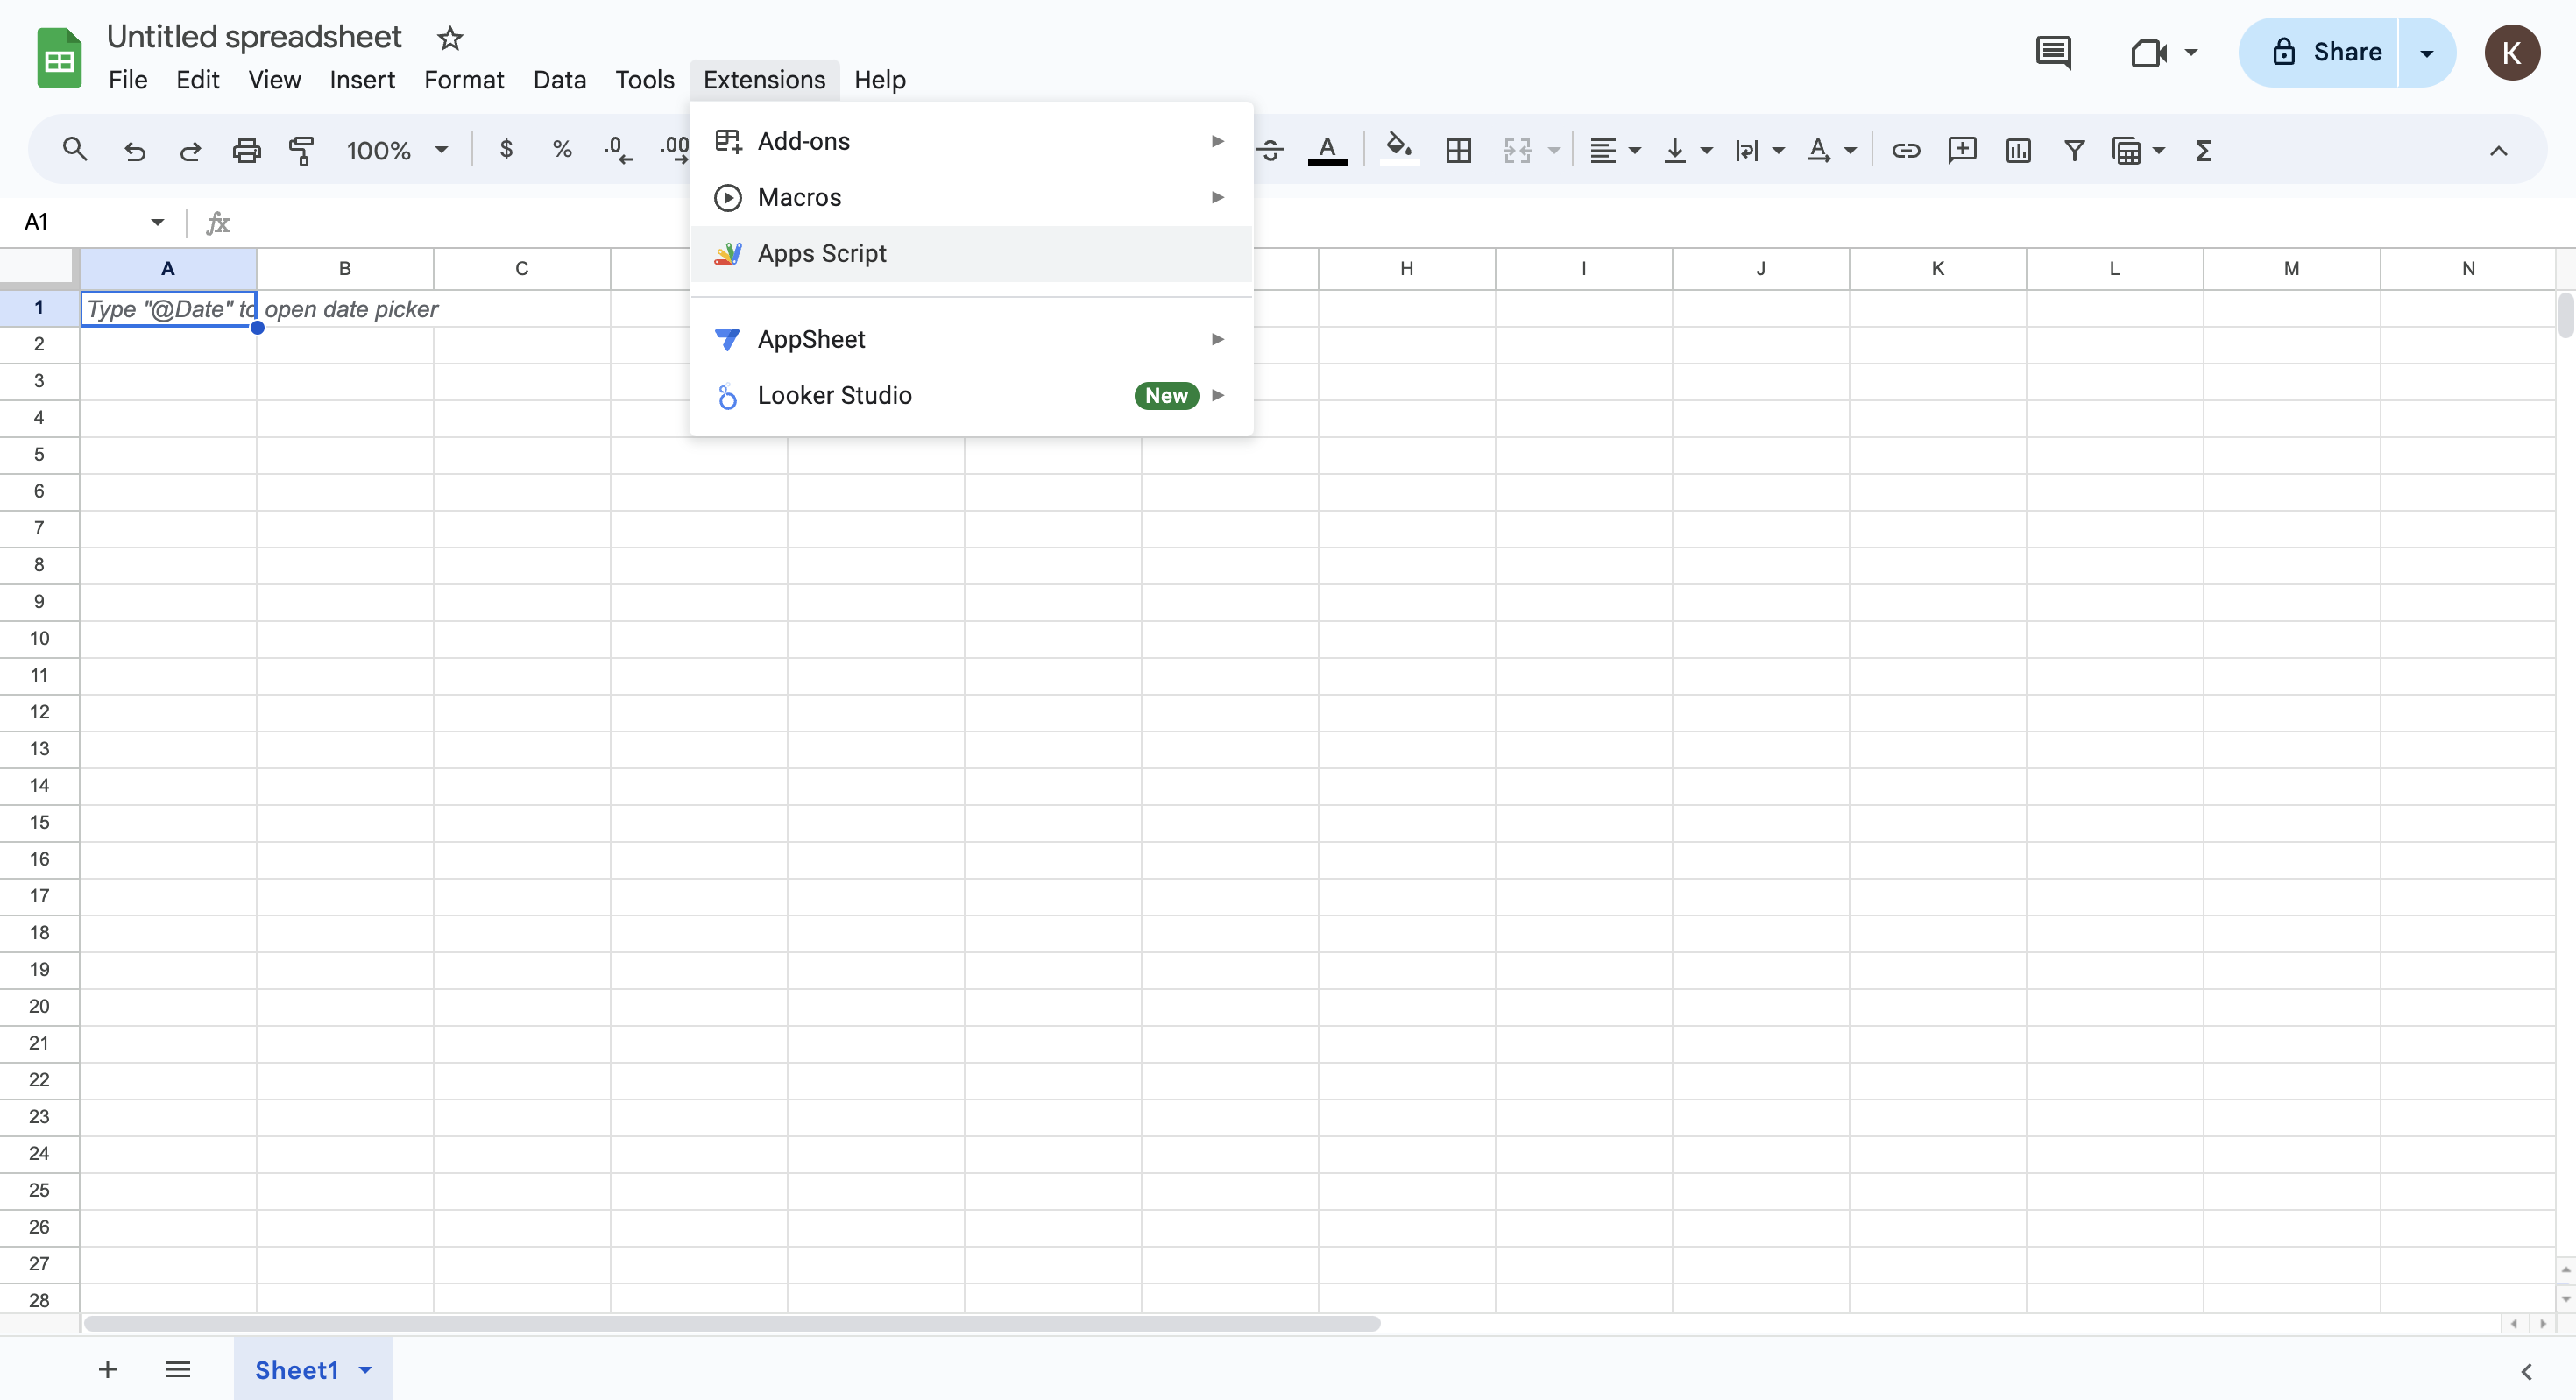
1. In Google Sheets, go to the 'Extensions' tab and click 'Apps Script'.
2. Add a new script.
3. Delete all the default content and paste the code below.
function doPost(e) {
  var ss = SpreadsheetApp.getActiveSpreadsheet();
  var sheet = ss.getSheets()[0];
  ss.setSpreadsheetTimeZone('Asia/Seoul');
  var data = JSON.parse(e.postData.contents);
  var formAnswers = data.form_answers;
  var submittedAt = new Date(data.form_response.submitted_at);

  var responseId = data.form_response.response_id.slice(0, 10);
  if (sheet.getLastRow() === 0) {
    var fieldLabels = formAnswers.map(function(answer) {
      if (answer.type === 'RADIO_GRID' || answer.type === 'CHECKBOX_GRID') {
        return answer.response.map(el => `${answer.label} - ${el.lineLabel}`);
      }
      return answer.label;
    }).flat();
    var headers = ['Response ID', 'Time Submitted', ...fieldLabels];
    sheet.appendRow(headers);
  }
  var rowData = formAnswers.map(field => {
    switch (field.type) {
      case 'CHECKBOX':
      case 'RADIO': {
        var isResponseArray = Array.isArray(field.response);
        if (isResponseArray) {
          return field.response.filter(el => Boolean(el)).join(', ');
        }
        return field.response || '';
      }
      case 'CHECKBOX_GRID':
      case 'RADIO_GRID': {
        var isLineResponseArray = Array.isArray(field.response.lineResponse);
        return field.response.map(el => {
          if (isLineResponseArray) {
            return el.lineResponse.filter(el => Boolean(el)).join(', ');
          }
          return el.lineResponse || '';
        });
      }
      case 'GEOLOCATION': {
        var response = field.response || {};
        var responseArray = Object.entries(response).map(el => `${el[0]}: ${el[1]}`);
        return responseArray.join(', ');
      }
      case 'HIDDEN': {
        return field.response === undefined || field.response === null
          ? ''
          : field.response;
      }
      default: {
        var response =
          field.response === undefined || field.response === null ? '' : field.response;
        if (Array.isArray(response)) {
          return response.join(', ');
        }
        return response;
      }
    }
  }).flat();
  sheet.appendRow([responseId, submittedAt, ...rowData]);
  return ContentService.createTextOutput(JSON.stringify({ result: 'success' })).setMimeType(ContentService.MimeType.JSON);
}
4. Click 'New Deployment'.
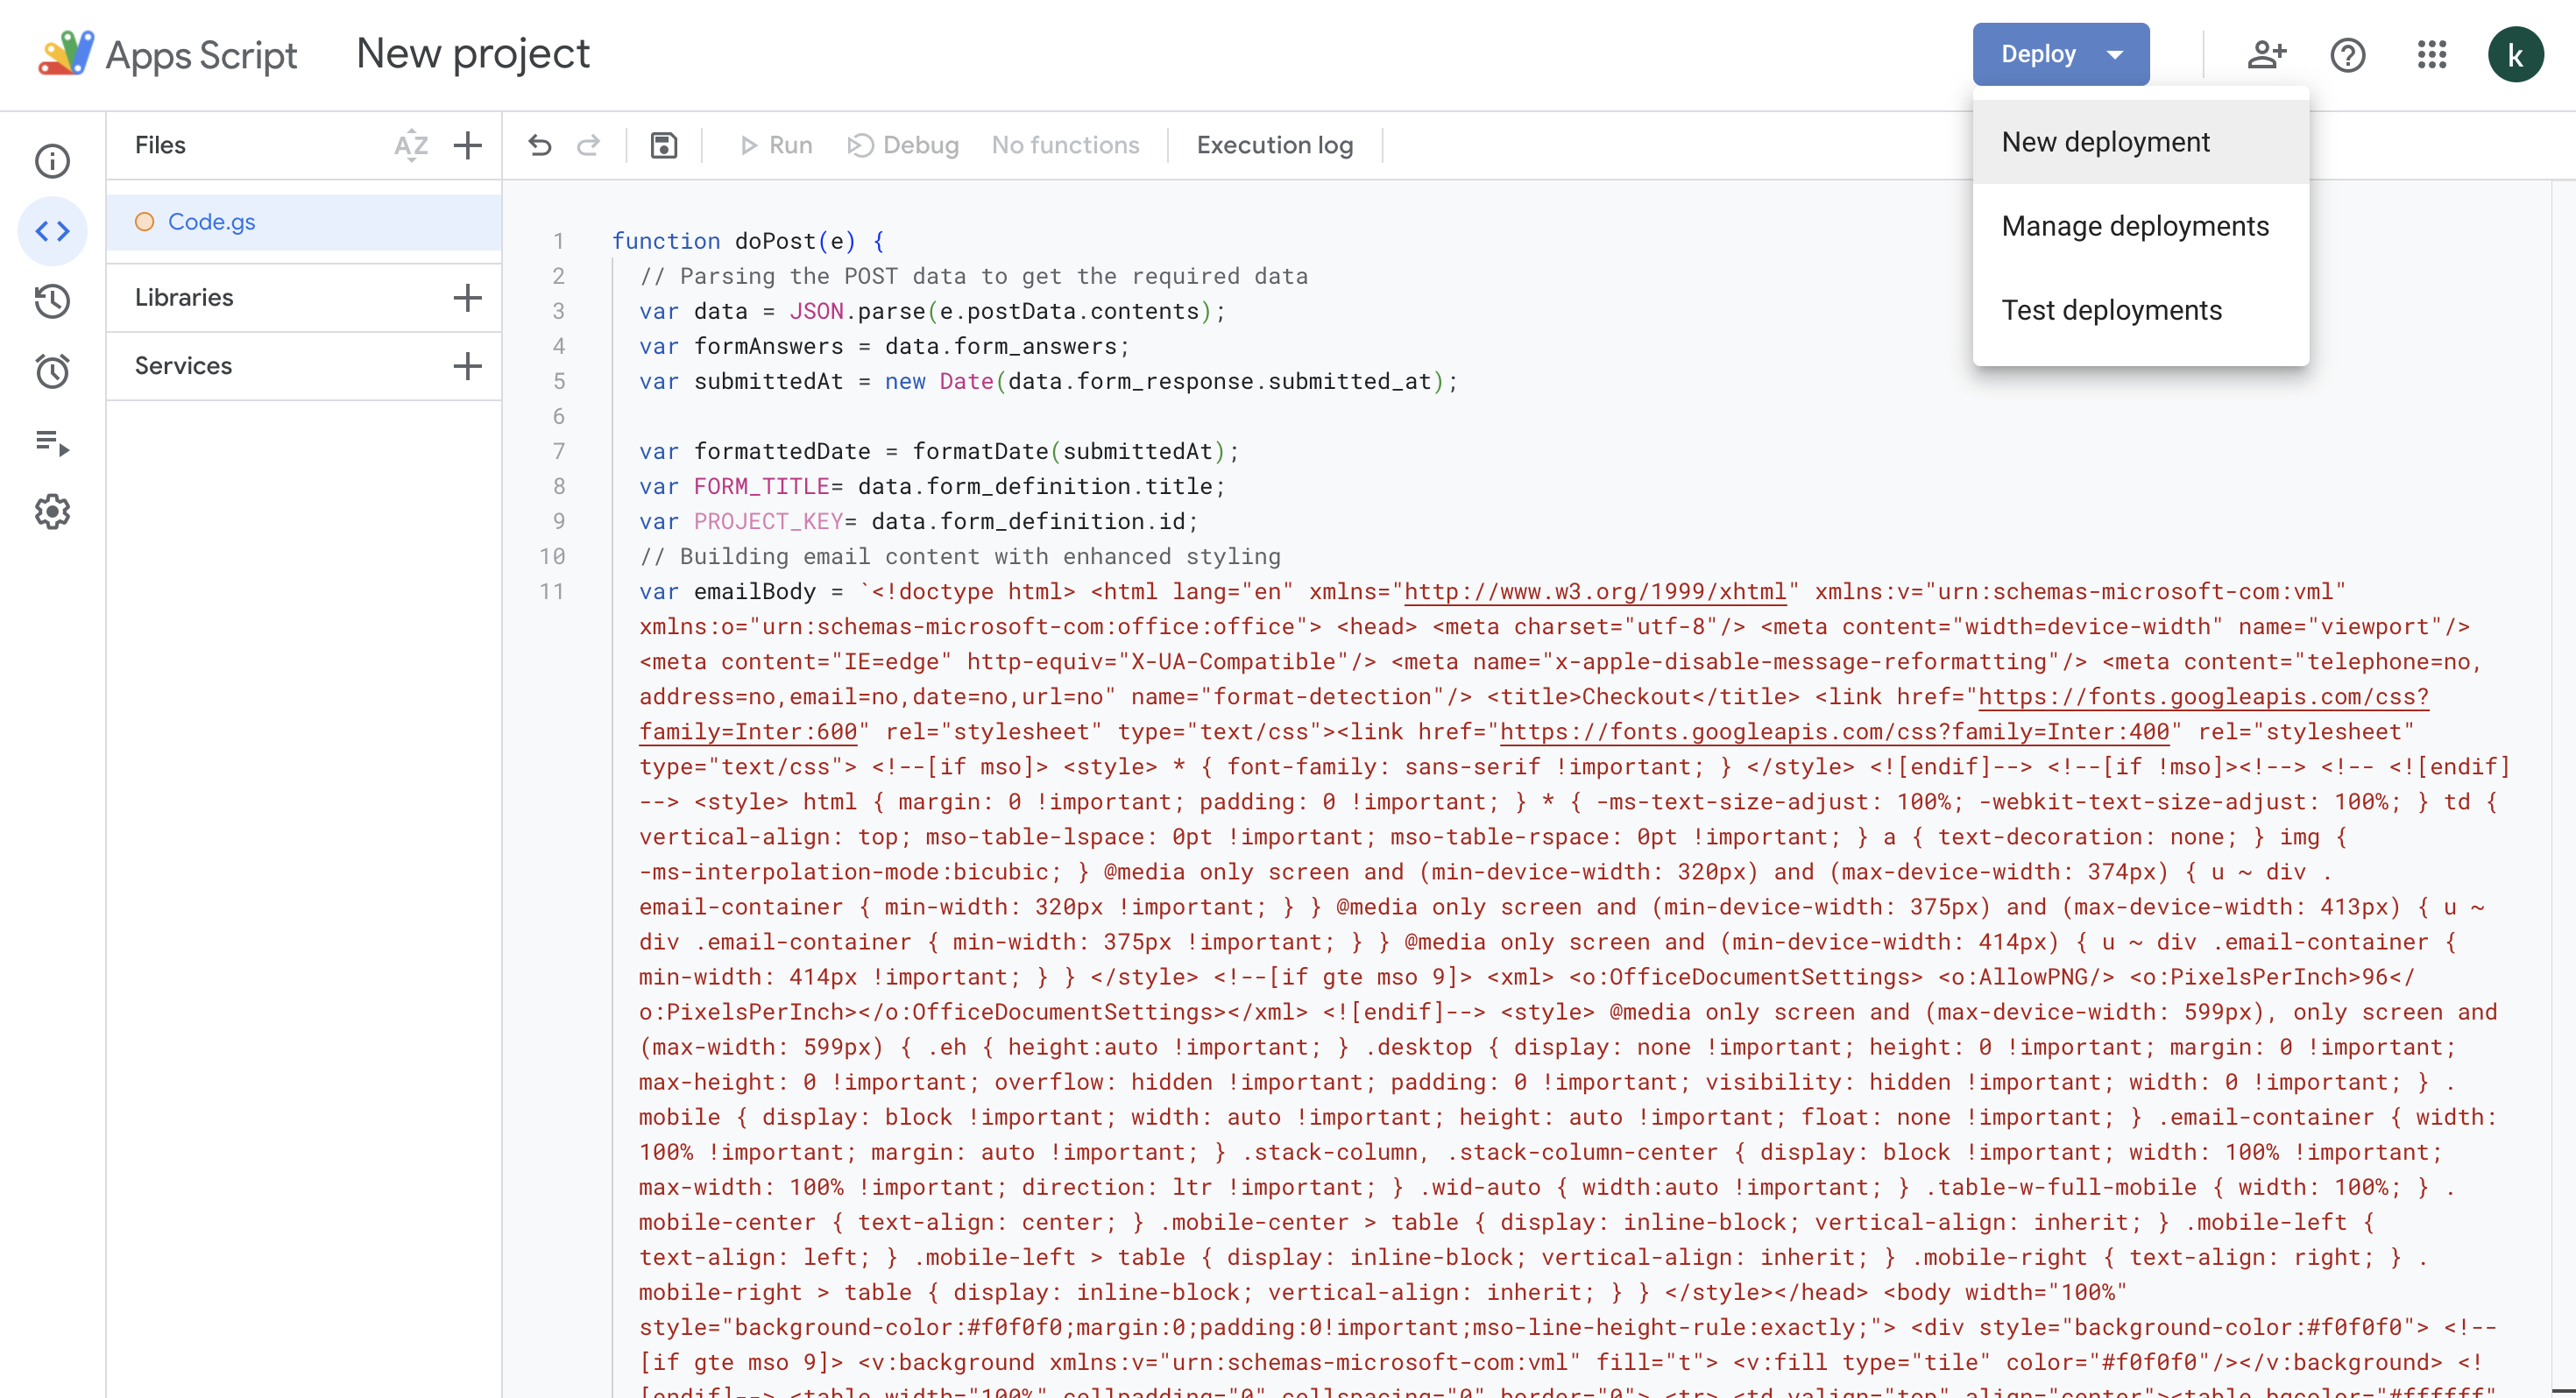
5. Set the type to 'Web App' and the user access to 'Anyone'.
6. Authorize access.
7. Copy the 'URL'.
8. Go to the 'Integrate' tab in Walla and click 'Add new webhook'.
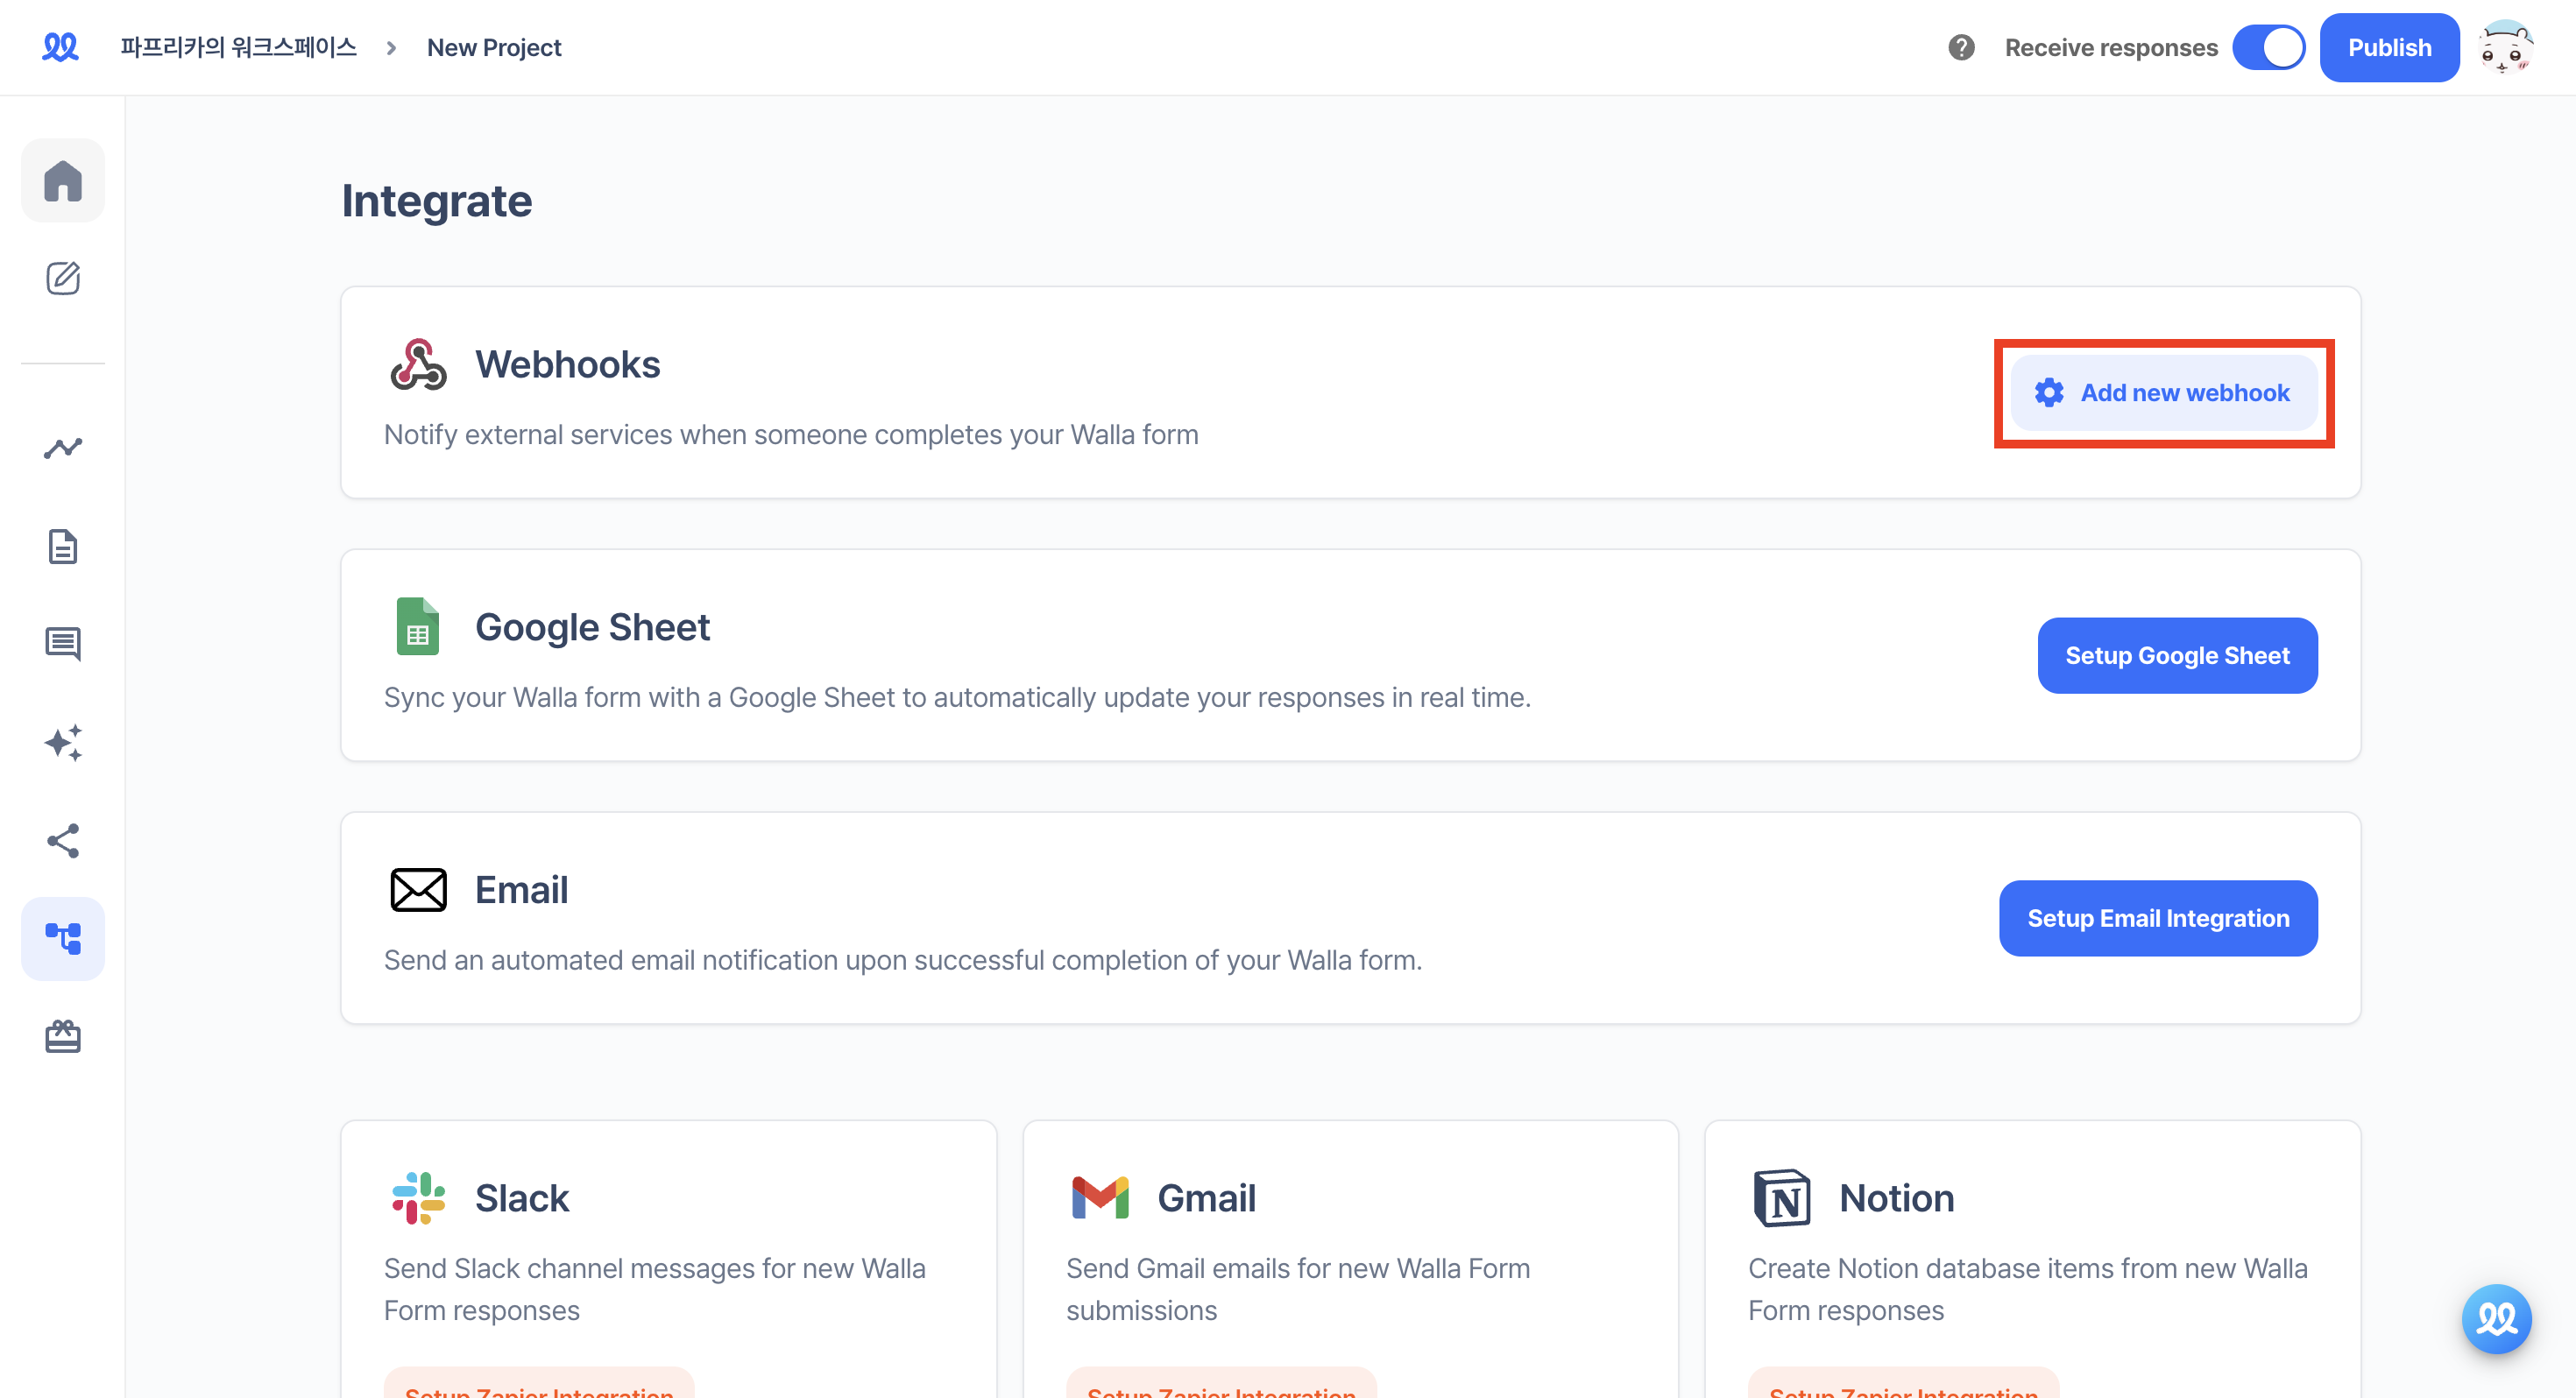
9. Paste the URL and add the webhook.
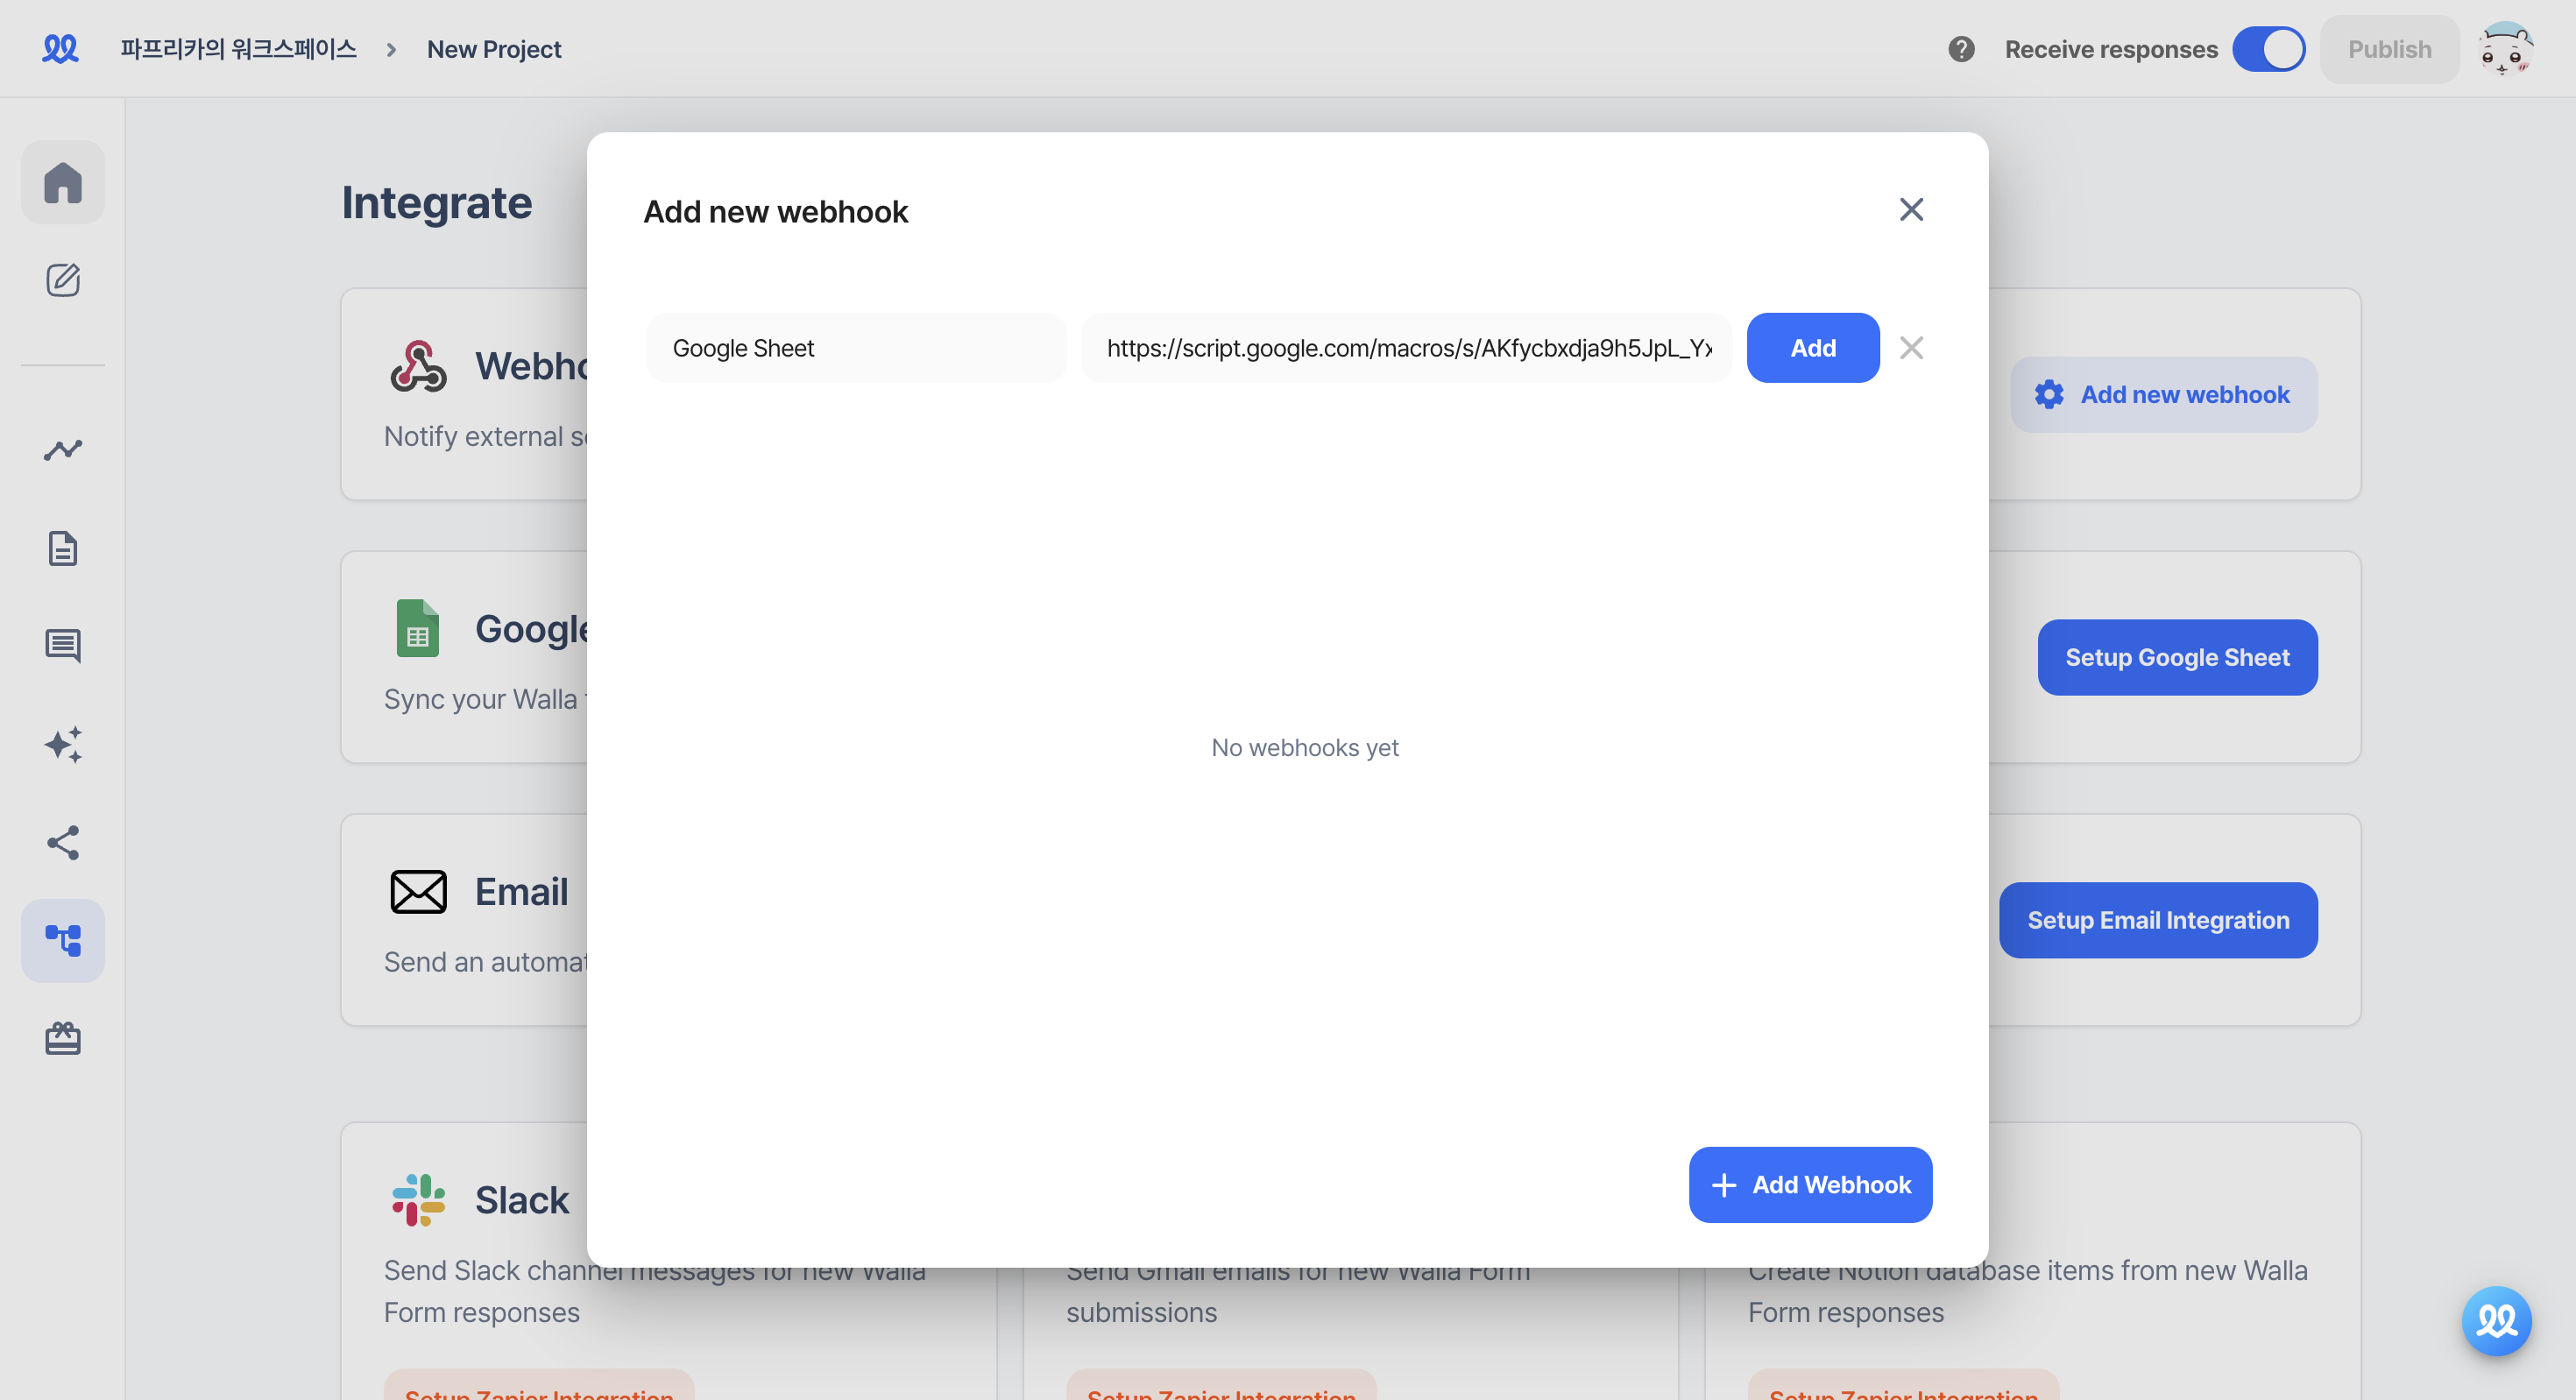
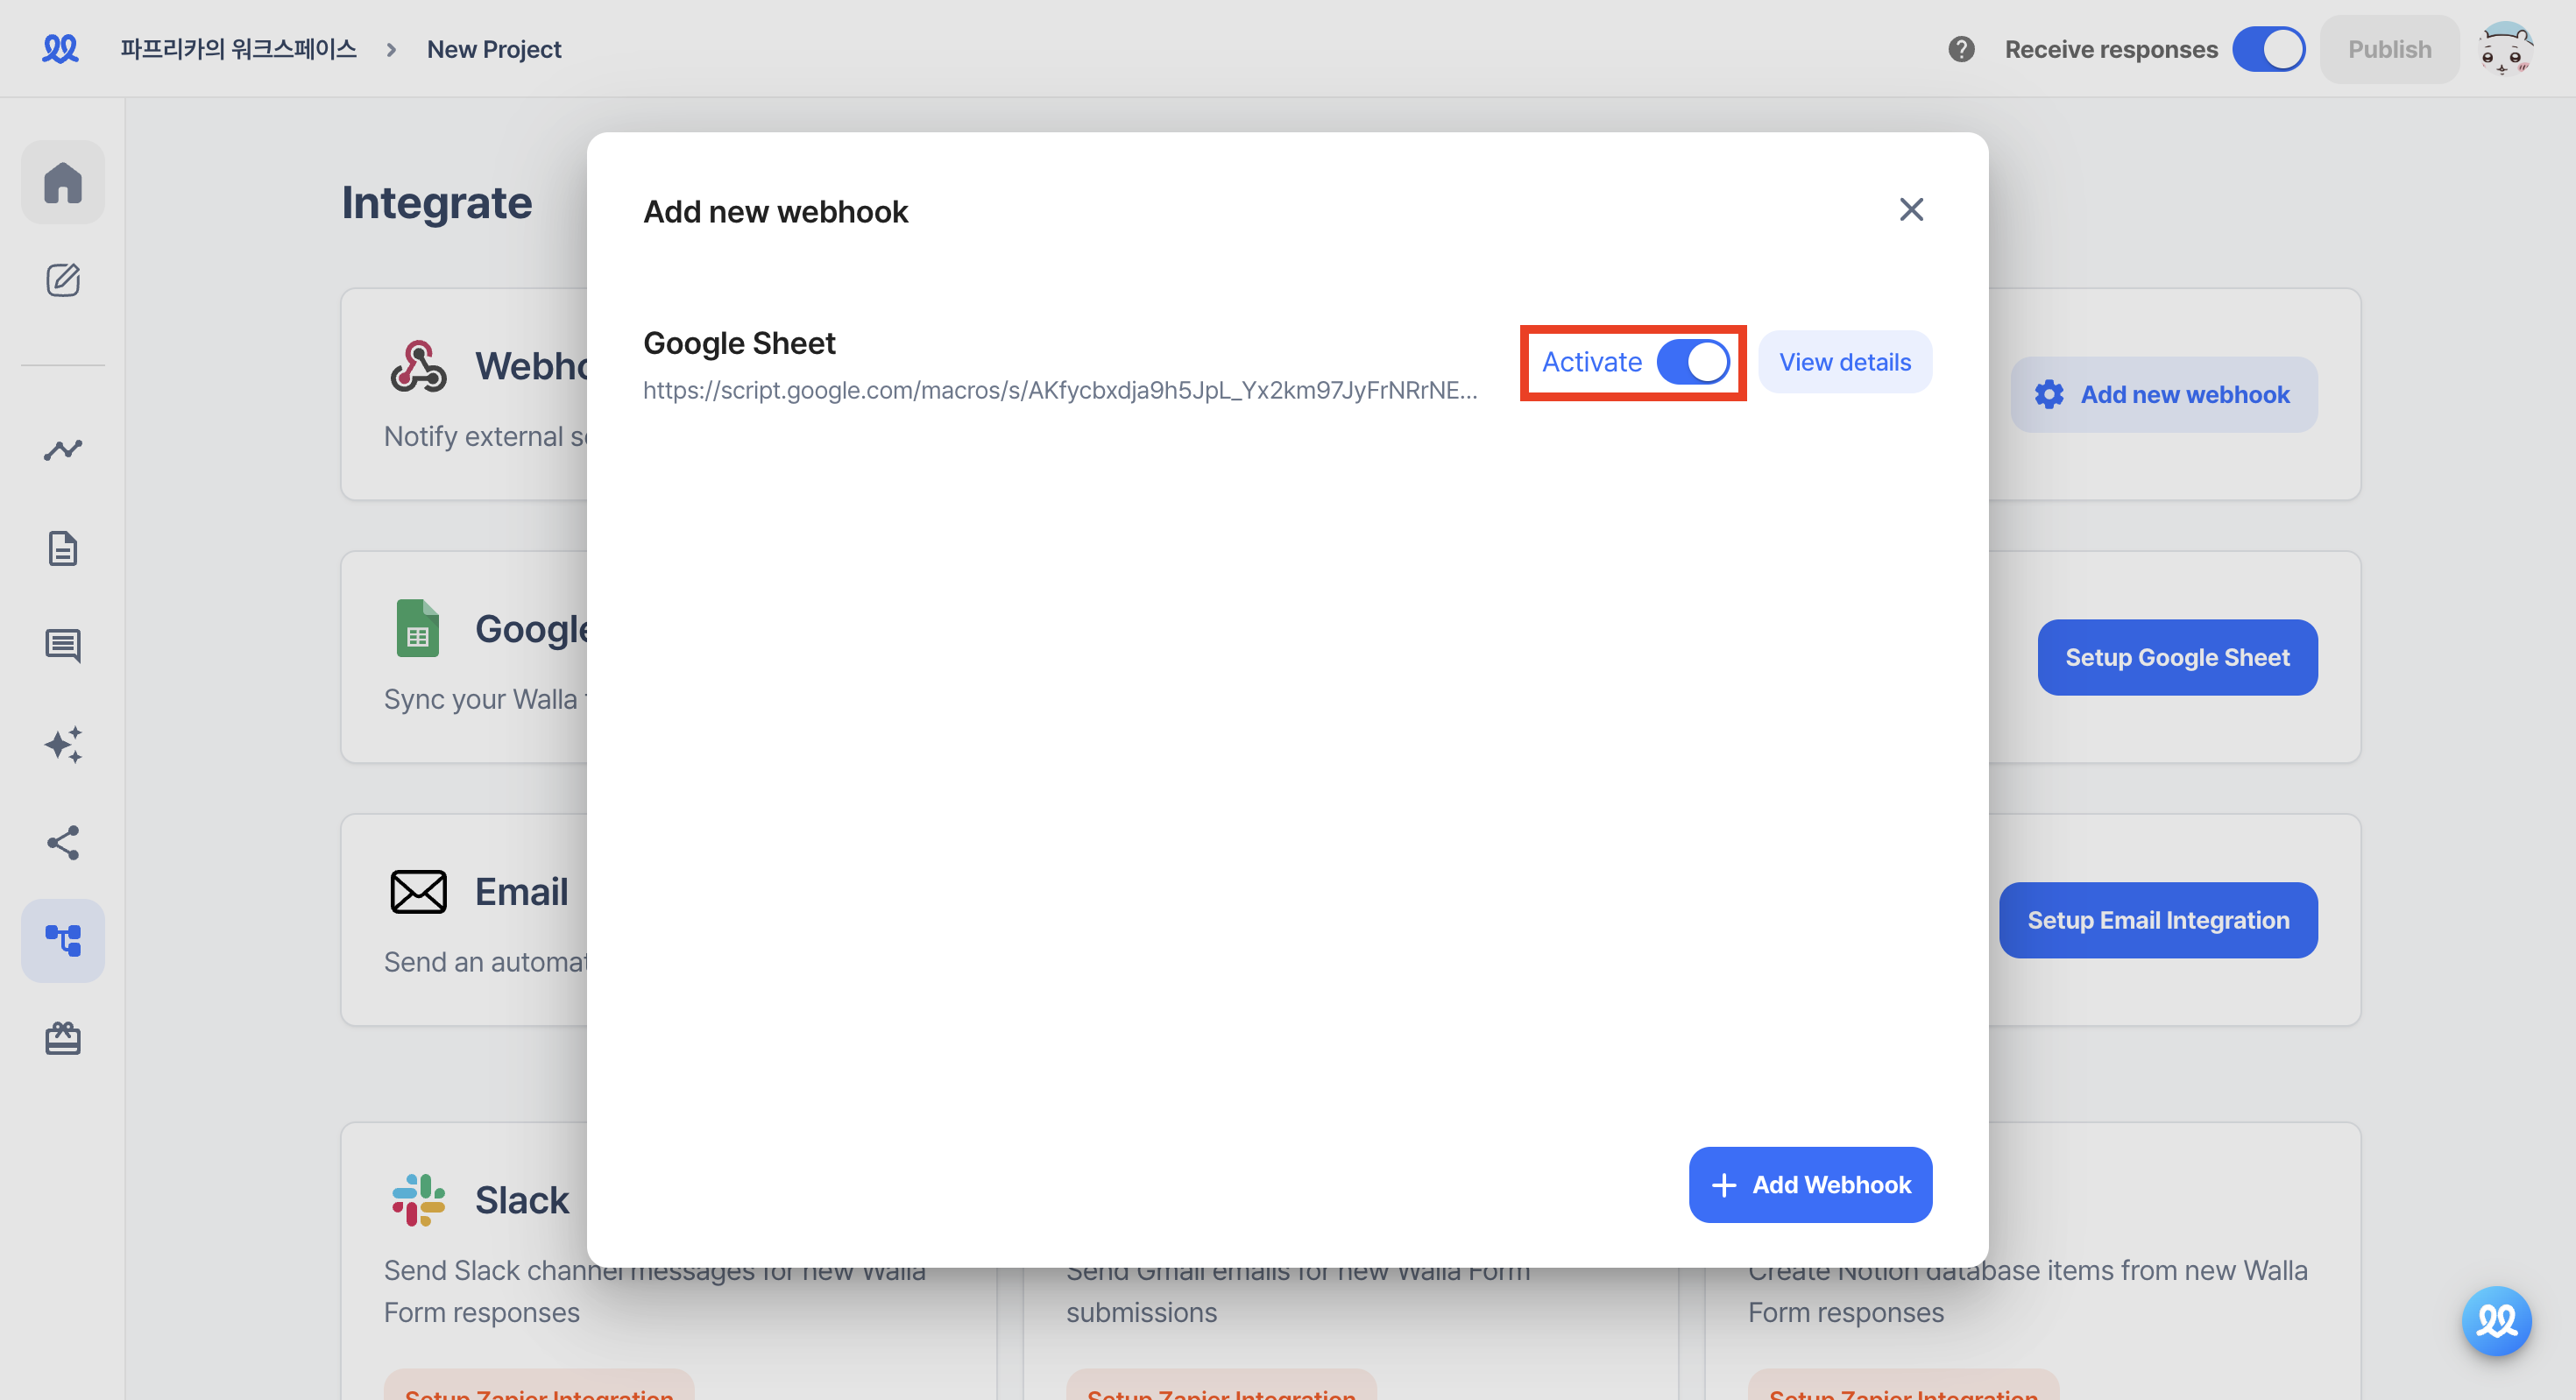
10. Save the changes and activate it in 'Add new webhook'.
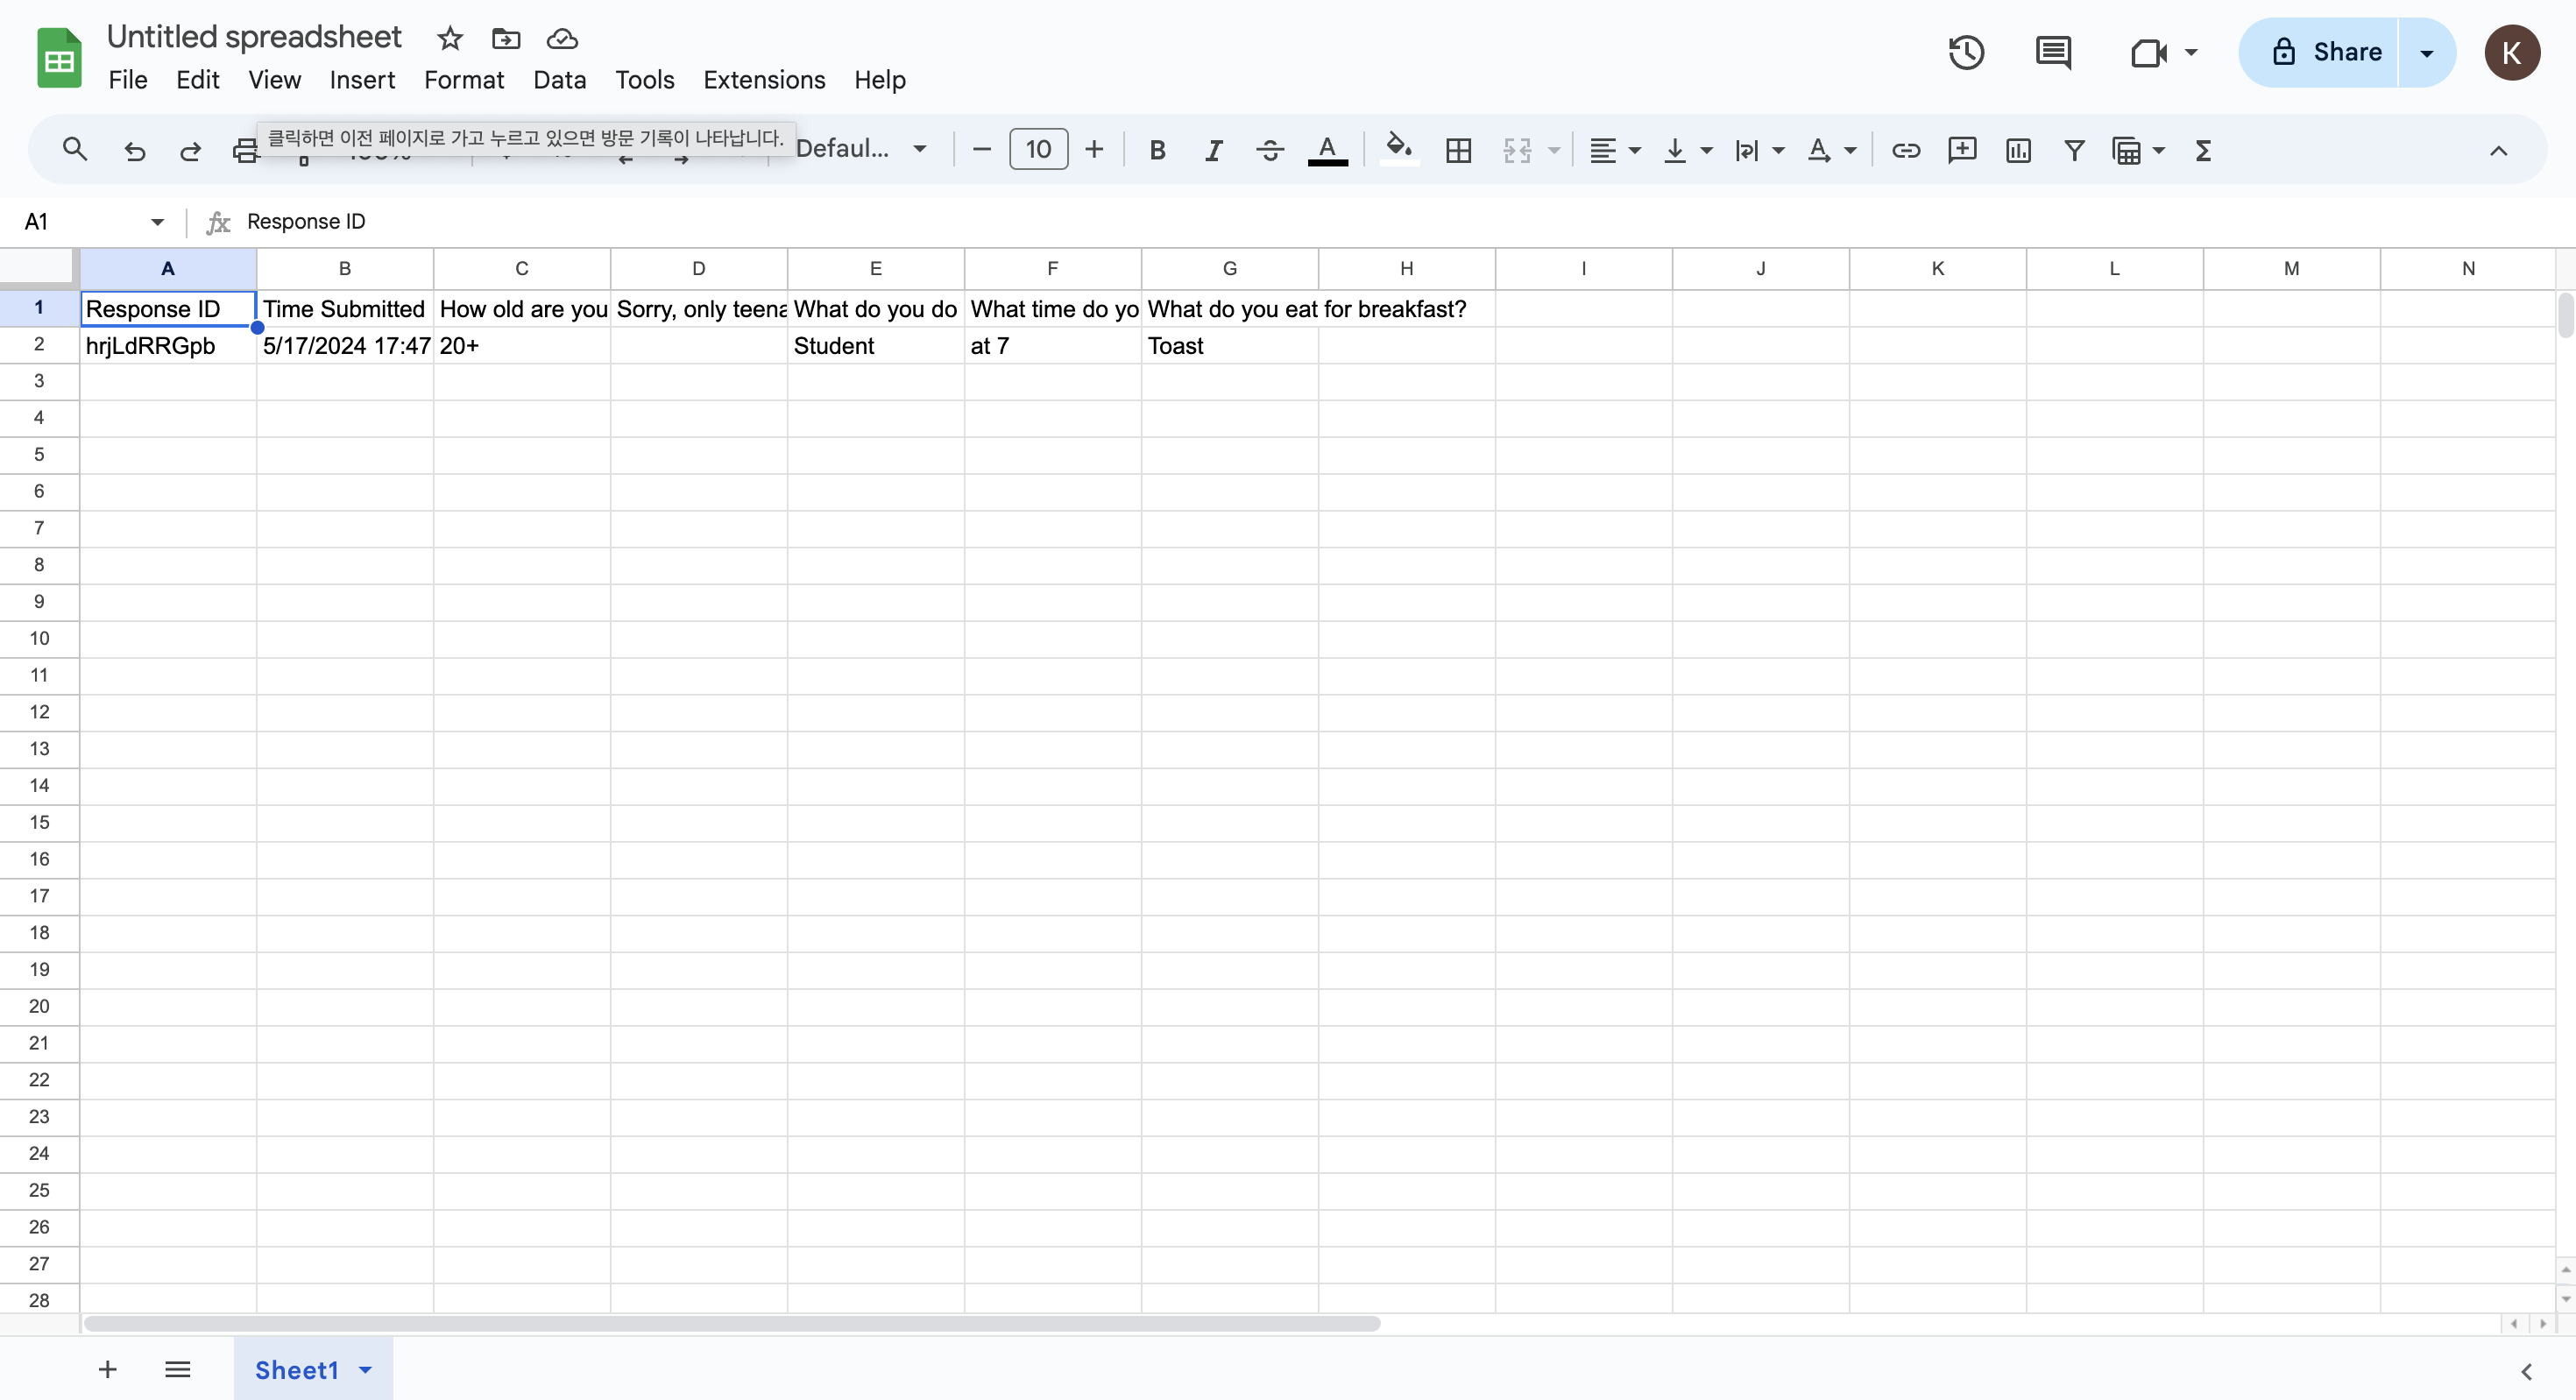
11. You will receive notifications in Google Sheets when a response arrives.
Do you want to check Walla's future development plans or suggest new features?
Click Product
Roadmap and Feature Suggestions